If you want to make your garage more organized, installing garage cabinets is one of the best ways to do it. Cabinets help you store tools, supplies, and other items so your space stays tidy. Many homeowners think installing garage cabinets is difficult, but with the right steps, you can do it yourself—even if you’re a beginner.
This guide will walk you through everything you need to know to install garage cabinets, from preparation to finishing touches. You’ll learn how to avoid common mistakes, save time, and get a clean, professional look.
Why Install Garage Cabinets?
Garage cabinets do more than just store things. They help you use your space better, protect your tools, and even increase your home’s value. Here are a few reasons to consider adding them:
- Better organization: Cabinets keep items off the floor and in order.
- Improved safety: Sharp tools and chemicals stay locked away from kids and pets.
- Cleaner look: Clutter disappears behind cabinet doors.
- Added value: Many home buyers prefer a well-organized garage.
A survey by the National Association of Home Builders found that 86% of homebuyers consider garage storage important. Well-installed cabinets can make your home more appealing if you ever decide to sell.
Types Of Garage Cabinets
Before you start, it’s important to choose the right cabinets for your needs. Garage cabinets come in different materials and styles.
| Cabinet Type | Material | Best For | Price Range (per unit) |
|---|---|---|---|
| Freestanding | Metal, Wood, Plastic | Renters, easy moves | $100–$400 |
| Wall-mounted | Metal, Wood | Permanent storage | $150–$600 |
| Modular systems | Metal, Composite | Custom layouts | $200–$800 |
Metal cabinets are strong and resist moisture. Wood cabinets look nice but can warp if your garage is damp. Plastic cabinets are affordable and light, but may not support heavy tools. Think about what you need to store before buying.
What You Need Before You Start
Installing garage cabinets is easier if you have the right tools and materials. Here’s a basic list:
- Drill and drill bits
- Level
- Stud finder
- Measuring tape
- Screws and anchors (usually included with cabinets)
- Pencil
- Safety glasses and gloves
Some cabinets come with their own hardware. Always check the instructions that come with your cabinets.
Planning Your Cabinet Layout
Proper planning helps you avoid problems later. Follow these steps:
- Measure your garage: Use a measuring tape to check the length, width, and height of the space where you want cabinets.
- Mark obstacles: Note where outlets, light switches, or windows are located.
- Decide on cabinet placement: Think about workflow. For example, place tool cabinets near your workbench.
- Leave room for cars: Make sure cabinet doors won’t hit your car or block paths.
A smart tip: Leave at least 18–24 inches between the bottom of wall cabinets and the floor. This gives you space for larger items below and keeps cleaning easy.
Assembling Your Garage Cabinets
Most garage cabinets arrive flat-packed. You’ll need to assemble them before installation.
- Read the manual: Every cabinet is different. Follow the instructions closely.
- Work on a flat surface: Use your garage floor or a large table.
- Sort parts before starting: Lay out screws, panels, and hardware.
If you’re unsure about a step, look for video tutorials online. Many brands have helpful guides on YouTube.
Finding Studs And Marking Walls
Wall-mounted cabinets need to be attached to wall studs for safety. Here’s how to do it:
- Use a stud finder: Move it slowly along the wall until the light or beep shows a stud.
- Mark stud locations: Use a pencil to mark where each stud is.
- Check spacing: Most studs are 16 or 24 inches apart in US homes.
Attaching cabinets to drywall alone is risky. Studs provide the support needed for heavy items.
Installing Wall-mounted Cabinets
This is the most common type for garages. These steps will help:
- Draw a level line: Use a level to mark where the top or bottom of your cabinets will sit.
- Pre-drill holes: Drill pilot holes at your stud marks. This makes it easier to drive in screws.
- Lift and hold the cabinet: Get help if the cabinet is heavy.
- Drive screws into studs: Attach the cabinet using the screws provided.
- Check with a level: Make sure each cabinet is straight before tightening all screws.
Install one cabinet at a time, checking each for level before moving to the next.
Example: Wall Cabinet Installation
Imagine you have a 36-inch wide metal cabinet. Your wall studs are 16 inches apart. You mark two studs, drill pilot holes at 72 inches from the floor, then lift the cabinet and secure it with 3-inch wood screws.
Securing Freestanding Cabinets
Freestanding cabinets can tip over if not secured, especially if you have children.
- Place cabinets on a level surface
- Anchor to the wall: Use small brackets and screws to attach the cabinet’s top to the wall studs.
- Adjust feet: Many cabinets have adjustable feet for uneven floors.
Never overload the top shelves—store heavy items on the bottom.
Working With Different Wall Types
Not all garages have the same walls. Here’s a quick comparison:
| Wall Type | Best Fasteners | Notes |
|---|---|---|
| Drywall (with studs) | Wood screws | Attach directly to studs |
| Concrete or Brick | Masonry anchors | Use a hammer drill |
| Metal studs | Self-tapping screws | Check for load limits |
If you have concrete walls, pre-drill holes with a masonry bit and use heavy-duty anchors.
Installing Modular Cabinet Systems
Modular cabinets let you mix and match for a custom setup. The basic steps are:
- Lay out all modules on the floor
- Connect modules as per instructions
- Install base cabinets first
- Add wall cabinets above
- Check alignment and secure each to studs
Modular systems are more flexible, but plan carefully so all units fit together.
Common Mistakes To Avoid
Many first-timers make these errors:
- Not checking for studs: Attaching to drywall can cause cabinets to fall.
- Skipping the level: Uneven cabinets look bad and may not close properly.
- Overloading shelves: Follow the weight limits listed in the manual.
- Ignoring wall type: The wrong anchors will not hold.
A non-obvious tip: Always check for hidden pipes or wires before drilling. Use a multi-scanner if you’re unsure.
After Installation: Final Checks
Once your cabinets are up:
- Test doors and drawers: Make sure they open smoothly.
- Check for wobble: Tighten all screws if anything feels loose.
- Add shelf liners: Protect shelves from spills and scratches.
- Label shelves: Helps you find tools faster.
A practical insight: If you plan to store chemicals, choose metal or sealed wood cabinets. These resist leaks better than bare wood or plastic.

Credit: garagegiantusa.com
Maintenance Tips
To keep your garage cabinets in top shape:
- Clean regularly: Wipe down with a damp cloth every few months.
- Check fasteners yearly: Screws can loosen due to vibration.
- Avoid overloading: Even strong cabinets have limits.
If you notice rust or swelling, fix leaks or improve ventilation.
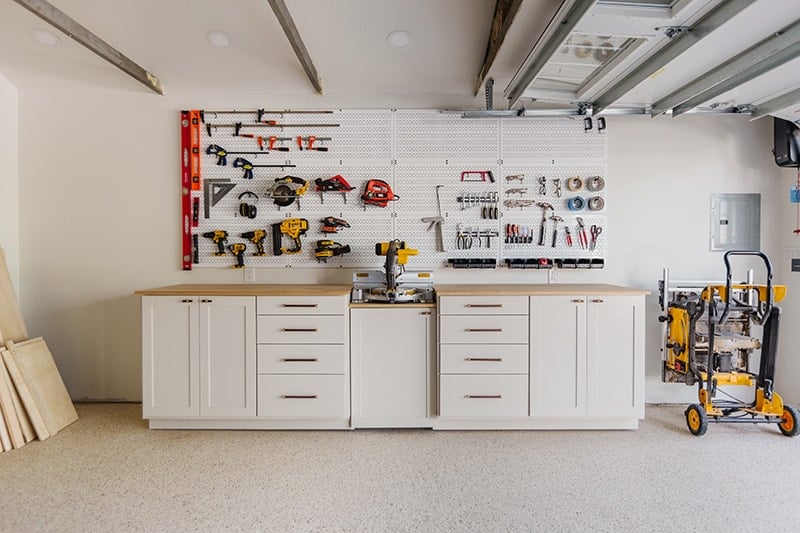
Example Garage Cabinet Layout
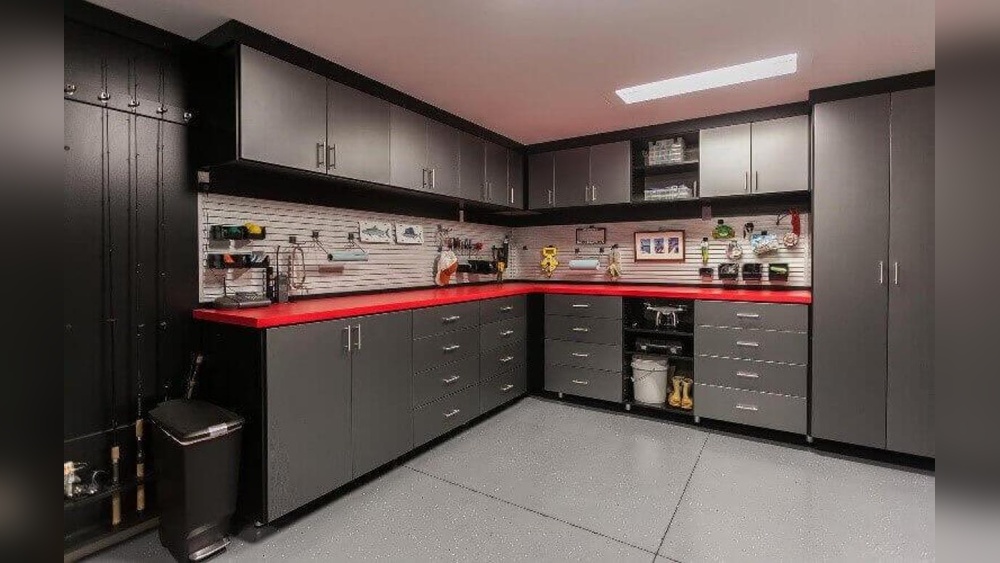
Here’s a simple layout for a one-car garage:
- Tall cabinet near the door for brooms and shovels
- Wall cabinets above the workbench for small tools and supplies
- Base cabinets under the bench for power tools
This setup keeps everything within reach without blocking parking space.
Credit: www.jennasuedesign.com
Cost And Time Estimates
How much should you expect to spend, and how long will it take?
| Cabinet Type | Average Cost (per unit) | DIY Install Time |
|---|---|---|
| Freestanding | $100–$400 | 30–60 minutes |
| Wall-mounted | $150–$600 | 1–2 hours |
| Modular System | $200–$800 | 2–4 hours |
A full garage setup with six cabinets can cost $900–$3,000, depending on materials and size. Most beginners can install a small set in a weekend.
Safety Considerations
Never skip safety:
- Wear safety glasses when drilling or cutting.
- Use a sturdy ladder for high cabinets.
- Work with a partner for lifting heavy units.
- Check for hidden wires before drilling.
One non-obvious insight: Garage humidity can rust metal fasteners. Use stainless steel or coated screws if your area is humid.
For more on safe DIY practices, the Family Handyman website has detailed guides.

Credit: www.youtube.com
Frequently Asked Questions
How Do I Choose The Right Size Of Garage Cabinets?
Measure your garage carefully. Consider what you want to store. Taller cabinets are best for long tools, while small wall cabinets work for paint cans or hardware. Always leave enough space for car doors and walking paths.
Can I Install Garage Cabinets On My Own?
Yes, most homeowners can install cabinets themselves with basic tools. Heavy cabinets may need two people for lifting. Beginners should start with freestanding or wall-mounted units.
What Is The Best Material For Garage Cabinets?
Metal is the most durable and resists moisture, but wood and heavy plastic can work if your garage stays dry. Avoid particle board if your garage is humid.
Do I Need To Anchor Freestanding Cabinets?
Yes. Anchoring prevents tipping, especially if you have children or live in an earthquake zone. Secure the top to wall studs with brackets.
How Much Weight Can Garage Cabinets Hold?
It depends on the design and installation. Typical wall cabinets hold 100–150 lbs per shelf if attached to studs. Check your cabinet manual for exact limits and never overload.
Installing garage cabinets can transform your garage from messy to organized in just a weekend. With careful planning, the right tools, and a bit of patience, even beginners can achieve strong, neat results. Remember to measure twice, follow safety rules, and check your work as you go.
Once your cabinets are in place, you’ll enjoy a cleaner, safer, and more valuable garage for years to come.