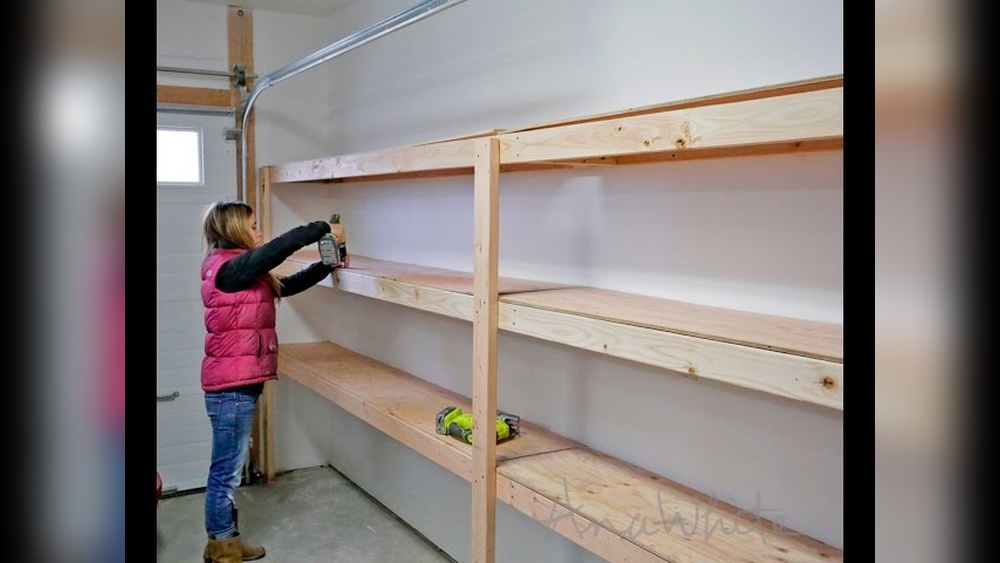
Building garage shelves is a smart way to use space, reduce clutter, and keep your tools and gear organized. If your garage feels crowded or messy, adding sturdy shelves can make a big difference. Many people believe you need special skills or expensive tools to build shelves, but even beginners can do it with the right plan and materials.
This guide will show you how to build garage shelves step by step, with clear instructions, practical tips, and real examples to help you succeed.
Why Build Your Own Garage Shelves?
Store-bought shelves can be pricey, and they might not fit your garage or your needs. Building your own shelves means you choose the size, strength, and style. Here are some reasons to consider doing it yourself:
- Custom size: Fit shelves exactly to your garage space.
- Cost savings: Materials often cost less than pre-made shelves.
- Strength: DIY shelves can hold more weight than many store options.
- Satisfaction: There’s pride in building something useful yourself.
Many beginners are surprised by how simple the process is once they start. You don’t need advanced tools or carpentry experience—just patience and a plan.
Planning Your Garage Shelves
A good plan is the secret to shelves that last. Before you buy anything, answer a few questions:
- What will you store? Heavy items like paint cans need stronger shelves than holiday decorations.
- How much space do you have? Measure your wall length, height, and depth.
- How many shelves? Think about the number and spacing. Most people want 3–5 shelves.
Example: Planning For A 10-foot Wall
Suppose your garage wall is 10 feet long and you want 4 shelves, each 16 inches deep, with 18 inches between them. This size holds most storage bins and tools comfortably.
Common Beginner Mistake
A common mistake is making shelves too deep. Shelves deeper than 18–20 inches make it hard to reach things at the back. Keep shelf depth between 12–18 inches for easy access.
Choosing Materials
Strong, affordable materials are best for garage shelves. Here are the most common choices:
- 2×4 lumber: Great for shelf supports (frames and legs).
- Plywood: 3/4-inch thick sheets are strong and resist sagging.
- Screws: Use 2.5–3 inch wood screws for strong joints.
- Brackets (optional): Useful for wall-mounted shelves.
Material Cost Comparison
Here’s a quick look at common materials and their average costs per 8-foot section:
| Material | Average Cost | Strength | Best Use |
|---|---|---|---|
| 2×4 Lumber | $4–$6 | High | Frames, Legs |
| 3/4″ Plywood | $50–$70 | High | Shelf Surface |
| MDF | $30–$40 | Medium | Light Storage |
| Particle Board | $25–$35 | Low | Temporary Shelves |
Most beginners choose 2×4 lumber for the frame and 3/4-inch plywood for the shelf surface. These materials are easy to find and work with.
Tools You Need
You don’t need a full workshop. Most beginners can build shelves with a few basic tools:
- Measuring tape
- Circular saw (or hand saw)
- Drill/driver
- Level
- Safety glasses
- Pencil
If you don’t own a saw, most home improvement stores will cut wood for you. This makes the project easier and your cuts more accurate.
Step-by-step Instructions
Let’s build a simple, strong shelving unit with four shelves, each 8 feet long and 16 inches deep. This is a popular size that fits most garages.
1. Cut Your Lumber
You’ll need:
- Eight 8-foot 2x4s (for shelf frames)
- Four 6-foot 2x4s (for vertical legs)
- Two sheets of 3/4-inch plywood (cut into four 8-foot x 16-inch pieces)
Ask the store to make these cuts if you don’t have a saw.
2. Build The Shelf Frames
Lay two 8-foot 2x4s parallel, 16 inches apart. Attach two short 2x4s (cut to 13 inches) at each end to create a rectangle. Add two more short pieces in the middle for extra support.
Repeat for all four shelves.
3. Attach The Shelves To The Legs
Stand the four 6-foot 2x4s upright as legs. Starting 6 inches from the bottom, attach the first frame using wood screws. Use a level to keep the frame straight.
Space the other shelves 18 inches apart. Attach each frame with screws, checking for level each time.
4. Add The Plywood Tops
Place a plywood piece on each frame. Secure it with 1. 5-inch screws every 12 inches along the edges and in the middle.
5. Anchor To The Wall (important For Safety)
Push the shelves against the wall. Use long screws or brackets to anchor the frame to wall studs. This step prevents tipping—a common safety risk.
Example: Holding Heavy Items
A shelf built this way can hold over 200 pounds per shelf if anchored well. Many store-bought shelves cannot match this strength.
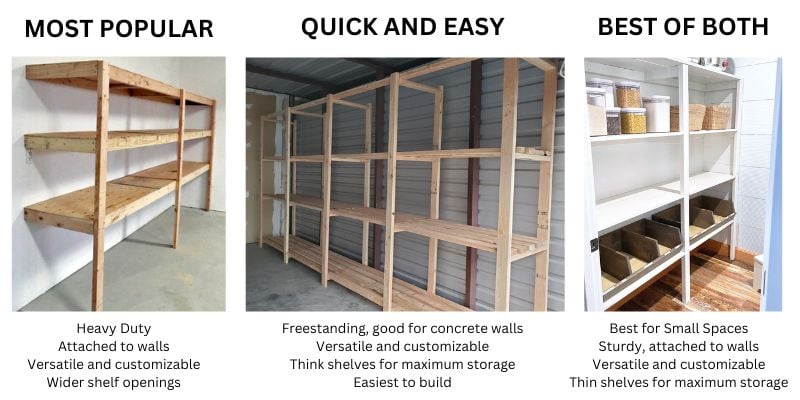
Wall-mounted Vs. Freestanding Shelves
Which is better for your garage? Let’s compare:
| Type | Pros | Cons |
|---|---|---|
| Freestanding | – Easy to move – No wall damage – Holds heavy items |
– Takes up floor space – Can tip if not anchored |
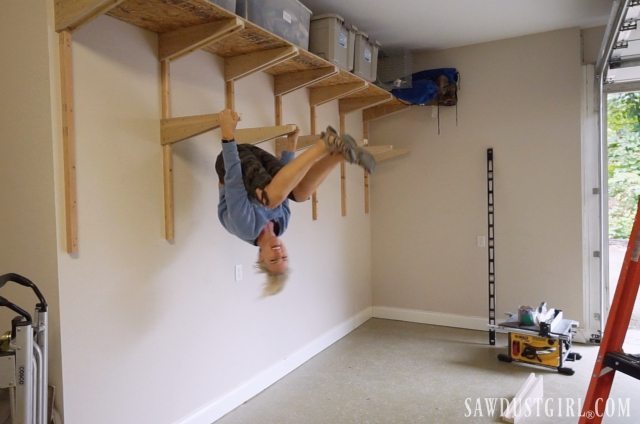
| Wall-Mounted | – Saves floor space – Looks clean – Great for smaller items |
– Needs strong walls – Harder to move – Not for very heavy items |
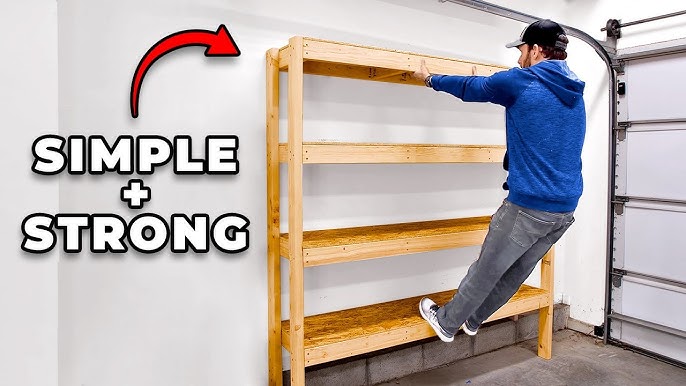
Freestanding shelves are best if you need to store heavy things like tools or paint. Wall-mounted shelves are good for boxes, cleaning supplies, or sports gear.
Credit: www.youtube.com
Safety Tips For Beginners
Many people miss simple safety steps. Here’s how to stay safe:
- Wear safety glasses when cutting or drilling.
- Lift wood safely—get help with long pieces.
- Anchor shelves to wall studs, not just drywall.
- Check for wires or pipes before drilling into walls.
- Keep your workspace clear to avoid tripping.
A sturdy shelf is safe only if built and anchored correctly. Take your time and double-check each step.
Painting Or Finishing Your Shelves
Bare wood works fine in most garages, but painting or sealing shelves has benefits:
- Easier cleaning: Paint resists stains and dust.
- Longer life: Sealer protects wood from moisture.
- Better look: Paint can match your garage color.
For garages with high moisture, use a waterproof sealer on the wood edges. This prevents swelling and warping.
Common Mistakes And How To Avoid Them
Even careful beginners can make mistakes. Here are some to watch for:
- Skipping the wall anchor: This is the biggest safety risk.
- Using thin plywood: Anything less than 3/4 inch sags quickly.
- Forgetting to level: Shelves that tilt cause things to slide or fall.
- Cutting wood too short: Double-check all measurements before cutting.
- Overloading shelves: Spread heavy items across the shelf, not all in one spot.
Customizing Your Shelves
Once you know the basics, you can adjust your shelves for different needs:
- Add more shelves: Increase storage by reducing the space between shelves.
- Make adjustable shelves: Use metal shelf brackets and tracks.
- Add hooks underneath: Hang bikes, cords, or tools from the shelf bottom.
- Install doors: Hide clutter and protect items from dust.
Many people find that after building their first set, they want to build more shelves in other parts of the garage or even in closets and basements.
Credit: www.ana-white.com
Real Cost Example
Let’s break down the cost for a basic 4-shelf unit (8 feet long):
- 8 x 2x4s: $32
- 2 sheets 3/4-inch plywood: $120
- Screws: $10
- Brackets/anchors: $10
Total: About $172
Compare this to similar store-bought shelves, which can cost $250 or more and hold less weight.
How Long Does It Take?
For most beginners, building one shelving unit takes 4–6 hours. If you have a helper or pre-cut wood, it can go faster. Take breaks and check your work as you go.
Example Layouts For Different Garage Sizes
Every garage is different. Here are two sample layouts:
Single-car Garage (10 Ft Wall)
- One 8-foot shelf unit on one wall
- Narrow shelves (12 inches deep) above the car for light items
Two-car Garage (20 Ft Wall)
- Two 8-foot shelf units, one on each side
- Extra wall-mounted shelves above the garage door
This flexibility is why DIY shelves are so popular.
Maintenance And Care
Garage shelves last for years with simple care:
- Check screws and anchors once a year.
- Clean dust and spills quickly.
- Repaint or reseal if wood looks worn.
Proper care means your shelves stay safe and strong for a long time.
Credit: sawdustgirl.com
When To Call A Professional
If your garage walls are concrete or you plan to store very heavy items, you might need special anchors or tools. In these cases, it’s smart to talk to a professional or check trusted guides such as the Family Handyman.
Frequently Asked Questions
How Much Weight Can Garage Shelves Hold?
Well-built shelves with 2×4 frames and 3/4-inch plywood, anchored to wall studs, can hold 150–300 pounds per shelf. The real limit depends on spacing, wood quality, and how well the unit is anchored.
What Size Should Garage Shelves Be?
A good size for most garages is 8 feet long, 16 inches deep, and 18 inches between shelves. For smaller items, 12-inch depth works well. Adjust size to fit your space and what you plan to store.
Can I Build Shelves Without A Saw?
Yes. Most home improvement stores cut wood for free or a small fee. Make a clear cutting list before you go. This saves time and helps beginners avoid mistakes.
Should I Paint My Garage Shelves?
Painting isn’t required, but it helps. Paint or sealant makes cleaning easier and protects wood from moisture. Use a basic latex paint or a waterproof sealer for best results.
How Do I Anchor Shelves To Concrete Walls?
Use concrete anchors or masonry screws. Mark where your shelf frame meets the wall, drill holes with a masonry bit, and install the anchors tightly. Anchoring is key for safety, especially with heavy items.
Building your own garage shelves is a project almost anyone can do. With a clear plan, simple tools, and the right materials, you’ll create storage that’s strong, safe, and built to last. Take your time, follow each step, and enjoy your new organized space.