If your garage door feels heavy, opens unevenly, or makes strange noises, the garage door springs might need adjustment. These springs help lift the door, so when they’re too loose or too tight, the door won’t work smoothly. Many homeowners wonder if they can tighten garage door springs themselves. With careful steps, basic tools, and safety in mind, you can fix minor issues. This guide explains everything beginners need to know, including safety tips, step-by-step instructions, and common mistakes to avoid.
Understanding Garage Door Springs
Garage doors use two main types of springs:
- Torsion springs: Mounted above the door, they twist to store energy.
- Extension springs: Located on both sides, they stretch and contract.
Each type works differently. Most modern doors use torsion springs because they last longer and provide more control. Older doors often have extension springs.
Why Springs Need Tightening
Springs lose tension over time. When this happens:
- The door may feel heavy or hard to lift.
- The door won’t stay open or may slam shut.
- The opener strains or fails.
A spring that’s too loose won’t support the door. If it’s too tight, the door may not close fully or could snap upward dangerously.
Garage Door Spring Life Expectancy
On average, torsion springs last about 10,000 cycles (one cycle = one open and close). For a family using their garage daily, this is roughly 7 years. Extension springs have a similar lifespan but may wear out faster under heavy use.
Safety First: Garage Door Spring Risks
Garage door springs store a lot of energy. If a spring breaks or slips during adjustment, it can cause serious injury.
- Always wear safety glasses and gloves.
- Never adjust springs without proper tools.
- Disconnect the garage door opener before starting.
- If you’re unsure, call a professional.
Non-obvious tip: Even if your door looks fine, weak springs can cause your opener motor to burn out. Fixing the springs early saves money.
Tools You’ll Need
Before tightening garage door springs, gather these tools:
- Winding bars (for torsion springs)
- Wrenches (usually 7/16″, ½”, or adjustable)
- Locking pliers or C-clamps
- Safety glasses
- Gloves
Never use screwdrivers as winding bars—they can slip and cause injury.
Example: Typical Garage Door Spring Sizes
Here’s a quick data table showing common torsion spring sizes:
| Spring Diameter | Length | Wire Size | Door Weight Supported |
|---|---|---|---|
| 2” | 24” | 0.225” | Up to 130 lbs |
| 2” | 36” | 0.250” | 130–180 lbs |
| 2” | 48” | 0.262” | 180–250 lbs |
Step-by-step: How To Tighten Garage Door Springs
1. Prepare The Area
- Close the garage door fully.
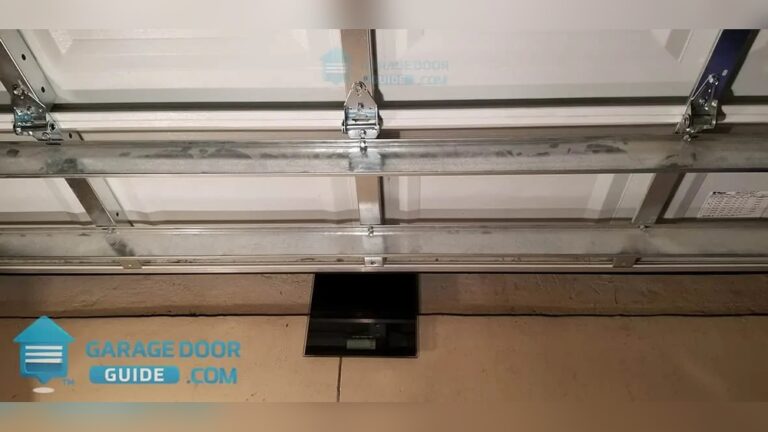
- Unplug the opener and lock the door in place using C-clamps on the tracks.
- Clear tools and objects from your workspace.
2. Identify Your Spring Type
- Torsion springs are above the door (horizontal bar).
- Extension springs are along the sides.
If you have torsion springs, follow the winding bar steps. For extension springs, see below.
3. Tightening Torsion Springs
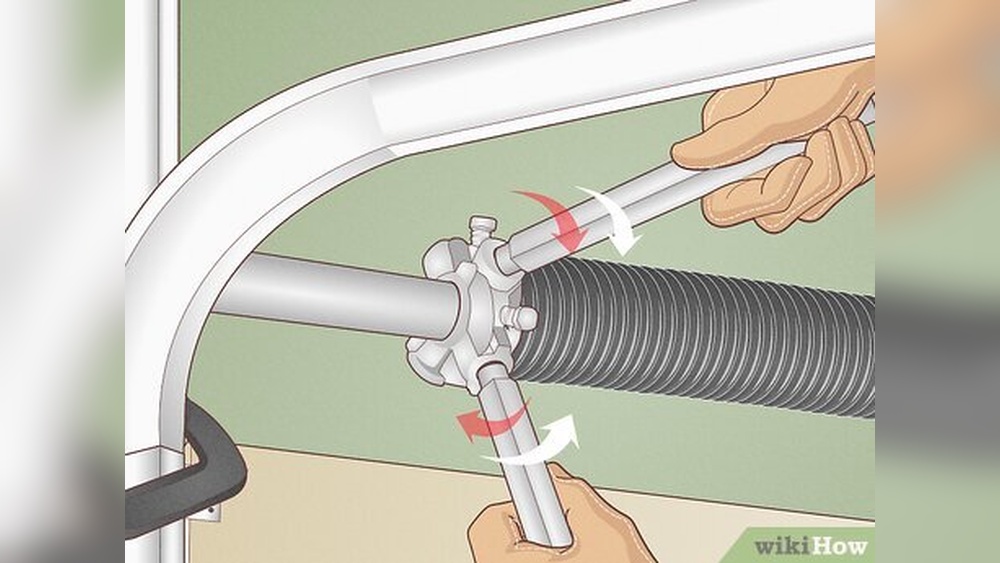
Torsion springs require winding bars. Here’s how to tighten them:
- Locate the winding cone at the end of the spring.
- Insert a winding bar into one hole of the cone.
- Loosen the set screws with a wrench. The spring may shift slightly.
- Use the winding bar to turn the spring 1/4 turn at a time. Each turn adds tension.
- Tighten set screws after adjusting.
- Remove winding bars carefully.
Example: If your door drops too quickly, add one full turn. If it’s hard to open, remove a turn. Test the door after each adjustment.
4. Tightening Extension Springs
Extension springs are easier but still need caution.
- Remove tension by opening the door fully.
- Clamp the door open using C-clamps.
- Move the hook to a higher hole in the bracket to increase tension.
- Release the clamps and test the door.
5. Test The Door
- Remove C-clamps and reconnect the opener.
- Open and close the door manually.
- The door should lift easily, stay open halfway, and close smoothly.
If the door still feels heavy or moves too fast, repeat small adjustments. Too much tension can make the door hard to close.
6. Fine-tuning
Test the balance:
- Lift the door halfway and let go. If it stays, the springs are correct.
- If it falls, add tension. If it rises, reduce tension.
Non-obvious insight: Springs often need slight adjustments after a few days. Metal stretches, so re-check the door later.
Data Table: Torsion Vs Extension Spring Adjustment
Here’s a quick comparison for beginners:
| Spring Type | Adjustment Method | Difficulty | Safety Risk |
|---|---|---|---|
| Torsion | Winding bar turns | Medium | High |
| Extension | Bracket hook moves | Easy | Medium |
Practical Tips For Beginners
- Adjust springs in small increments.
- Mark the original position before changes.
- Always keep your face and body away from the springs.
- Replace both springs if one is weak; uneven tension causes problems.
- Springs should never be adjusted when broken. Replace them first.
- If your door has double springs, adjust each one equally.
Example: If your garage door is 200 lbs, both springs must support 100 lbs each.

Credit: www.youtube.com
Common Mistakes To Avoid
- Using the wrong tools: Screwdrivers can slip. Use winding bars.
- Over-tightening springs: This causes the door to shoot up or stay open.
- Ignoring safety steps: Always unplug the opener and wear protection.
- Adjusting only one spring: Both sides must match for proper balance.
- Skipping a test after adjustment: Always test the door before reconnecting the opener.
When To Call A Professional
If you notice any of these signs, call a garage door expert:
- Broken springs (visible gaps or cracks)
- Loud bang or snap sounds
- Door won’t stay open at all
- Springs look rusted or worn
- You feel unsure about safety
Professional repairs cost $150–$350 for spring replacement, but it’s safer and faster. Experts have special tools and know how to handle high-tension springs.
Real-life Example
Let’s look at a typical scenario:
A homeowner in Ohio noticed their garage door was hard to lift. Testing showed the door fell quickly when halfway open. They tightened each torsion spring by one turn using winding bars. After adjustment, the door stayed open halfway and lifted smoothly.
The opener worked without strain.
Most beginners think only the opener needs fixing, but the springs are often the real issue. Fixing springs early prevents expensive repairs.
Maintenance Tips After Tightening
- Lubricate springs every 6 months with garage door oil.
- Inspect springs for rust or wear.
- Keep the tracks clean.
- Avoid forcing the door if it’s stuck.
Non-obvious insight: Lubrication reduces noise and helps springs last longer. Many beginners skip this step.

Credit: www.wikihow.com
Cost Comparison Table
Understanding repair costs can help you decide between DIY and hiring a professional:
| Repair Type | DIY Cost | Professional Cost | Time Needed |
|---|---|---|---|
| Tightening Springs | $20–$40 (tools) | $80–$150 | 1 hour |
| Spring Replacement | $50–$100 (parts & tools) | $150–$350 | 2–3 hours |
Frequently Asked Questions
Is It Safe To Tighten Garage Door Springs Myself?
It is safe if you use the correct tools and follow safety steps. Torsion springs are dangerous because they store a lot of energy. Beginners should use winding bars and always unplug the opener. If you feel unsure, call a professional.
How Can I Tell If My Springs Need Tightening?
If the door feels heavy, won’t stay open, or the opener struggles, the springs may need adjustment. You can test by lifting the door halfway and letting go. If it moves, the springs likely need tightening.
How Often Should Garage Door Springs Be Adjusted?
Most springs last 7–10 years. Adjust them when you notice balance issues or after heavy use. Lubricate and inspect every 6 months for best performance.
What Happens If I Over-tighten My Garage Door Springs?
Over-tightened springs make the door shoot up or stay open. This is dangerous and strains the opener. Always adjust in small steps and test after each change.
Where Can I Find More Information About Garage Door Springs?
For detailed spring specifications, safety tips, and maintenance, visit Wikipedia.
—
Garage door spring adjustment is a practical skill for homeowners, but it’s essential to follow safety steps and use the right tools. Start with small adjustments, test often, and keep springs lubricated. If the springs look worn or broken, replace them or call a professional.
Taking care of your garage door springs keeps your door running smoothly and prevents costly repairs down the road.

Credit: www.youtube.com