A gap on one side of your garage door can seem like a small problem. But it lets in cold air, pests, and even water. Over time, this gap can damage your garage and what you store inside. If you fix the gap early, you can save money and avoid bigger repairs. The good news: most side gaps are easy to fix if you know what to look for and use the right steps.
This guide will help you find the cause and fix the gap, even if you’ve never worked on a garage door before. You’ll learn what tools you need, step-by-step solutions, and how to avoid common mistakes. With clear instructions and tips, you’ll feel confident tackling this repair yourself.
Why Does A Gap Appear On One Side Of The Garage Door?
A gap often appears because something is out of alignment. Here are some common reasons:
- Worn weatherstripping: The seal at the bottom or sides of the door may be old or damaged.
- Uneven floor: Concrete can crack or settle over time, making one side lower.
- Misaligned tracks: The metal rails that guide the door may be bent or loose.
- Broken springs or cables: If these parts fail, the door may hang unevenly.
- Improper installation: Sometimes, the door was never installed straight.
Many beginners think only the door is the problem. But most side gaps start with the tracks or the floor. Always check these first.
Safety Precautions Before You Start
Garage doors are heavy and have parts under tension. Before you work:
- Unplug the opener: Prevents accidental movement.
- Wear gloves and safety glasses: Protect your hands and eyes.
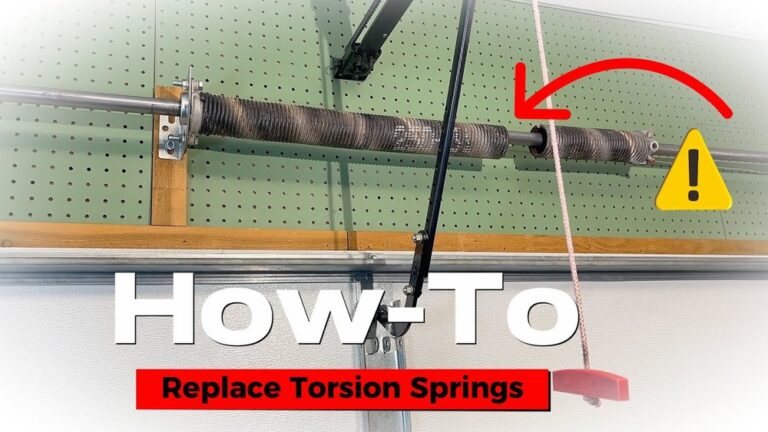
- Do not remove springs: Torsion springs can cause injury. Call a pro for these.
Never skip safety steps. A surprising number of injuries happen each year from DIY garage repairs.
Step 1: Inspect And Identify The Gap
Start by finding exactly where the gap is and what’s causing it.
- Close the garage door and check both sides from inside.
- Use a flashlight to spot light coming through.
- Measure the size of the gap with a tape measure. Write it down.
- Check the weatherstripping for cracks or wear.
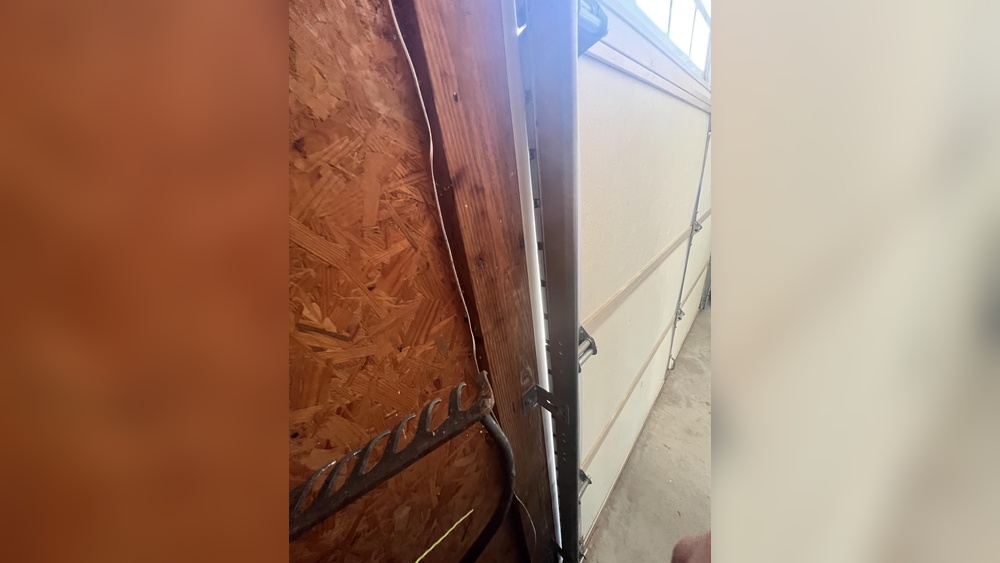
- Look at the tracks: Are they straight and tight?
- Use a level to check if the floor is even under the door.
Example: If the gap is 1 inch wide at the bottom left, but there’s no gap on the right, the problem is likely with alignment, not the seal.
Step 2: Simple Fixes For Small Gaps
If your gap is less than ½ inch, try these easy fixes first.
Adjust The Weatherstripping
- Buy new garage door weatherstripping from a hardware store.
- Remove old weatherstripping from the bottom or sides. Clean the surface.
- Cut new weatherstripping to length.
- Attach with nails or screws (follow package instructions).
- Close the door and check for a tight seal.
Tip: There are different types of weatherstripping. Choose one that matches your door (aluminum, wood, or steel).
Fill Minor Floor Gaps
If the floor is uneven but the door is straight, you can:
- Use a concrete patch to fill cracks or dips.
- For small gaps, install a garage floor threshold seal. This is a rubber strip that glues to the floor.
Beginners often miss: Weatherstripping alone cannot fix large gaps caused by misaligned tracks or a slanted floor.
Step 3: Adjust The Garage Door Tracks
If one side of the door is higher than the other, the tracks may be misaligned.
Tools Needed
- Wrench or socket set
- Level
- Tape measure
How To Adjust
- Loosen the bolts holding the vertical track on the side with the gap.
- Gently tap the track with a rubber mallet toward the garage door. This moves the door closer to the wall or floor.
- Use a level to make sure the track is straight.
- Tighten the bolts once the gap closes.
- Open and close the door several times to check the fit.
| Problem | Adjust Track? | Replace Weatherstripping? | Floor Patch? |
|---|---|---|---|
| Small gap, even floor | No | Yes | No |
| Large gap, uneven track | Yes | Maybe | No |
| Gap from floor settling | No | Maybe | Yes |
Common mistake: Overtightening track bolts can bend the track and cause more problems. Tighten just enough to hold the track in place.
Step 4: Check The Door’s Balance And Springs
An unbalanced garage door can cause one side to hang lower.
How To Test Door Balance
- Disconnect the door from the opener by pulling the release cord.
- Lift the door halfway by hand and let go.
- If the door stays in place, it’s balanced.
- If one side drops or rises, the springs or cables may need adjusting.
What To Do If Door Is Unbalanced
- Do not adjust torsion springs yourself. These are dangerous.
- Call a qualified garage door technician.
Fact: According to the International Door Association, more than 20,000 garage door injuries are reported each year, many from spring accidents. Leave spring repairs to professionals.

Credit: www.reddit.com
Step 5: Fix Uneven Concrete Or Floor
Sometimes, the garage floor is the real problem.
Options For Uneven Floors
- Garage floor leveling compound: Use this to fill in low spots.
- Install a floor threshold: Good for gaps up to ½ inch.
- Install a door sweep: Adds a flexible rubber piece to the bottom of the door.
When To Call A Professional
- If your floor has sunk more than 1 inch, you may need concrete repair.
- For major structural issues, always get expert help.
Pro insight: Many homeowners only notice floor settling after years. If you see cracks wider than ¼ inch, have your foundation checked.
Step 6: Replace Or Adjust Hinges And Rollers
Worn or damaged garage door hinges and rollers can cause the door to tilt.
How To Inspect
- Open the door halfway.
- Look for bent or rusted hinges.
- Spin the rollers by hand; they should move smoothly.
How To Replace
- Buy matching replacement parts.
- Unbolt the old hinge or roller.
- Bolt on the new part and test the door.
Tip: Lubricate new rollers with garage door spray for smoother movement.
Step 7: Adjust The Limit Settings (for Automatic Openers)
If you have an automatic garage door opener, the closing force or travel limits may be set wrong.
How To Adjust
- Find the limit adjustment screws on your opener (check the manual).
- Turn the screw in small increments.
- Test the door after each adjustment.
Example
If the door stops before closing fully on one side, increase the closing limit. If it slams, decrease the force.
Caution: Always unplug the opener before adjusting. For some models, you’ll need a flathead screwdriver.
Step 8: When To Replace The Door
If your door is more than 20 years old or badly warped, repairs may not help.
- Measure the cost of repair vs. replacement.
- Newer doors are better insulated and safer.
| Door Age | Repair Cost (avg.) | Replacement Cost (avg.) | Recommended? |
|---|---|---|---|
| Under 10 years | $100 – $300 | $900 – $1,800 | Repair |
| 10-20 years | $200 – $600 | $900 – $2,000 | Depends |
| Over 20 years | $500+ | $1,000 – $2,500 | Replace |
Non-obvious insight: If you plan to sell your home soon, a new garage door often adds more value than the repair cost.

Credit: diy.stackexchange.com
Tools And Materials Checklist
Before starting, gather these items:
- Tape measure
- Level
- Wrench set
- Rubber mallet
- Screwdriver set
- Replacement weatherstripping
- Garage floor seal or patch (if needed)
- Safety gear (gloves, glasses)
Having all tools ready saves time and reduces mistakes.
Maintenance Tips To Prevent Future Gaps
Once you’ve fixed the gap, keep your garage door in good shape:
- Inspect weatherstripping every 6 months and replace if worn.
- Lubricate rollers and hinges twice a year.
- Check track alignment and tighten bolts as needed.
- Clean the floor and keep drains clear to prevent settling.
- Test door balance each year.
Extra tip: After heavy rain or snow, check the door for new gaps. Water can cause sudden floor movement.
Real-world Example
A homeowner in Ohio noticed a ¾ inch gap on the left side of his garage door after winter. He checked the weatherstripping, which was fine. Next, he found the left track bolts were loose from vibration. He adjusted and tightened the track, closing the gap in 20 minutes with simple tools.
This saved him a $150 service call.
Many issues like this can be solved in under an hour if you follow the right steps.
When To Call A Professional
Some repairs are best left to experts:
- Torsion spring replacement
- Major track or panel damage
- Structural floor problems
If you’re not sure, ask for a quote from a certified garage door company. This can prevent injuries and further damage.
For more technical details, you can visit the HomeAdvisor Garage Door Repair Guide.

Credit: www.reddit.com
Frequently Asked Questions
Why Does My Garage Door Have A Gap Only On One Side?
Most side gaps happen because the tracks are misaligned, the floor is uneven, or the door is not balanced. Sometimes, old weatherstripping shrinks more on one side, causing a visible gap.
Can I Fix A Garage Door Gap Myself, Or Do I Need A Professional?
You can fix most small gaps yourself with basic tools and new weatherstripping. If the problem is with springs, cables, or major alignment, it’s safer to call a professional.
How Much Does It Cost To Fix A Garage Door Gap?
Most DIY fixes (weatherstripping, minor track adjustment) cost $10 to $50. If you need professional help for springs or major repairs, the cost ranges from $100 to $300.
Will Fixing The Gap Improve Energy Efficiency?
Yes. Sealing gaps keeps out cold air, dust, and pests. This helps your garage stay warmer in winter and cooler in summer, saving on energy bills.
How Often Should I Check My Garage Door For Gaps?
Check your garage door every 6 months. Look for signs of wear, loose tracks, or floor changes. Regular checks help you catch small issues before they become big problems.
A gap on one side of your garage door is not just a small problem—it’s a sign something needs attention. With this guide, you can diagnose the cause, try easy fixes, and know when to call a pro. Regular maintenance will keep your garage secure, energy-efficient, and looking good for years to come.