Garage Door Adjustment Do It Yourself
A garage door that works smoothly is something many people take for granted. But when it starts making strange noises, gets stuck, or won’t close properly, it quickly becomes a big problem. The good news? Most garage door issues can be fixed with a little knowledge and the right tools—no need to call a professional for every small adjustment.
If you’re new to DIY repairs, adjusting your garage door might sound intimidating. But with clear steps, safety tips, and practical advice, you can often handle adjustments yourself. This guide covers the most common garage door problems, how to fix them, and when it’s best to call a pro.
Why Garage Door Adjustment Matters
A poorly adjusted garage door can cause several issues:
- Loud noises during opening or closing
- Door not closing completely, leaving your garage exposed
- Uneven movement that could damage parts over time
- Extra strain on the opener, reducing its lifespan
Regular adjustment helps your door last longer, keeps your home secure, and saves you money on repairs.
Safety First: Precautions Before Any Adjustment
Working with garage doors has risks. The springs, especially, are under high tension and can cause injury.
- Disconnect power to the opener before working on the door
- Wear safety glasses and gloves to protect your hands and eyes
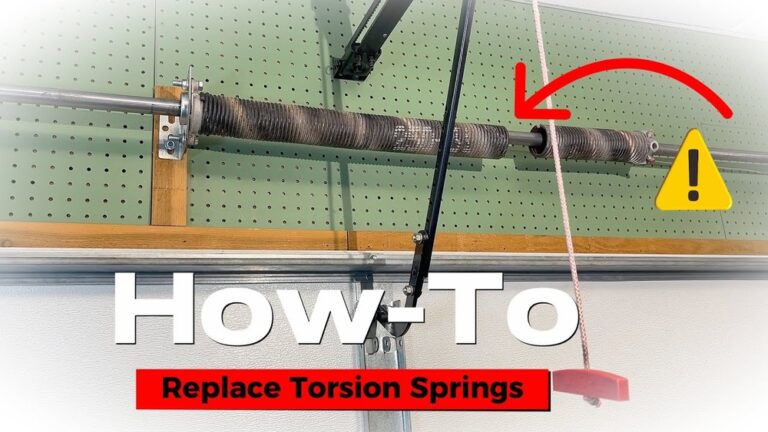
- Never remove or loosen the torsion springs if you’re not trained—call a professional for spring replacement or major repairs
- Keep children and pets away from the work area
If you ever feel unsure, stop and call a technician.
Tools And Materials Needed
Before you start, gather these basic tools:
- Adjustable wrench or socket set
- Phillips and flat-head screwdrivers
- Stepladder
- Level
- Lubricant spray (for garage doors)
- Safety glasses and gloves
Optional but helpful:
- Tape measure
- Clamps (to hold the door in place)
Having everything ready keeps the process smooth and safe.
Common Signs Your Garage Door Needs Adjustment
Here are the most frequent signs your garage door needs attention:
- The door closes unevenly or hangs at an angle
- It won’t open or close fully
- There’s a loud bang or grinding sound
- The door reverses after hitting the floor
- The opener struggles or strains
Catching these early can prevent bigger problems.

Credit: www.youtube.com
Step-by-step Guide To Diy Garage Door Adjustment
Let’s break down the main adjustments you can do safely at home.
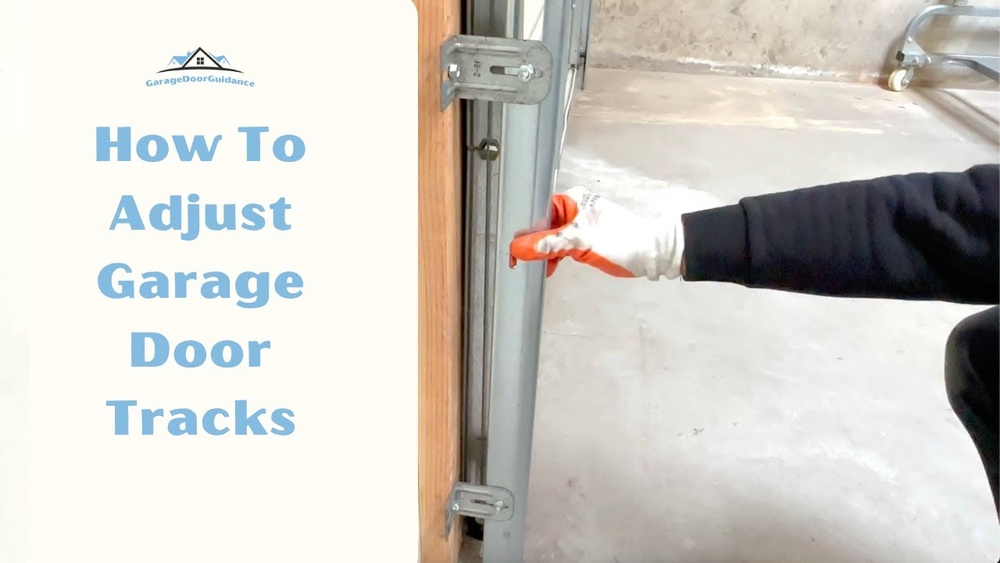
1. Adjusting The Garage Door Tracks
If your door is rubbing, sticking, or hanging unevenly, the tracks may be misaligned.
How to check and adjust:
- Close the garage door fully.
- Use a level to check if the tracks are plumb (vertical).
- Loosen the mounting bolts slightly—just enough to move the track.
- Gently tap the track into alignment using a rubber mallet.
- Tighten the bolts and recheck with the level.
Key tips:
- Both sides must be even for smooth operation.
- Don’t overtighten the bolts, or you risk bending the track.
2. Adjusting The Door Spring Tension (extension Springs Only)
If the door is hard to lift or slams shut, the springs may need adjustment.
Important: Adjusting torsion springs is dangerous. Only adjust extension springs (side-mounted, long springs).
How to adjust:
- Open the door fully and clamp it in place.
- Move the spring hook to a different hole in the track support to change tension.
- Move to a higher hole for more tension; lower for less.
- Remove clamps and test the balance.
Test: The door should stay in place when opened halfway. If it moves, repeat the adjustment.
3. Balancing The Garage Door
A properly balanced door makes opening easier and reduces wear.
How to check:
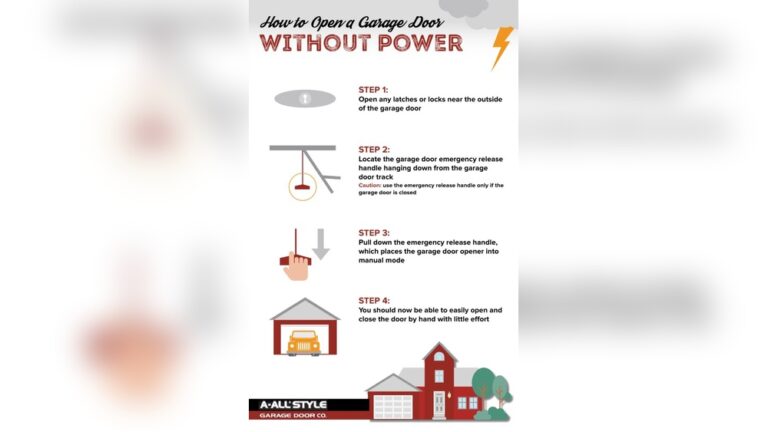
- Disconnect the opener (usually by pulling the emergency release cord).
- Manually lift the door halfway and let go.
Result: The door should stay in place. If it falls, the springs need more tension. If it rises, they need less.
Repeat the spring adjustment process as needed.
4. Adjusting The Opener Limit Switches
If your door doesn’t close all the way or reverses, adjust the limit switches.
How to adjust:
- Locate the adjustment screws on the opener motor (usually labeled “up” and “down”).
- Turn the screw in small increments (usually ¼ turn).
- Test after each change until the door opens and closes fully without stopping or reversing.
Tip: Always make adjustments with the door closed for safety.
5. Fixing Sensor Alignment
Modern garage doors have safety sensors near the floor. If misaligned, the door won’t close.
How to realign:
- Locate sensors on both sides of the door.
- Loosen the mounting bracket.
- Adjust until the indicator lights stay solid (not blinking).
- Tighten the brackets.
Note: Clean the sensor lenses to remove dust or debris.
Practical Data: Common Garage Door Problems And Fixes
Here’s a quick reference for the most frequent problems and their DIY solutions.
| Problem | Likely Cause | DIY Fix |
|---|---|---|
| Door won’t close completely | Limit switch needs adjustment | Adjust opener limit screws |
| Door reverses after closing | Sensor misaligned/obstructed | Realign and clean sensors |
| Door hangs unevenly | Track misalignment | Realign tracks, tighten bolts |
| Door is heavy/hard to lift | Spring tension too low | Increase extension spring tension |
| Loud noises during operation | Lack of lubrication | Apply garage door lubricant |
Credit: www.expressgaragedoors.com
How To Lubricate Your Garage Door For Smoother Operation
Lubrication is a simple way to keep your garage door running quietly.
- Use a garage door lubricant (never WD-40—it’s not made for this).
- Spray hinges, rollers, and tracks lightly.
- Wipe away extra lubricant with a clean rag.
- Repeat every 6 months for best results.
Extra tip: Don’t forget the springs and bearing plates.
Comparing Diy Vs. Professional Garage Door Adjustment
Is it worth doing adjustments yourself or should you call a pro? Here’s a comparison to help you decide.
| Aspect | DIY | Professional |
|---|---|---|
| Cost | Mostly free (tools/lube only) | $100–$300 per service call |
| Skill required | Basic hand tools, reading instructions | Trained, experienced |
| Time required | 1–2 hours | 30–60 minutes |
| Risk | Low (tracks, sensors, lube) | Very low (insured, trained) |
| Complex issues (torsion springs, cables) | Not recommended | Yes |
Insight: Most minor adjustments are safe for beginners, but anything involving high-tension springs should be left to professionals.
Mistakes Beginners Make (and How To Avoid Them)
Even with simple adjustments, there are common beginner errors:
- Skipping safety steps like unplugging the opener
- Using the wrong lubricant (regular oil can attract dirt and cause jams)
- Over-tightening bolts which can bend tracks
- Ignoring strange noises, which often signal a bigger issue
- Attempting spring repair without experience
Always start with small changes, test frequently, and never force parts into place.
Real-world Example: Balancing A Garage Door
Imagine your garage door is heavy and slams shut quickly. Here’s what a beginner might do:
- Disconnect the opener.
- Lift the door halfway—it falls quickly.
- Add tension to the extension spring (move hook to a higher hole).
- Test again—the door now stays in place.
- Reconnect the opener and operate as normal.
This simple fix can prevent motor burnout and keep your door safer.
Credit: ddmgaragedoors.com
When To Call A Professional
Not every problem can be fixed at home. Call a pro if:
- The door is off its tracks and you can’t move it
- There’s a broken cable or spring
- You hear a loud bang and the door won’t lift
- DIY attempts don’t solve the issue
Professional help is best for repairs involving torsion springs, cables, or major realignment. Your safety is always more important than saving money.
Maintenance Tips To Prevent Adjustment Issues
Regular care can help you avoid big repairs:
- Lubricate moving parts twice a year
- Tighten bolts and screws every few months
- Check the door balance at least once a year
- Test sensors by closing the door and blocking the beam—door should reverse
A little time spent on maintenance keeps your door working for years.
Cost Of Common Garage Door Adjustments
Knowing what to expect can help you budget.
| Adjustment Type | DIY Cost | Pro Cost (Avg.) |
|---|---|---|
| Lubrication | $5–$10 | $50–$100 |
| Track realignment | Free (tools only) | $100–$200 |
| Sensor adjustment | Free | $75–$150 |
| Spring tension (extension only) | Free–$10 | $150–$300 |
DIY saves money, but always put safety first.
Where To Learn More
For more details on how garage doors work and safety warnings, visit the Wikipedia Garage Door Opener page.
Frequently Asked Questions
How Often Should I Adjust My Garage Door?
Check your garage door’s operation every 6–12 months. Make minor adjustments if you notice changes in movement, noise, or balance.
Can I Adjust Garage Door Springs Myself?
You can safely adjust extension springs if you follow instructions. Torsion springs are dangerous—never adjust these yourself.
What If My Garage Door Opener Stops Working After Adjustment?
Check all connections, reset the opener, and test the sensors. If the problem continues, you may need professional help.
Is It Normal For My Garage Door To Make Noise?
Some noise is normal, but grinding, banging, or squealing means parts need lubrication or alignment.
How Do I Know If My Garage Door Is Balanced?
Disconnect the opener, lift the door halfway, and let go. The door should stay in place—if it moves, it’s unbalanced and needs adjustment.
Taking care of your garage door doesn’t require expert skills—just patience, basic tools, and attention to detail. With these DIY steps, you’ll keep your garage door running smoothly, quietly, and safely for years to come.