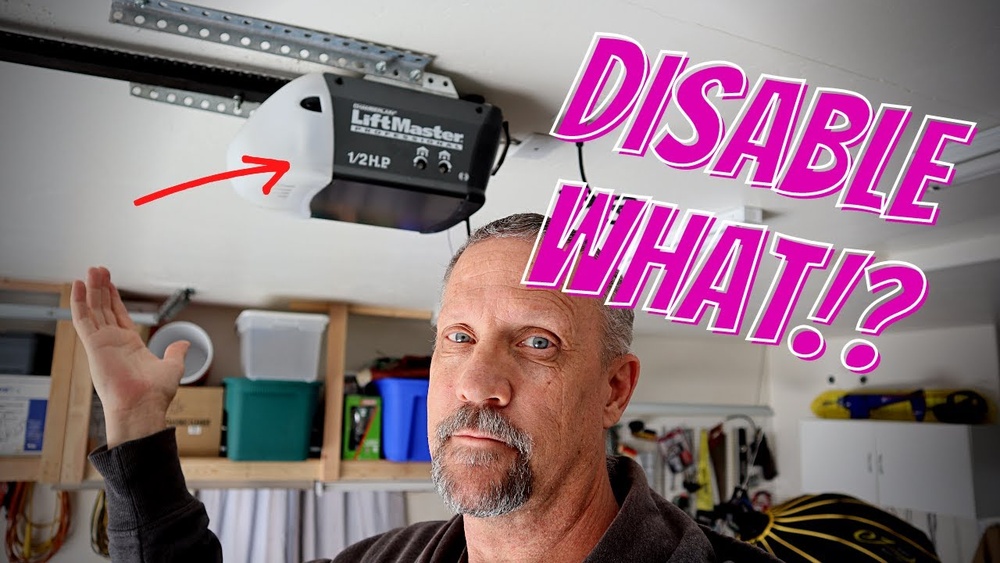
If your garage door suddenly stops working, the sensors might be the reason. These small devices sit near the ground at both sides of the door. They make sure nothing is in the way before the door closes. Sometimes, you may need to trick garage door sensors—for example, to test the system, troubleshoot a problem, or close the door in an emergency. Learning how these sensors work, and how to bypass them safely, helps you avoid frustration and possible damage.
This guide explains how to trick garage door sensors in simple terms. You’ll learn how sensors function, why they sometimes fail, and the safest ways to work around them. We’ll also cover common mistakes, safety warnings, and some clever techniques used by professionals and homeowners.
If you want fast, clear answers, keep reading.
How Garage Door Sensors Work
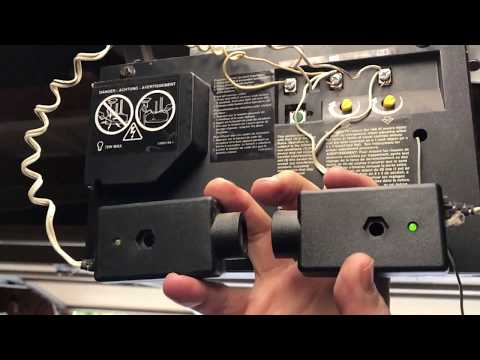
Garage door sensors use infrared light to create an invisible beam across the base of your garage door opening. When this beam is unbroken, the system knows it’s safe to close. If something blocks the beam (like a child, pet, or object), the sensor tells the garage door to stop or reverse.
Key parts of the system:
- Sender: Emits the infrared beam.
- Receiver: Detects the beam from the sender.
- Control unit: Connects sensors to the garage door opener.
If the beam is interrupted, the receiver signals the opener to stop. This safety feature prevents injury and damage.
Example: If a ball rolls under your door while it’s closing, the sensors “see” the ball, and the door goes back up.
Why Trick Garage Door Sensors?
There are legitimate reasons for wanting to bypass or “trick” sensors:
- Testing: Diagnose whether the sensors work or if the opener is the problem.
- Emergency closing: Close the door when sensors are dirty, misaligned, or malfunctioning.
- Temporary bypass: Move vehicles or tools in bad weather when the sensor beam is blocked.
Warning: Never bypass sensors if children or pets are present. Safety should always come first.
Credit: www.sterlinggaragedoorrepairpa.com
Methods To Trick Garage Door Sensors
Several ways exist to trick garage door sensors. Each method has its own pros, cons, and safety risks. Let’s look at the most common approaches.
1. Align The Sensors
Many sensor problems happen because of misalignment. The sender and receiver must “see” each other. If either sensor is bumped or dirty, the beam can’t pass.
How to realign:
- Check both sensors for dirt or cobwebs.
- Make sure both are pointed straight at each other.
- Adjust until the indicator light on each turns solid (not blinking).
Tip: About 80% of sensor issues are fixed by simple cleaning and alignment.
2. Hold Down The Wall Button
Most garage door openers have a wall button with a “press and hold” function. If you hold this button, the opener ignores the sensors and closes the door.
Steps:
- Press and hold the wall button until the door fully closes.
- Release the button only when the door is down.
Why this works: The manual override tells the control unit you accept the risk. It’s built-in for emergencies.
3. Tape Or Reflect The Sensor Beam
Some people use reflective tape or a small mirror to bounce the beam from the sender to the receiver. This tricks the sensors into thinking the path is clear.
How to do it:
- Place a piece of reflective tape or a small mirror directly across from the sender.
- Adjust until the receiver’s light turns solid.
Note: This method works only if the sensors are not badly damaged.
4. Bypass The Sensors With A Jumper Wire
You can temporarily bypass the sensors at the opener’s main unit using a jumper wire. This method is more technical and should be used with caution.
Steps:
- Disconnect power to the garage door opener.
- Locate the sensor wires on the opener’s terminal.
- Use a short piece of insulated wire to connect the two sensor terminals.
- Restore power and test the system.
Warning: This disables safety features. Never leave the sensors bypassed permanently.
5. Block Sunlight Or Strong Light
Bright sunlight sometimes confuses sensors by “blinding” the receiver. To trick the sensors, block the sunlight with your hand, cardboard, or a small box, then try closing the door.
Works best for: Temporary closing during strong sunlight hours.
Quick tip: Some modern sensors have sun shields, but older units are more sensitive.
Comparison Of Sensor Bypass Methods
Here’s a quick look at the pros and cons of each method:
| Method | Difficulty | Safety Risk | Best For |
|---|---|---|---|
| Align Sensors | Easy | Low | Most problems |
| Hold Wall Button | Very Easy | Medium | Quick emergency use |
| Reflect Beam | Medium | Medium | Temporary workaround |
| Jumper Wire | Hard | High | Testing, advanced troubleshooting |
| Block Sunlight | Easy | Low | Sunlight interference |

Credit: www.reddit.com
Safety Concerns When Bypassing Sensors
Tricking garage door sensors can be dangerous if not done carefully. The sensors exist to prevent accidents.
Important risks:
- Door may close on objects, pets, or people.
- Permanent bypass is illegal in many places.
- You could void your garage door opener’s warranty.
Always restore normal sensor function after testing or emergency use.
Fact: According to the U.S. Consumer Product Safety Commission, sensor failures are a factor in about 10,000 garage door injuries per year.
Common Reasons Sensors Fail
Understanding why sensors stop working can help you avoid bypassing them in the future. Here are the top causes:
- Dirt or debris: Dust, mud, or spider webs block the sensor lens.
- Misalignment: Sensors get bumped by bikes, tools, or people.
- Wiring issues: Loose or damaged wires interrupt the signal.
- Sunlight: Strong sun can overwhelm older sensors.
- Electrical surges: Lightning or power spikes damage sensor circuits.
Example: If your garage floods, water can shift one sensor out of line.
Credit: www.youtube.com
How To Test Garage Door Sensors
Testing sensors helps you decide if you really need to trick them or just fix a simple problem.
Step-by-step:
- Block the sensor beam with your hand.
- Press the remote or wall button.
- Door should not close. If it does, sensors are already bypassed or broken.
- Clean and realign if sensors fail the test.
Quick test: Most sensors have an LED light. Solid means “good.” Blinking or off means “problem.”
Table: Sensor Status Indicators
Here’s what sensor lights usually mean:
| Light Status | Meaning | Action Needed |
|---|---|---|
| Solid | Aligned and working | None |
| Blinking | Misaligned or dirty | Clean/realign |
| Off | No power or wiring issue | Check wiring/power |
Practical Tips For Safe Bypassing
If you must trick your garage door sensors, follow these tips to reduce risk:
- Warn family members before bypassing sensors.
- Use bypass only for short periods.
- Fix the root problem as soon as possible.
- Never bypass sensors on doors used by children or pets.
Pro tip: Keep a flashlight, screwdriver, and extra wire in your garage for emergency troubleshooting.
What Not To Do
Many beginners make mistakes when trying to trick sensors. Here are things to avoid:
- Do not cut sensor wires permanently.
- Never cover sensors with duct tape for long-term use.
- Don’t force the door closed if it won’t move. This can damage the opener.
Remember: Permanent sensor bypass can lead to serious injury and legal trouble.
When To Call A Professional
If you can’t fix the problem with basic steps, it’s smart to call a garage door technician. Some problems, like bad circuit boards or complex wiring, need expert help.
Signs you need help:
- Sensors stay off after cleaning and realignment.
- Door moves erratically or won’t respond.
- You see sparks or smell burning.
A professional can quickly diagnose and repair deeper issues. Find a licensed technician with good reviews for best results.
Data: Average Cost Of Sensor Repair
Sensor repair is usually affordable. Here’s a quick look at average costs in the U.S.:
| Service | Typical Cost | Time Needed |
|---|---|---|
| Sensor cleaning/realignment | $50 – $100 | 30-60 minutes |
| Sensor replacement | $100 – $200 | 1-2 hours |
| Wiring repair | $75 – $150 | 1 hour |
Tip: Always get a written estimate before work begins.
Legal And Insurance Issues
It’s important to know that tampering with garage door sensors can affect your home insurance and local building code compliance.
- Many U.S. states require working sensors by law.
- Disabling sensors can void your insurance if an accident happens.
- Some cities do random checks on garage door safety.
Example: After an accident, insurers may deny claims if sensors were bypassed.
Learn more: The U.S. Consumer Product Safety Commission offers official safety guidelines.
Frequently Asked Questions
What Is The Safest Way To Trick Garage Door Sensors?
The safest way is to use the wall button override. Hold it down until the door fully closes, then release. This does not require tampering with wires or removing sensors.
Can I Permanently Bypass My Garage Door Sensors?
No, you should never permanently bypass sensors. This removes critical safety features and may be illegal in your area. Only bypass for short-term testing or emergencies.
Why Does My Garage Door Only Close When I Hold The Wall Button?
This means the sensors are blocked or misaligned. The opener requires you to hold the button as a safety precaution. Try cleaning and aligning the sensors to fix the problem.
How Do I Know If My Sensors Are Bad Or Just Dirty?
Check the indicator lights on each sensor. If they are blinking or off, clean the lenses first. If the problem remains after cleaning and realignment, the sensors may be faulty.
Do Sensor Problems Affect All Garage Door Openers?
Most modern garage door openers use safety sensors. Older openers (before 1993) may not have them. Always check your opener’s model and follow the manufacturer’s safety advice.
Tricking garage door sensors should be your last resort. Use these tips only for emergencies or testing, and always restore normal safety functions as soon as possible. When in doubt, call a professional to keep your garage—and your family—safe.