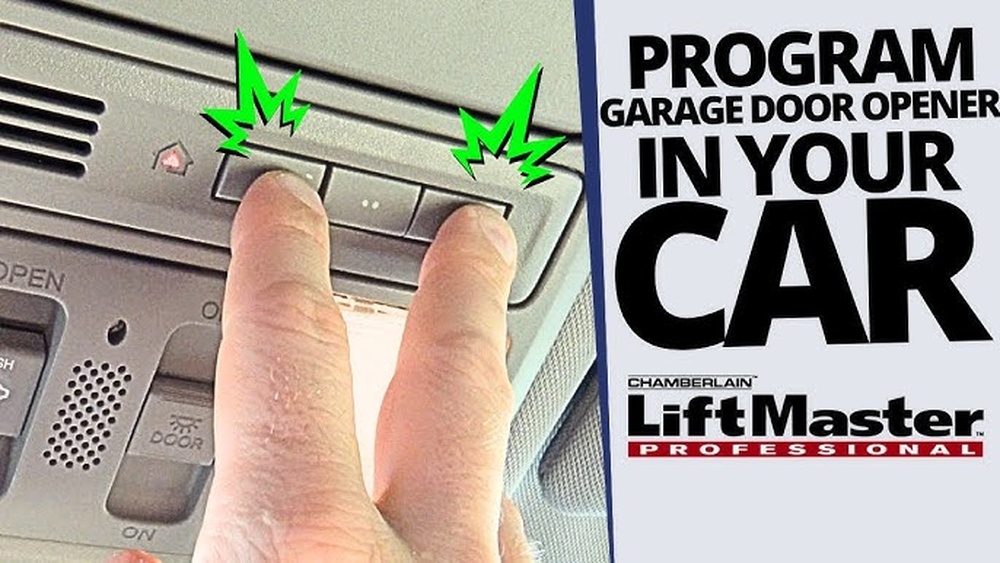
Programming your Liftmaster garage door opener to your car with a remote can feel confusing, especially if you’re doing it for the first time. Many car owners want to use their vehicle’s built-in buttons or a universal remote to control the garage door, but they’re unsure how to start.
The good news is, with a few clear steps and practical tips, you can set up your Liftmaster system quickly and safely. This guide will walk you through everything you need to know, from basic concepts to troubleshooting common problems.
Understanding Liftmaster And Car Remotes
Before starting, it’s helpful to know how Liftmaster garage door openers and car remotes work together. Liftmaster is a popular brand for residential garage door openers. Most modern cars come with a built-in system, usually called HomeLink or Car2U, that lets you control garage doors or gates without needing the original remote.
Liftmaster uses a technology called rolling code. This means the code changes each time you use the remote, making your garage more secure. To program your car, you need to sync the rolling code with your vehicle’s system.
Common Car Remote Systems
- HomeLink: Found in many vehicles, especially from brands like Honda, Toyota, Ford, and BMW.
- Car2U: Used in some Ford, Lincoln, and Mercury cars.
- Universal Remotes: Separate devices that work with multiple brands.
Not every car uses the same system, so check your vehicle’s manual for details.
What You Need Before Starting
To make the programming process smooth, gather these items first:
- Liftmaster remote: The original remote or a compatible universal remote.
- Car manual: For instructions on your car’s remote system.
- Step ladder: To reach the garage opener’s buttons.
- Pen and paper: For noting steps or codes.
It’s important to check that your Liftmaster opener is compatible with your car’s system. Most models made after 1993 use rolling codes, which work with HomeLink and similar systems.
Credit: www.continentaldoorco.com
Step-by-step Guide To Programming Liftmaster To Car
This section gives you clear steps for pairing your Liftmaster opener with your car’s built-in remote or a universal remote. The process might vary slightly, but these steps cover most setups.
1. Clear Existing Codes (optional)
If your car’s remote has been programmed before, you may need to clear old codes first.
- Hold the desired button in your car for 10-20 seconds until the indicator light flashes rapidly.
- Release the button. This clears previous settings.
2. Prepare The Liftmaster Remote
- Make sure the remote has a fresh battery.
- Stand close to your car and garage door opener.
3. Program The Car Remote
Here’s how to pair HomeLink or Car2U systems:
- Press and hold the car’s remote button you want to program and the Liftmaster remote button at the same time.
- Continue holding until the car’s indicator light changes from slow to rapid flashing (usually takes 20-30 seconds).
- Release both buttons.
4. Sync With The Garage Door Opener
Liftmaster’s rolling code system needs you to press a button on the opener itself.
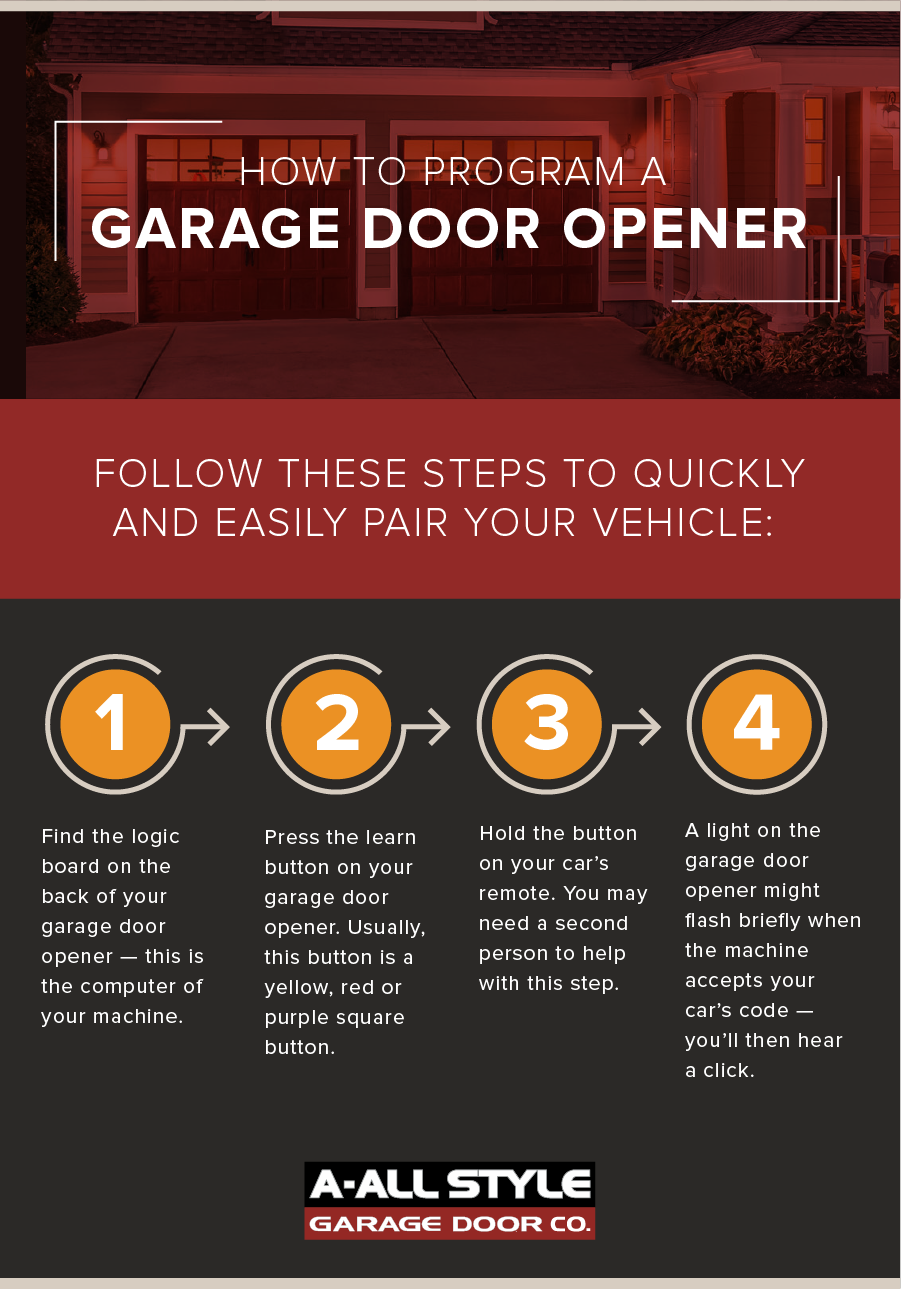
- Climb the ladder and find the Learn button on the Liftmaster opener. It’s usually under a light cover, colored yellow, orange, or purple.
- Press and release the Learn button. You’ll have 30 seconds to complete the next step.
5. Complete Programming In Your Car
- Within 30 seconds, return to your car.
- Press the programmed car button (HomeLink or Car2U) for 2-3 seconds, repeating up to three times.
- The garage door should move, confirming programming is complete.
If it doesn’t work, check battery levels or try again. Some systems need an extra attempt.
Practical Example: Programming A Toyota Camry With Liftmaster
Let’s use a real-world example to make the process clearer:
- You own a 2018 Toyota Camry with HomeLink.
- Your Liftmaster opener has a yellow Learn button.
Steps:
- Hold the HomeLink button and Liftmaster remote together until the HomeLink light flashes quickly.
- Press and release the yellow Learn button on your Liftmaster opener.
- Within 30 seconds, press the HomeLink button in the car three times.
- The garage door opens and closes.
This process is similar for most vehicles with HomeLink, but check your car manual for details.
Data Table: Liftmaster Compatibility By Year
Compatibility depends on the model year of your Liftmaster opener. Here’s a quick reference:
| Liftmaster Model Year | Rolling Code? | Works with HomeLink? |
|---|---|---|
| 1993–1997 | No | Limited (may need adapter) |
| 1998–2004 | Yes | Yes |
| 2005–Present | Yes | Yes |
Most new Liftmaster models are compatible with HomeLink and Car2U, but older openers may require an adapter.
Troubleshooting Common Problems
Programming doesn’t always work the first time. Here are some practical tips:
- Remote not responding: Change the battery in the remote or car system.
- Learn button not found: Check the opener’s manual or look for colored buttons under the light cover.
- HomeLink indicator doesn’t change: Move closer to the opener, as signal strength matters.
- Garage door doesn’t move: Confirm you pressed the Learn button, and try programming again.
Common Mistakes Beginners Make
- Skipping the Learn button step: Many people only program the car remote, forgetting to sync with the opener.
- Wrong timing: After pressing the Learn button, you must act within 30 seconds.
- Weak batteries: Low battery power can stop signals from reaching the opener.
- Not checking compatibility: Some older Liftmaster models need a bridge device for newer cars.
Safety Tips
Programming garage door openers involves electrical devices and moving doors. Here’s how to stay safe:
- Always use a sturdy step ladder when reaching the opener.
- Keep children and pets away from the garage door during programming.
- Don’t force the Learn button; press gently.
- If unsure, ask a professional for help.
Comparison Table: Homelink Vs. Universal Remotes
Choosing between your car’s built-in remote and a universal remote can make a difference. Here’s a quick comparison:
| Feature | HomeLink | Universal Remote |
|---|---|---|
| Built-in to Car | Yes | No |
| Rolling Code Support | Yes | Most models |
| Ease of Programming | Simple | Usually easy |
| Multiple Doors | Up to 3 | Varies |
| Price | Included | $20–$40 |
If you want a seamless experience, HomeLink is usually best. Universal remotes are good for older cars or extra doors.
Advanced Programming Tips
Some Liftmaster models and cars need extra steps or adapters. Here are advanced tips for special cases:
- Older Liftmaster openers (pre-1998): May need a HomeLink bridge adapter to work with modern car systems.
- Multiple garage doors: You can program different buttons for each door, but repeat the full process for each.
- Smartphone apps: Newer Liftmaster openers support apps like myQ for remote control. These require Wi-Fi setup, not car remote programming.
- Vehicle software updates: Some cars need HomeLink software updates to work with rolling codes.
Practical Data: Success Rate
According to HomeLink, over 90% of cars with built-in remotes successfully program to Liftmaster openers made after 1998. For older openers, adapters increase success rates to about 85%. Knowing this helps you plan if you have an older system.
Credit: www.allstyledoor.com
Example: Common User Scenario
A family moves into a new house with a Liftmaster opener from 2010. Their Honda CR-V has HomeLink, but the previous owner didn’t leave any remotes.
- They buy a Liftmaster remote online for $25.
- Follow the steps: Clear HomeLink codes, program with remote, press Learn button, sync from car.
- In less than 10 minutes, their car controls the garage door.
This shows how easy the process can be with the right steps.
Tips For Faster Programming
- Have all items ready before starting.
- Read both car and opener manuals to avoid confusion.
- Test the remote after programming to confirm.
- Write down which button controls which door.
Data Table: Time Needed For Programming
Programming time varies by experience and setup. Here’s an average:
| Step | Estimated Time |
|---|---|
| Clear old codes | 1 minute |
| Pair car remote | 2–3 minutes |
| Sync with opener | 1–2 minutes |
| Test and adjust | 2 minutes |
| Total | 6–8 minutes |
Most people finish programming within 10 minutes.
How To Reset Liftmaster Remote
If you need to reset your remote or HomeLink system:
- Press and hold the Learn button on the opener for 6 seconds until the light goes out.
- This erases all codes. You must reprogram all remotes and cars after this step.
- Useful if you move houses or lose a remote.
Where To Find Official Help
If you get stuck, check the official Liftmaster support site or HomeLink’s website. Both offer step-by-step guides and troubleshooting tips. You can also ask a professional installer for help.
For detailed HomeLink compatibility information, see HomeLink Compatibility.
Frequently Asked Questions
What If My Car’s Homelink Won’t Program To My Liftmaster?
Check if your Liftmaster opener uses rolling code. If it’s an older model, you may need a bridge adapter. Also, make sure you press the Learn button during setup and try programming multiple times.
Can I Use A Universal Remote Instead Of My Car’s Built-in System?
Yes, universal remotes work with most Liftmaster openers. Follow the same steps: program the remote, press the Learn button, and sync. Universal remotes are helpful if your car doesn’t have HomeLink.
How Many Garage Doors Can I Program To My Car?
Most built-in car remotes support up to three garage doors or gates. You can program each button for a different door, but repeat the process for every opener.
What Should I Do If I Lose My Original Liftmaster Remote?
You can buy a replacement remote online or from a hardware store. Make sure it’s compatible with your opener’s model year. Once you have it, follow the programming steps to sync your car.
Is Programming Liftmaster To My Car Safe?
Yes, it’s safe if you follow instructions and keep clear of moving doors. Always use a sturdy ladder and never let children or pets near the garage while programming.
Setting up your Liftmaster garage door opener to your car remote is simple if you follow clear steps and check compatibility. With the right tools, most people can finish the process in under 10 minutes. Remember to use safety tips, read your manuals, and test your setup after programming.
If you run into trouble, official support or a professional installer can help. Once set up, you’ll enjoy the convenience of opening your garage door from your car, making daily life easier and more secure.

Credit: www.youtube.com