Diy Overhead Garage Storage Ideas
Many homeowners struggle with garage clutter. Boxes, bikes, tools, and holiday decorations fill floors and shelves until there’s barely room for the car. If you want to reclaim space, overhead storage is one of the best solutions. It uses the area above your head – usually wasted space – to organize items safely and efficiently.
With a few DIY skills, you can build practical, sturdy overhead storage in your garage. This guide will show you how, with clear instructions and beginner-friendly advice.
Why Choose Overhead Garage Storage?
Overhead storage is smart for several reasons:
- Maximizes space: Uses ceiling area, freeing up floors and walls.
- Keeps items safe: Protects belongings from moisture, pests, and accidental damage.
- Improves access: Makes seasonal items easy to find.
- Reduces clutter: Creates a cleaner, more organized garage.
According to the National Association of Home Builders, 89% of new homes in the US have garages, but most are packed with storage. Overhead solutions help solve this common problem.
Planning Your Diy Overhead Storage
Before you start, careful planning will make your project safer and more effective.
Measure Your Garage
- Use a tape measure to check ceiling height and width.
- Leave at least 18 inches of clearance above vehicles.
- Note any obstructions: Pipes, lighting, garage door tracks.
Choose What To Store
Overhead storage is best for:
- Lightweight bins
- Sports gear
- Holiday decorations
- Camping supplies
Avoid storing heavy items like large tools or liquids overhead, as this can be unsafe.
Safety Considerations
- Confirm your ceiling is strong enough for storage. Most garage ceilings can handle about 50 pounds per square foot, but check your local building codes.
- Use sturdy hardware and supports.
- Never overload shelves.
Popular Diy Overhead Garage Storage Ideas
There are several effective overhead storage styles. Each has benefits for different needs and skill levels.
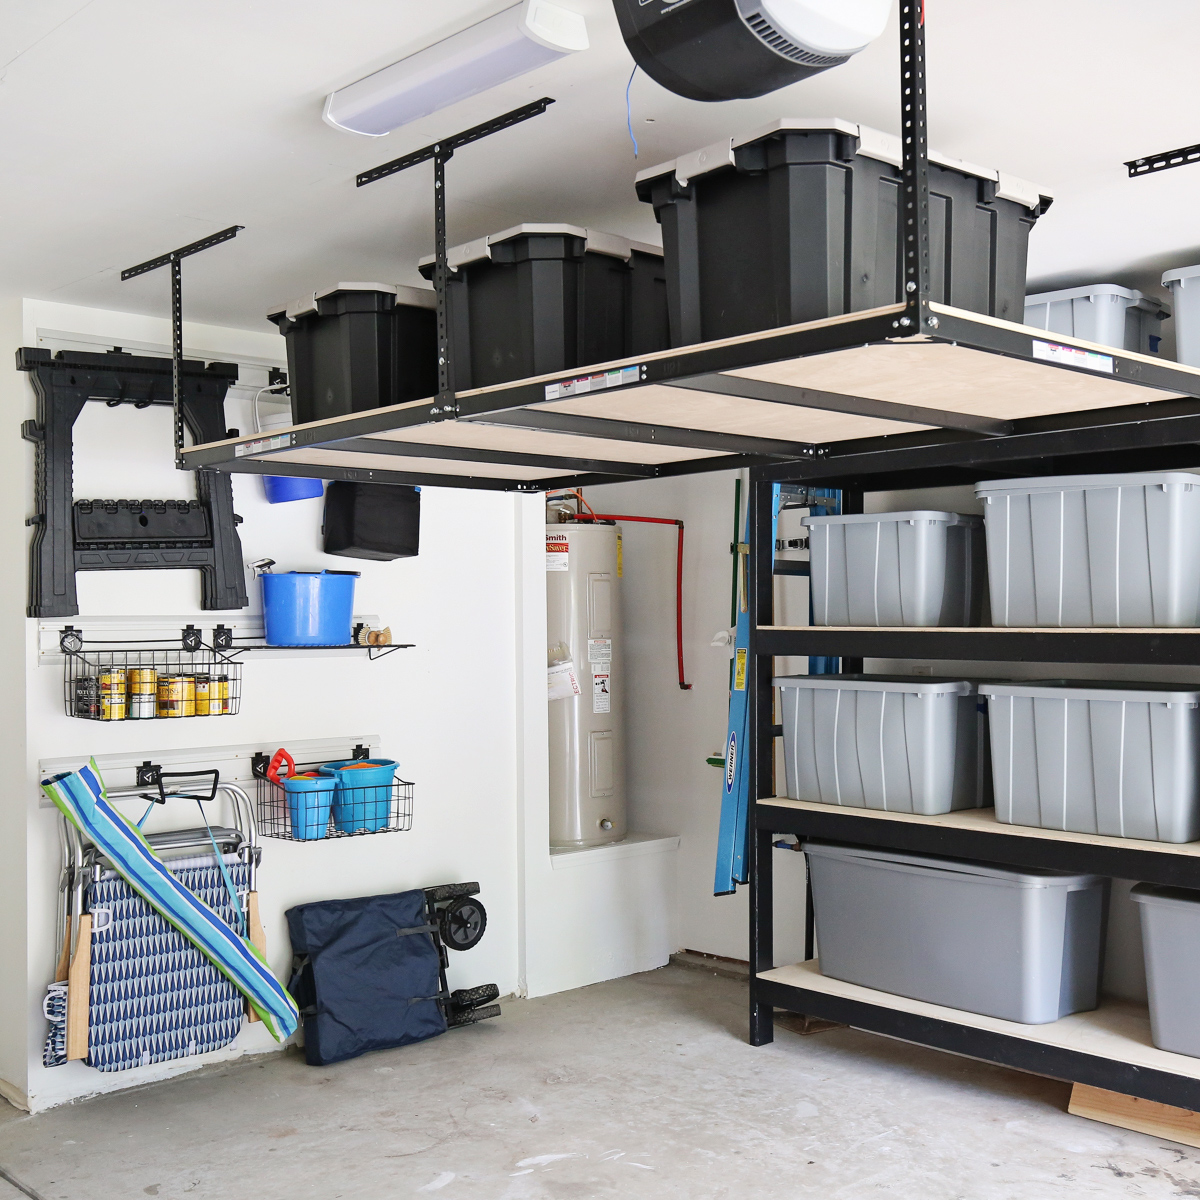
1. Ceiling-mounted Shelves
These shelves hang directly from ceiling joists.
- Made from plywood or wire shelving.
- Use heavy-duty L-brackets and screws for support.
- Ideal for storing bins and boxes.
Example: A 4 ft x 8 ft plywood shelf can hold up to 250 lbs if mounted with strong brackets.
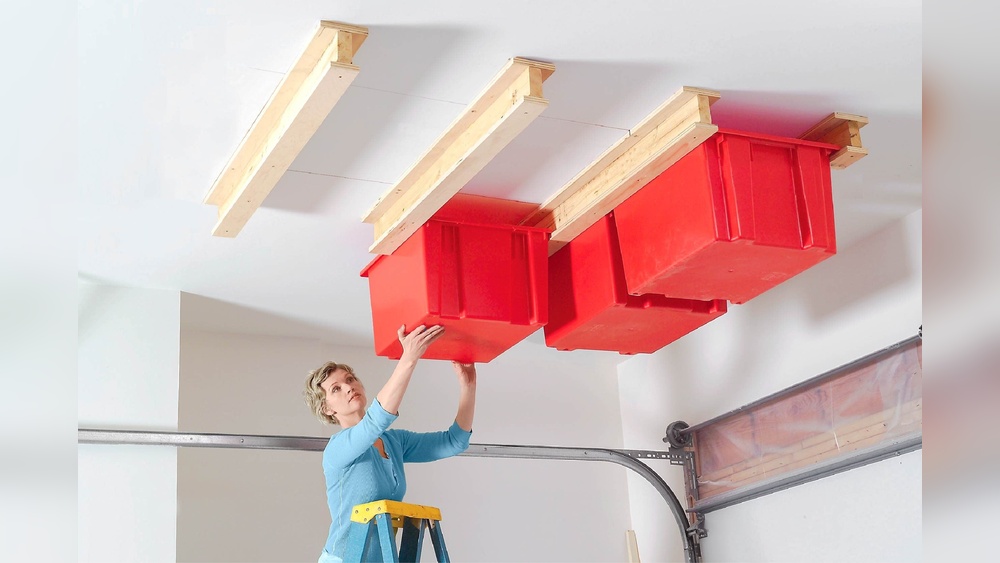
2. Sliding Bin System
Bins slide into tracks fixed to the ceiling.
- Use plastic bins with strong lips.
- Install wood or metal tracks spaced to fit bin sizes.
- Great for seasonal decorations and small items.
Tip: Label each bin for easy identification.
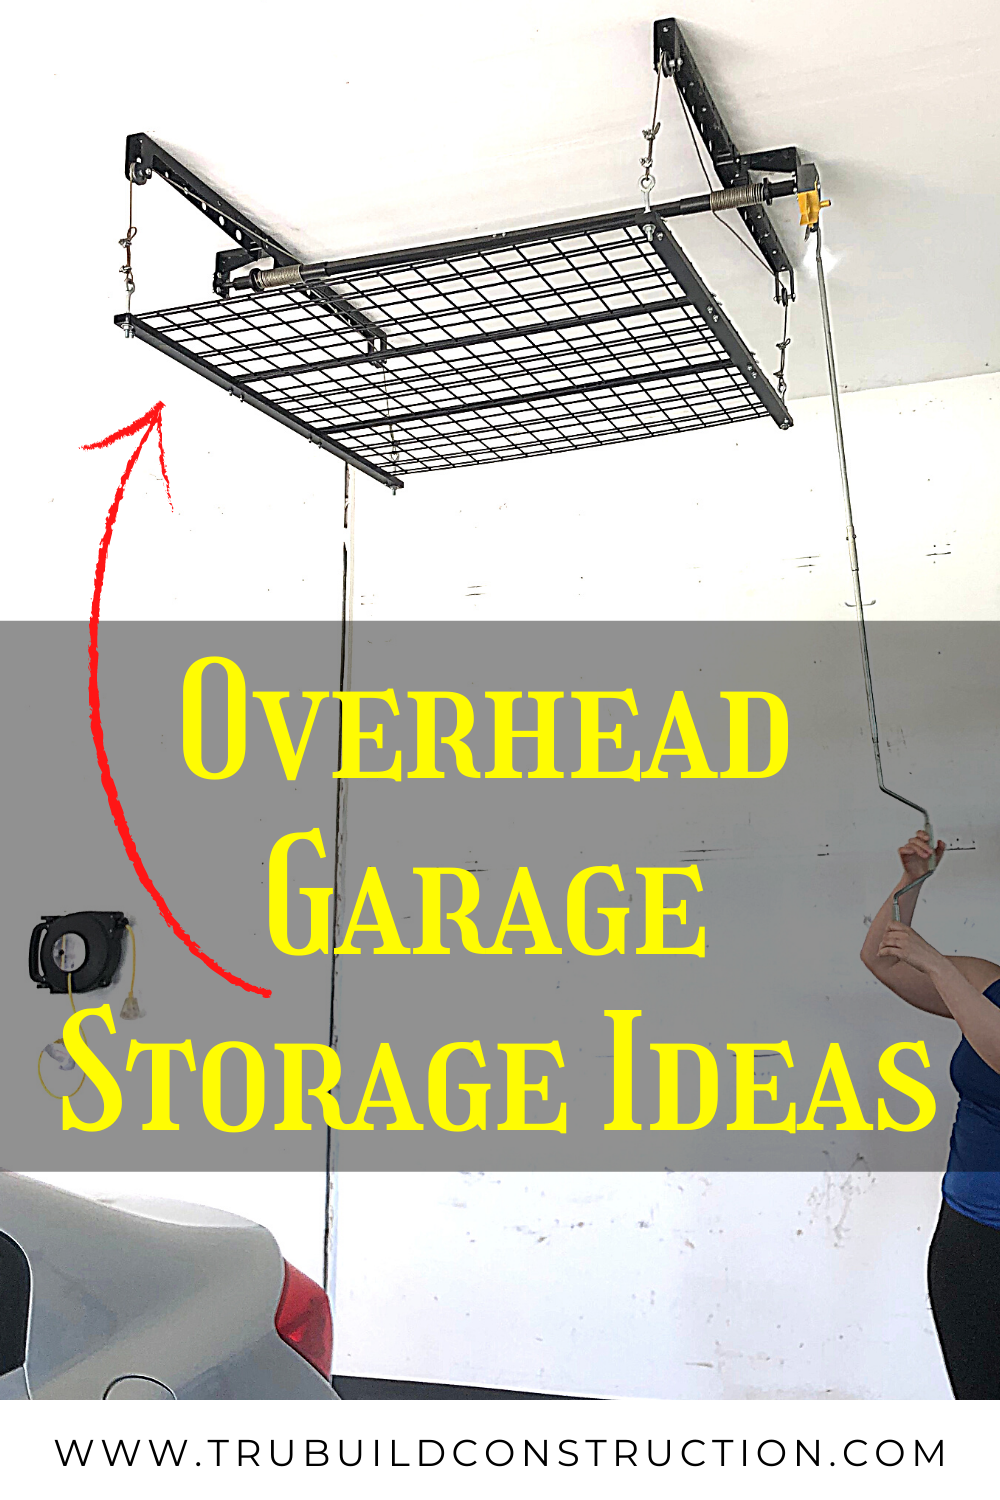
3. Pulley Storage Lifts
A pulley system lets you raise and lower items.
- Store bikes, kayaks, or bulky gear.
- Use commercial kits or build your own with ropes and pulleys.
- Makes heavy items accessible without ladders.
Safety Insight: Always use locking pulleys to prevent accidental drops.
4. Overhead Rack Kits
Pre-made racks are easy for beginners.
- Available at home improvement stores.
- Adjustable height and size.
- Quick installation with basic tools.
Cost Data: A standard 4 ft x 4 ft rack kit costs about $120–$180.
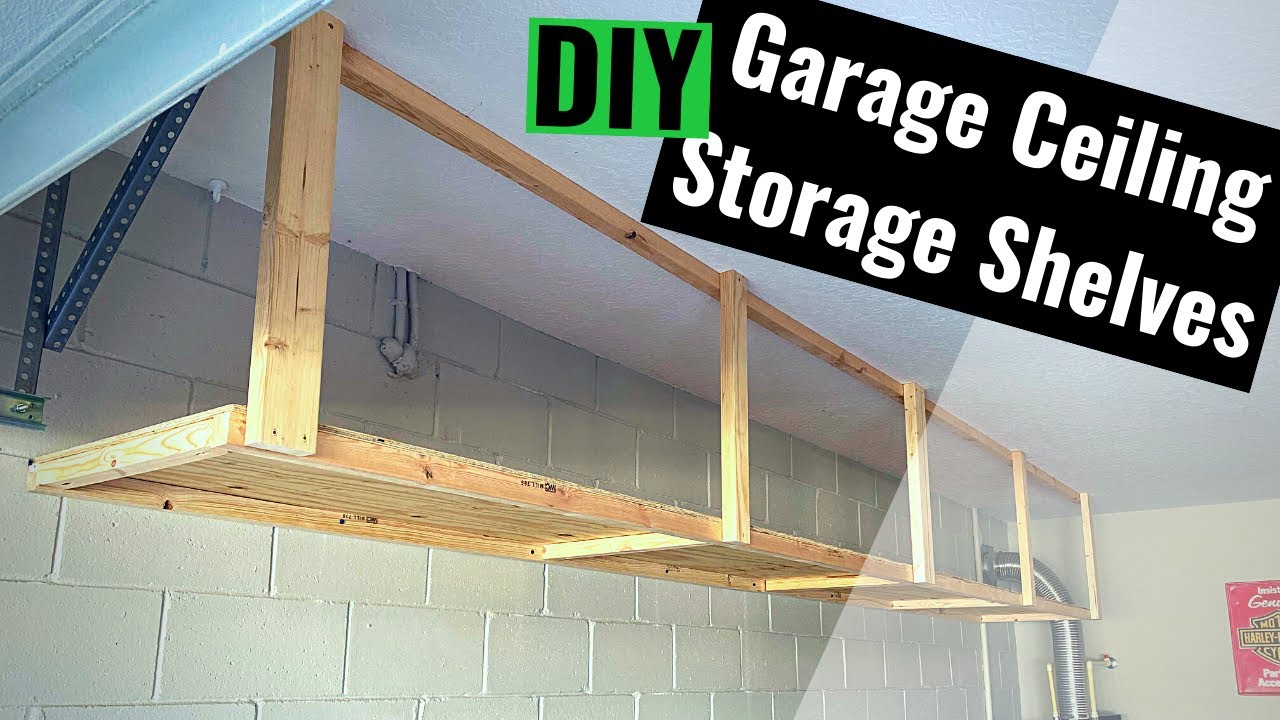
5. Custom Wood Platforms
Build a platform tailored to your garage.
- Use 2×4 lumber and plywood.
- Attach to ceiling joists with lag bolts.
- Add safety rails for extra security.
Beginner tip: Pre-drill holes to prevent wood splitting.
Step-by-step: Building Ceiling-mounted Shelves
This is the most common DIY overhead storage project. Here’s how to do it safely and effectively.
Materials
- 2×4 lumber (for frame)
- ¾-inch plywood (for shelf surface)
- Heavy-duty L-brackets
- Lag bolts and screws
- Drill, saw, measuring tape
- Safety goggles and gloves
Instructions
- Locate Joists
- Use a stud finder to find ceiling joists.
- Mark their position.
- Build Shelf Frame
- Cut 2x4s to desired length.
- Assemble a rectangle frame using screws.
- Attach Plywood
- Cut plywood to fit frame.
- Screw onto frame securely.
- Install Brackets
- Fix L-brackets to joists with lag bolts.
- Attach frame to brackets.
- Mount Shelf
- Lift shelf into place.
- Secure frame to brackets with additional screws.
- Check Stability
- Test with light weight first.
- Check for wobbling or sagging.
Time Estimate: Most shelves take 2–4 hours to build.
Credit: angelamariemade.com
Comparison: Diy Vs. Pre-made Overhead Storage
Some people prefer DIY shelves, while others buy pre-made racks. Here’s a quick comparison:
| Type | Cost | Installation | Customization | Load Capacity |
|---|---|---|---|---|
| DIY Shelves | $50–$100 | Intermediate | High | Up to 300 lbs |
| Pre-Made Racks | $120–$250 | Easy | Low–Medium | Up to 600 lbs |
Non-obvious tip: DIY shelves are better for odd-shaped spaces. Pre-made racks are ideal if you want quick, professional results.
Choosing The Right Storage Solution
Picking the best overhead storage depends on your garage and needs.
- For small garages, sliding bin systems save space.
- If you have high ceilings, pulley lifts work well.
- For large families, wood platforms offer strong support.
- Beginners often prefer rack kits for simple setup.
Key Factors To Compare
| Factor | Why It Matters | Best Solution |
|---|---|---|
| Ceiling height | Room for storage above car | Pulley lifts or shallow shelves |
| Item weight | Safety and stability | Wood platforms or steel racks |
| Skill level | Ease of installation | Pre-made racks |
| Budget | Material and tool costs | DIY shelves |
Beginner mistake: Don’t forget to measure your car height. Many people install shelves too low, making it hard to park.
Credit: trubuildconstruction.com
Practical Tips For Safe Diy Overhead Storage
Safety is key, especially if you’re new to DIY projects.
- Always wear safety goggles and gloves.
- Use a friend or family member to help lift shelves.
- Check ceiling joists for damage before installing.
- Do not exceed recommended weight limits.
- Keep a step ladder nearby for safe access.
Non-obvious insight: Use bright labels and color-coded bins. This makes it easy to find items, even in low light.
Organizing Your Overhead Storage
After building your storage, organization matters. Here are some practical ways to keep things tidy:
- Group similar items in bins (sports gear, holiday décor).
- Label bins clearly with permanent marker.
- Use clear bins for easy visibility.
- Store heavier items closer to the wall for stability.
- Keep frequently used items within easy reach.
Example: Place summer gear in bins near the garage door. Put winter gear toward the back.
Maintenance And Longevity
Your overhead storage needs occasional care.
- Inspect brackets and bolts every 6 months.
- Tighten loose screws.
- Check for signs of sagging or wood rot.
- Clean shelves and bins to prevent dust buildup.
Data point: Properly maintained shelves can last 10–15 years.
Common Mistakes Beginners Make
Avoid these issues for a safer, more effective project:
- Using weak screws or brackets.
- Overloading shelves beyond weight limit.
- Ignoring ceiling joist positions.
- Forgetting to measure car clearance.
- Not labeling bins (makes finding items harder).
Experience-based tip: If you’re unsure about installation, consult a professional or watch trusted DIY videos from sources like Family Handyman.
Credit: www.youtube.com
Frequently Asked Questions
How Much Weight Can My Overhead Garage Storage Hold?
Most ceiling-mounted shelves hold 250–300 lbs if built with strong wood and hardware. Pre-made racks often support up to 600 lbs. Always check your manufacturer’s guidelines and never exceed load limits.
What Materials Are Best For Overhead Shelves?
Plywood and 2×4 lumber are popular for DIY shelves. For racks, steel offers high strength and durability. Use heavy-duty brackets and lag bolts for safe installation.
Can I Install Overhead Storage Alone?
It’s possible, but safer with two people. Lifting shelves overhead is challenging. If you’re a beginner, ask a friend to help or use a step ladder with caution.
What Items Should I Avoid Storing Overhead?
Don’t store heavy tools, paint cans, or liquids overhead. These items can fall and cause injury. Stick to lightweight, non-fragile items like bins, sports gear, or decorations.
How Do I Maintain My Overhead Storage?
Inspect hardware every 6 months. Tighten screws and bolts. Check for signs of damage or sagging. Clean shelves and bins regularly to prevent dust and pests.
Final Thoughts
DIY overhead garage storage is one of the smartest ways to organize your space. With careful planning, strong materials, and safe installation, you can create storage that lasts for years. Whether you use shelves, bins, pulleys, or racks, the key is to match your needs and skill level.
Avoid common mistakes, check your setup regularly, and enjoy a garage that feels open and organized. Even beginners can tackle these projects with confidence, turning wasted ceiling space into a valuable storage area.