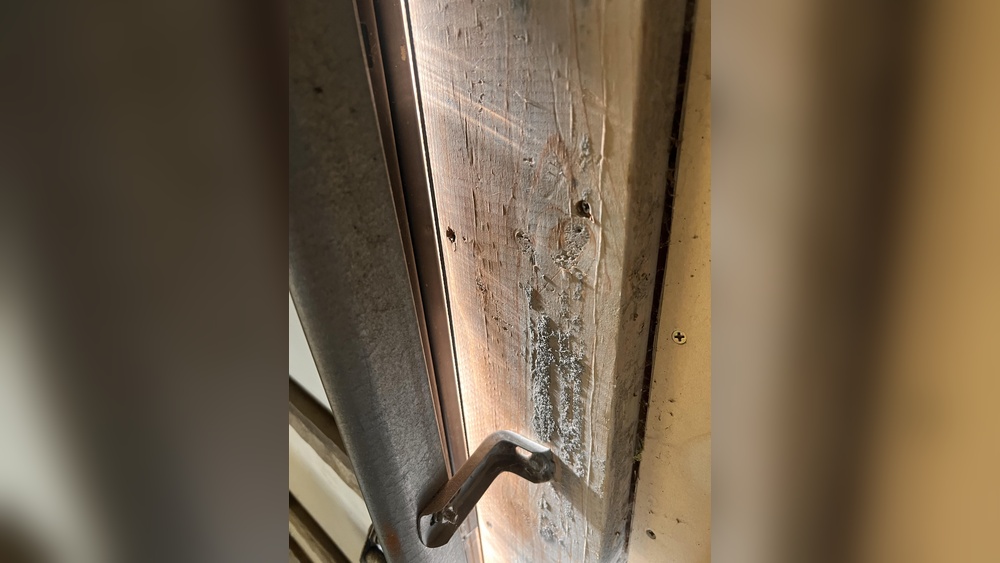
Sealing garage door side gaps is a common problem for homeowners. These gaps let in cold air, pests, water, and dust. This can increase your energy bill, damage belongings, and even make your garage uncomfortable. If you’re a beginner, don’t worry.
Fixing these gaps is simple with the right tools and steps. By sealing the sides, you protect your home and save money.
Why Garage Door Side Gaps Matter
Side gaps on garage doors are often ignored. Yet, they have big impacts:
- Energy loss: Cold or hot air gets inside, making your heating or cooling work harder.
- Pest entry: Mice, bugs, and even snakes can squeeze through small cracks.
- Water leaks: Rainwater seeps through, causing mold or damage.
- Security risk: Larger gaps make it easier for thieves to peek inside.
According to the US Department of Energy, air leaks in garages can raise home energy costs by 10-20%. Sealing your garage door is a small project with big benefits.
Common Causes Of Side Gaps
Understanding the cause helps you choose the right fix.
- Door misalignment: Over time, garage doors shift or sag.
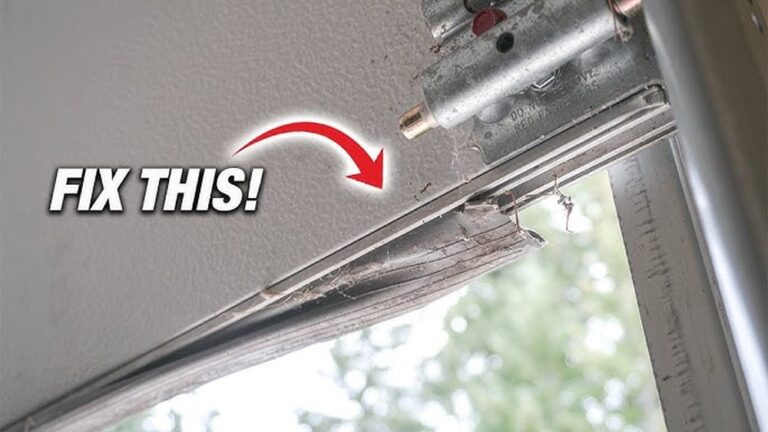
- Old or damaged seals: Rubber or vinyl seals wear out, leaving gaps.
- Foundation settling: Your house may settle unevenly, causing gaps.
- Weather changes: Heat and cold can expand or shrink materials.
Inspect your garage door closely. Look for daylight coming through the sides, drafts, or signs of moisture.
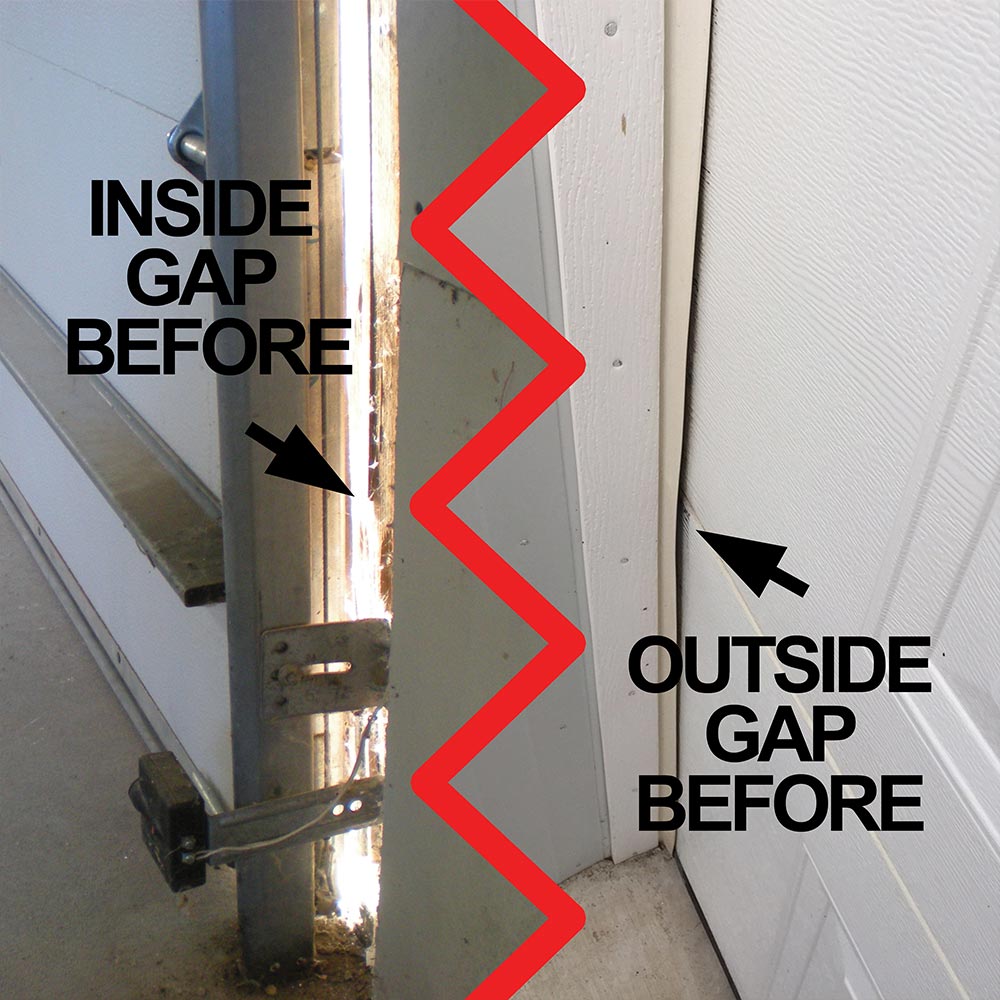
Credit: www.snirtstopper.com
Tools And Materials Needed
You don’t need fancy tools to seal garage door side gaps. Here’s a basic list:
- Tape measure
- Utility knife or scissors
- Screwdriver or drill
- Weatherstripping (rubber, vinyl, or foam)
- Garage door side seal kit
- Caulk (optional)
- Cleaning supplies (rag, brush)
Most supplies are available at hardware stores. For a standard single garage door, expect to spend $15–$40.
Choosing The Right Seal
Not all seals are equal. Picking the right one is important. Here’s a quick comparison:
| Seal Type | Material | Best For | Cost Range |
|---|---|---|---|
| Rubber | Flexible, durable | Extreme weather, heavy use | $20–$35 |
| Vinyl | Lightweight | Mild climates, easy install | $10–$25 |
| Foam | Soft, compressible | Small gaps, temporary fix | $5–$15 |
| Brush | Nylon bristles | Pest control, dust | $18–$30 |
For most homes, rubber or vinyl seals work best. Foam strips are good for quick fixes, but may not last long.
Step-by-step Guide To Sealing Garage Door Side Gaps
Follow these steps for a beginner-friendly solution:
1. Inspect The Gap
- Close the garage door fully.
- Stand inside and look for light coming through the sides.
- Use your hand to feel for drafts.
- Measure the length and width of the gap.
Tip: Gaps wider than 1/2 inch may need special seals or adjustment of the door.
2. Clean The Door Edges
- Remove old seals, if present.
- Wipe down the edges with a damp rag.
- Remove dust, grease, and debris.
A clean surface helps the new seal stick better.
3. Choose Your Seal
- Decide on rubber, vinyl, foam, or brush (see comparison table above).
- Buy a seal kit that matches your door’s length.
For a standard door (7 feet high), buy at least 7–8 feet of seal.
4. Cut The Seal
- Measure the door height with a tape measure.
- Cut the seal to match the exact length.
- Use scissors or a utility knife for clean edges.
Tip: Leave an extra 1/4 inch. This allows for compression.
5. Attach The Seal
Most seals install with nails, screws, or adhesive.
- Position the seal along the door side, overlapping the gap.
- Use a screwdriver or drill to secure it. Start at the top, then work down.
- If adhesive-backed, peel off the backing and press firmly.
- For nail-on seals, space nails every 12–18 inches.
Tip: If the gap changes in width, use thicker seal in wider areas.
6. Check The Fit
- Open and close the garage door several times.
- Make sure the seal doesn’t block movement.
- Look for remaining light or drafts.
If you still see gaps, adjust the seal or add more material.
7. Seal Small Cracks With Caulk
- For tiny gaps under 1/8 inch, apply weatherproof caulk.
- Run the caulk along the edge, then smooth with your finger.
Caulk is good for awkward spots where strips don’t fit.
8. Test After Installation
- Wait 24 hours for adhesive to set.
- Check for air leaks during windy or rainy weather.
- Repeat inspection every few months.
A well-sealed door keeps your garage comfortable and dry.
Practical Examples And Mistakes Beginners Make
Let’s look at some real-world situations:
- Example 1: Sarah installed foam strips but noticed they broke down after two months. She switched to rubber seals, which lasted through winter.
- Example 2: Mike used adhesive-backed vinyl, but didn’t clean the edge first. The seal peeled off after a week. Cleaning is key for good adhesion.
- Example 3: Ana didn’t measure the gap size. Her seal was too thin, so cold air still got in. Measuring before buying saves time and money.
Common mistakes to avoid:
- Not cleaning the door before installing
- Using the wrong thickness of seal
- Over-tightening screws (can damage the seal)
- Ignoring small gaps (they add up)

Credit: www.reddit.com
Comparing Garage Door Seal Kits
Here’s a quick look at popular seal kits:
| Brand | Material | Length | Price | Warranty |
|---|---|---|---|---|
| Frost King | Vinyl | 8 ft | $16 | 1 year |
| M-D Building Products | Rubber | 7 ft | $28 | 3 years |
| Weather Defender | Rubber | 10 ft | $32 | 5 years |
| Prime-Line | Foam | 8 ft | $9 | None |
Look for kits with longer warranties and thicker materials. Rubber lasts longer, but costs more.
Extra Tips For Better Sealing
- Double check measurements. A small error can leave gaps.
- Replace seals every 2–5 years. Sun and weather wear them out.
- Use brush seals for dusty garages. Nylon bristles block dirt.
- Combine strip and caulk. For tricky gaps, use both.
Insider tip: Many pros use a combination seal—rubber plus brush—for maximum protection.
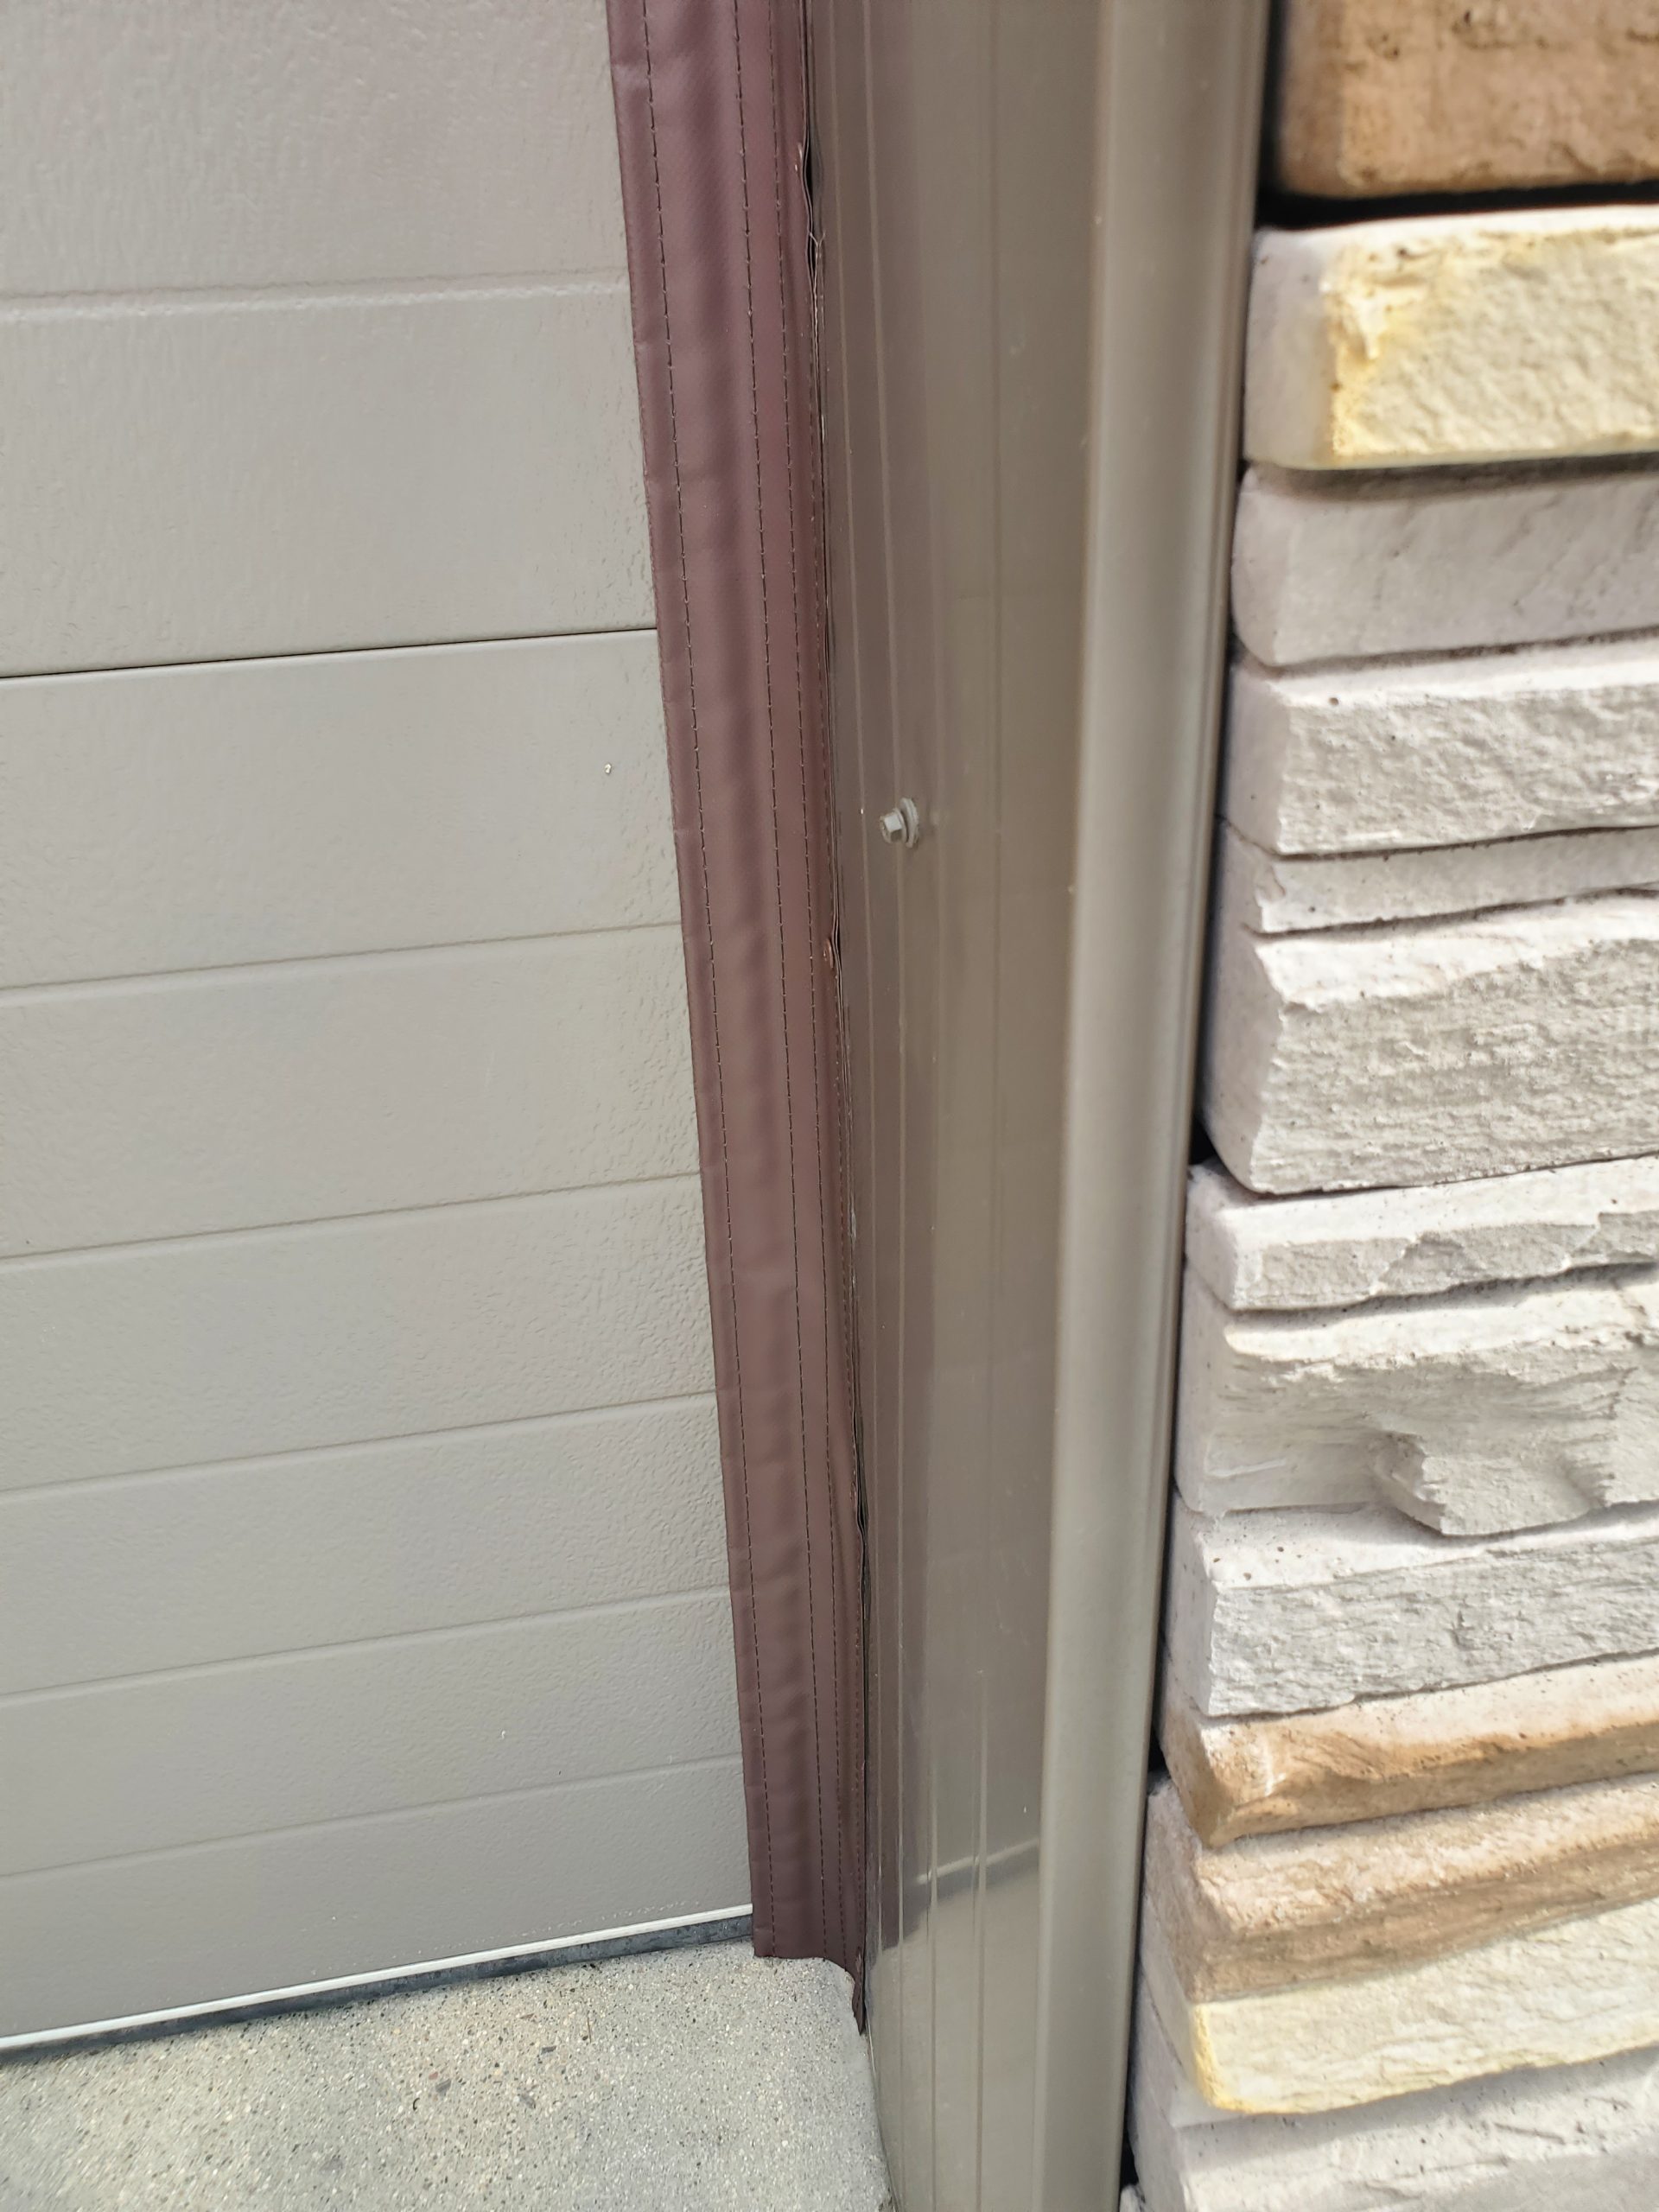
Credit: www.snirtstopper.com
Signs Your Garage Door Needs Resealing
Even after sealing, check for:
- New daylight or drafts
- Water puddles inside after rain
- Increased energy bills
- Musty smells (could be mold)
These signs mean your seal isn’t working, or you have new gaps.
When To Call A Professional
Most people can seal garage door gaps themselves. But consider a pro if:
- The door is badly misaligned
- The gap is larger than 1 inch
- You see structural damage
- You’re not comfortable with tools
A professional can fix bigger issues and ensure the door is safe.
Maintenance After Sealing
Keeping your seal in good shape is easy:
- Check seals twice a year (spring and fall)
- Clean dust and debris regularly
- Replace damaged or cracked strips quickly
- Lubricate garage door tracks as needed
This keeps your garage protected for years.
Cost And Time Estimates
Sealing garage door side gaps doesn’t cost much:
- DIY kit: $15–$40
- Professional install: $75–$150
- Time needed: 30–60 minutes (DIY), 20–30 minutes (pro)
Most beginners finish the job in less than an hour.
Weather Impact On Garage Door Seals
Weather affects seal lifespan:
| Climate | Seal Life (Years) | Recommended Material |
|---|---|---|
| Hot & Sunny | 2–3 | Rubber |
| Cold & Wet | 3–5 | Vinyl |
| Dry & Dusty | 3–4 | Brush |
| Moderate | 5–7 | Rubber/Vinyl |
Rubber seals resist sun damage, vinyl stands up to moisture, and brush is best for blocking dust.
One Non-obvious Insight
Most beginners think sealing just the sides is enough. But the top and bottom often have gaps too. For complete protection, seal all edges of your garage door.
Another hidden tip: Sealing garage door gaps can also reduce noise, making your garage quieter.
Reliable External Resource
For more tips and official advice on garage sealing, visit the US Department of Energy.
Frequently Asked Questions
How Often Should I Replace Garage Door Side Seals?
Most seals last 2–5 years, depending on weather and material. Inspect them twice a year. Replace when you see cracks, peeling, or daylight.
What Is The Best Material For Garage Door Side Seals?
Rubber is best for extreme weather and durability. Vinyl works well in wet climates. Brush seals are good for blocking dust and pests.
Can I Seal Garage Door Side Gaps Myself?
Yes. Most homeowners can do it with basic tools. Kits are easy to install and come with instructions. If the gap is large or the door is misaligned, call a professional.
Will Sealing Side Gaps Lower My Energy Bill?
Yes. Sealing gaps can reduce energy loss by up to 20%. Your garage stays warmer in winter and cooler in summer, saving money on heating and cooling.
Is Caulk Enough To Seal Garage Door Gaps?
Caulk works for small gaps (under 1/8 inch). For bigger gaps, use weatherstripping or seal kits. Caulk is best used with strips for full protection.
Sealing garage door side gaps is a simple project that makes a big difference. With the right tools and steps, you can protect your garage from weather, pests, and energy loss. Regular maintenance keeps your seal working for years. If you follow these beginner-friendly tips, your garage will stay secure and comfortable.