Programming a garage door opener might sound technical, but with the right approach, it’s a task most homeowners can complete in less than an hour. Whether you just bought a new remote or replaced your garage door opener, programming it correctly ensures security and smooth operation.
This guide explains each step in plain English, avoids technical jargon, and highlights common mistakes beginners make. By the end, you’ll be ready to handle most garage door opener programming tasks yourself.
Understanding Garage Door Opener Basics
A garage door opener is an electric device that opens and closes your garage door with a remote control or wall switch. Most modern systems use a radio signal to link the remote with the opener. Each brand and model is a bit different, but the process is usually similar. Knowing some basics helps you avoid confusion and select the right method.
Key Components
- Opener unit: The motor attached to your garage ceiling.
- Remote control: Small device, usually with one to three buttons.
- Learn button: A button on the opener unit used to program remotes.
- Safety sensors: Devices near the floor that stop the door if something is in the way.
Main Programming Methods
- Using the learn button on your opener unit.
- Setting a universal remote with manufacturer codes.
- Programming a built-in car remote (like HomeLink).
For most users, programming with the learn button is the easiest and most secure.
Before You Start: Preparation Steps
Programming is smoother if you prepare first.
- Find your opener brand and model. Common brands: Chamberlain, LiftMaster, Genie, Craftsman.
- Check the remote battery. Weak batteries cause programming failures.
- Clear the area. Keep kids and pets away while testing the door.
- Have a ladder ready. Most learn buttons are on the opener unit attached to your ceiling.
Pro tip: Take a photo of your opener’s wiring and controls before starting. This helps in case you accidentally change a setting.
How To Program Garage Door Opener Remotes (standard Method)
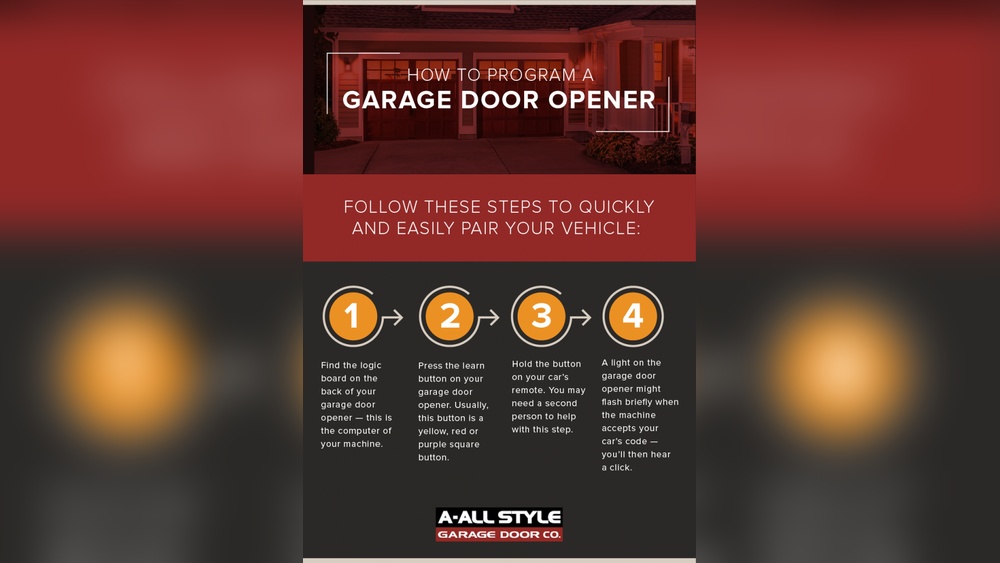
This step-by-step guide focuses on the most common method: using the learn button.
Step 1: Locate The Learn Button
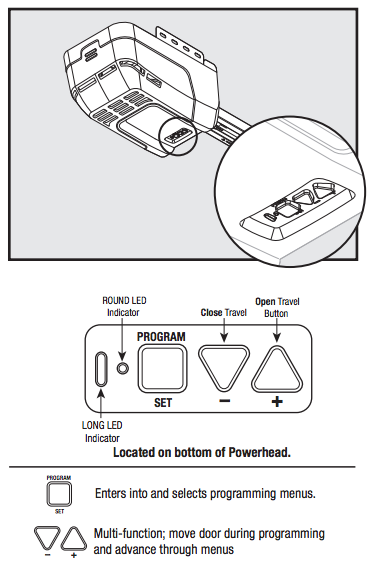
- The learn button is usually near the antenna wire on your opener motor.
- It may be under a light cover; look for a small colored button (often yellow, orange, purple, or red).
- Some openers have a label, but not all.
Example: On a Chamberlain opener, the learn button is usually on the back, near the light bulb.
Step 2: Prepare The Remote
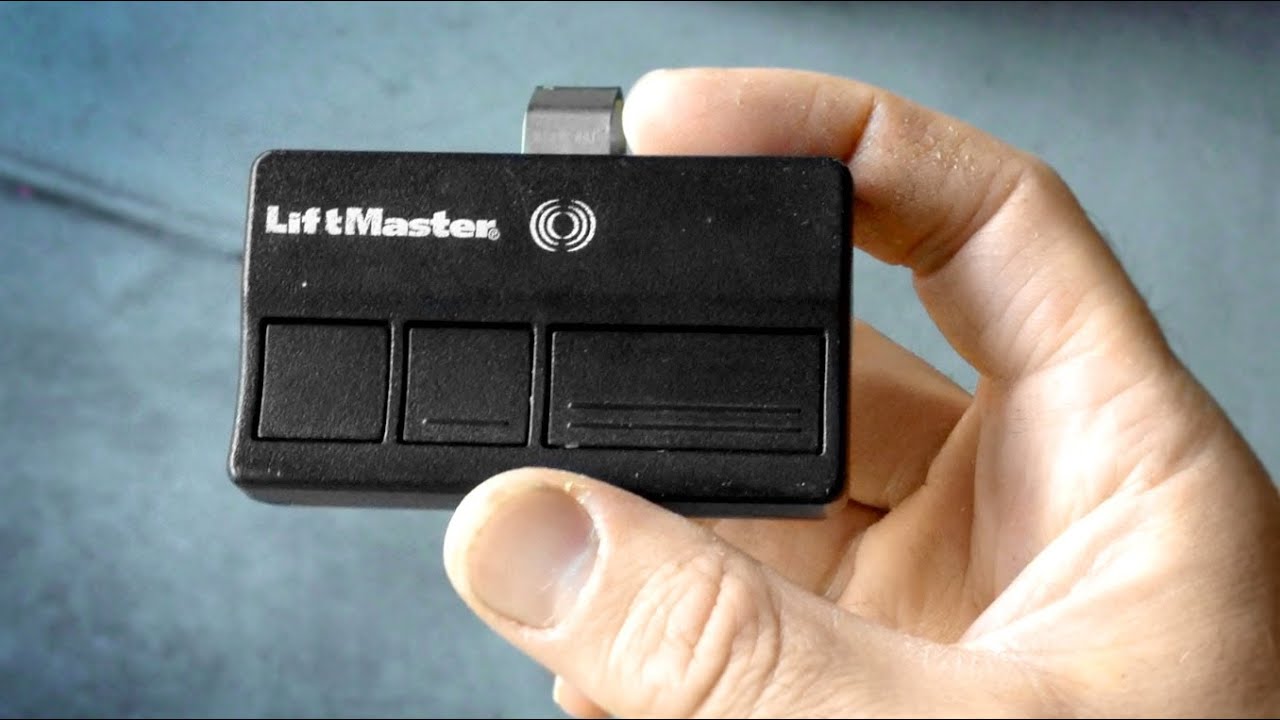
- Hold the remote you want to program.
- Make sure it has a working battery.
- Stand on a stable ladder if needed.
Step 3: Enter Programming Mode
- Press and release the learn button on the opener unit.
- An indicator light will turn on (usually for 30 seconds).
- If you hold the button too long, you might erase all remotes (common mistake).
Step 4: Sync The Remote
- Within 30 seconds, press and hold the button on your remote.
- Wait until the opener light blinks or clicks. This means the remote is linked.
- Release the remote button.
Step 5: Test The Remote
- Stand clear of the door.
- Press the programmed remote button.
- The garage door should open or close.
If it doesn’t work, repeat the process. Make sure you pressed the learn button (not another button) and the remote battery is fresh.
Programming Universal Remotes
Some remotes work with several brands. They may need extra steps.
How To Program A Universal Remote
- Read the instructions for your universal remote.
- Find the correct code for your opener brand. Usually found in the remote’s manual.
- Press and hold the program button on the remote (may need a pen tip).
- Enter the code using the remote buttons, then test with your opener.
Important: Not all universal remotes work with all openers. Check compatibility before buying.
Programming A Built-in Car Remote (homelink)
Many newer cars have a HomeLink or Car2U system that can control your garage door without a separate remote. Here’s how to set it up.
Step-by-step Homelink Programming
- Clear old codes: Hold the two outer HomeLink buttons until the indicator light flashes (about 20 seconds).
- Train the button: Hold your handheld remote close to the car’s HomeLink panel. Press and hold both the chosen HomeLink button and the remote button. Wait for the light to flash rapidly.
- Sync with opener: Within 30 seconds, press the learn button on your opener unit. Then, return to your car and press the programmed HomeLink button three times.
- Test: The garage door should move.
Some openers use “rolling code” technology (for more security). If your opener is made after 1996, you will need to press the learn button during programming.
Clearing All Remotes (when Needed)
If you lose a remote or move into a new house, you should erase all programmed remotes for security.
- Find the learn button on your opener.
- Hold it down for about 6–10 seconds until the indicator light goes out.
- All remotes are now erased.
- Reprogram remotes you want to keep.
Non-obvious insight: Many people don’t realize that erasing remotes also disconnects built-in car remotes and wireless keypads. You’ll need to program them again.
Credit: overheaddoorgardencity.com
Common Problems And Troubleshooting
Even if you follow the steps, sometimes things don’t work. Here’s how to fix common issues.
Remote Not Working After Programming
- Check battery in the remote.
- Make sure you didn’t hold the learn button too long.
- Try standing closer to the opener during programming.
- Confirm the opener’s antenna wire is hanging down and not broken.
Opener Light Doesn’t Blink
- Some models beep instead of blinking.
- If nothing happens, repeat programming steps.
- If you still have no luck, unplug the opener for 30 seconds, then try again.
Door Opens Randomly
- Sometimes remotes use the same code as a neighbor’s.
- Erase all remotes, then reprogram only yours.
- Consider a newer opener with rolling code technology.
Table: Troubleshooting Quick Reference
| Problem | Likely Cause | Quick Fix |
|---|---|---|
| Remote doesn’t work | Dead battery | Replace battery |
| Opener doesn’t enter programming mode | Wrong button pressed | Find correct learn button |
| Door moves by itself | Code conflict | Erase all remotes and reprogram |
| Remote works only close to opener | Weak battery or interference | Replace battery, check for Wi-Fi devices nearby |
Safety Tips For Programming Garage Door Openers
Programming involves working near moving parts and electricity. Stay safe with these tips.
- Unplug the opener before checking wires.
- Use a sturdy ladder. Don’t overreach.
- Keep children and pets away during programming.
- Test the safety sensors after programming. Wave an object in front of the sensors during closing. The door should stop and reverse.
Non-obvious insight: Safety sensors can get misaligned during programming. If your door won’t close, check the sensors before calling for repair.
Credit: www.youtube.com
How Garage Door Opener Frequencies Affect Programming
Most openers use radio frequencies (300, 310, 315, or 390 MHz). Modern openers often use rolling code technology for security. This means the code changes each time you use the remote.
Table: Common Garage Door Opener Frequencies By Brand
| Brand | Frequency (MHz) | Rolling Code? |
|---|---|---|
| Chamberlain/LiftMaster | 315/390 | Yes |
| Genie | 315/390 | Yes |
| Craftsman | 315/390 | Yes |
| Older models | 300 | No |
Example: If your remote only works with a 390 MHz opener, buying a 315 MHz remote will not work. Always check your opener’s frequency before buying a new remote.
When To Call A Professional
Most programming problems can be solved at home, but call a pro if:
- The opener doesn’t respond after multiple attempts.
- Wires are damaged.
- The door moves unevenly or makes loud noises.
- Safety sensors don’t work after cleaning and aligning.
Some issues require experience or special tools. For example, wiring errors or circuit board problems should be handled by a qualified technician.
Practical Tips For Reliable Operation
- Replace remote batteries every 1–2 years.
- Clean the opener’s antenna gently with a dry cloth.
- Keep the opener and sensors free of cobwebs and dust.
- If you notice your remote range shrinking, check for new Wi-Fi devices nearby. Some can cause interference.
- Store a spare remote in your home or car, but never leave it visible in an unlocked car.
Example: Thieves sometimes break into cars just to steal garage remotes. Always keep remotes out of sight.
Comparison: Standard Vs Universal Vs Built-in Remotes
Here’s a quick look at the pros and cons of each type.
| Remote Type | Pros | Cons |
|---|---|---|
| Standard (OEM) | Easy to program, best compatibility | May need to order from manufacturer, higher cost |
| Universal | Works with many brands, easy to find | Not always compatible, sometimes more steps |
| Built-in (HomeLink) | No extra device needed, always in car | Setup can be tricky, not all cars/opener combos work |
Recommendation: If you want the simplest experience, use a remote from your opener’s brand. If you have several doors or brands, a universal remote might be better.
Credit: support.chamberlaingroup.com
Additional Resources
For more details on specific brands and models, check your opener’s manual or visit the Wikipedia page on garage door openers for extra background.
Frequently Asked Questions
Why Won’t My New Remote Program To My Opener?
Most problems are due to wrong frequency, dead batteries, or old openers that don’t support newer remotes. Double-check your opener’s model, the remote’s compatibility, and make sure you follow the programming steps exactly.
How Do I Reset My Garage Door Opener?
To reset, hold the learn button on your opener for 6–10 seconds until the indicator light turns off. This erases all remotes and wireless keypads. You’ll need to reprogram each device you want to use.
Can I Program Two Different Remotes To One Garage Door Opener?
Yes, most openers support multiple remotes (usually up to 5). Just program each remote one at a time using the learn button method.
What If I Lost My Remote?
If you lose a remote, it’s smart to erase all remotes from your opener and reprogram only those you have. This prevents anyone from using the lost remote to access your garage.
How Do I Program The Keypad Outside My Garage?
Most wireless keypads have a program button or require the learn button on the opener. Enter your desired code on the keypad, press the learn button on the opener, then enter the code again to sync. Check your keypad manual for exact steps.
Programming your garage door opener doesn’t need to be stressful. With clear steps, attention to detail, and a bit of patience, you can secure and control your garage quickly. If you ever feel stuck, your opener’s manual and official support lines are always helpful resources.