Wiring a garage door opener can seem difficult if you’ve never done it before. But with the right steps, tools, and safety tips, you can handle this project yourself. Doing your own wiring saves money and gives you more control.
In this guide, you’ll learn how to wire a garage door opener safely, with clear instructions, practical examples, and tips for beginners. Whether you’re updating an old opener or installing a new one, you’ll find everything you need to know here.
Understanding Garage Door Opener Wiring
A garage door opener is an electric motorized device. It opens and closes your garage door using a remote or wall button. Wiring connects the opener to power and controls. Getting the wiring right is key for safety and smooth operation.
Main parts you’ll wire:
- Motor unit: The main box hanging from the ceiling.
- Wall switch: Usually near the garage door entrance.
- Safety sensors: Placed near the floor on both sides of the door.
- Remote receiver: Allows wireless control.
Why proper wiring matters:
- Prevents electrical shocks and fires
- Ensures sensors work for safety
- Helps the opener last longer
Example: Most modern garage door openers use 120-volt AC power in the US. Older openers may need rewiring for new safety sensors.
Tools And Materials You’ll Need
Before starting, gather your tools and materials. Having everything ready makes the job easier and safer.
Essential tools:
- Screwdrivers: Flat and Phillips head
- Wire stripper: For removing insulation
- Pliers: Needle nose for tight spaces
- Drill: For mounting units and brackets
- Tape measure: To plan sensor placement
- Voltage tester: To check power safely
Materials:
- Wire: Usually 18-22 gauge, solid or stranded
- Wire nuts: To connect wires securely
- Electrical tape: For covering connections
- Mounting brackets: For sensors and opener unit
- Safety glasses and gloves: Protect yourself
Example: A typical opener kit includes wire for sensors and wall switch, but you may need extra if your garage is large.
Credit: www.support.getzooz.com
Safety Precautions Before Wiring
Electrical work can be dangerous if you’re not careful. Always follow these safety steps:
- Turn off power: Switch off the breaker for your garage before starting.
- Double-check with voltage tester: Make sure no electricity is running.
- Wear protective gear: Safety glasses and gloves prevent accidents.
- Keep area dry: Water and electricity don’t mix.
- Read the manual: Each opener model is different. Follow manufacturer instructions.
Non-obvious tip: Some garages share circuits with lights or outlets. Test all switches to confirm the power is truly off.
Step-by-step: Wiring Your Garage Door Opener
Follow these steps for a beginner-friendly installation. Each step is explained with clear instructions and practical examples.
1. Locate Power Source
Find the nearest electrical outlet or junction box. Most openers plug into a ceiling outlet. If you don’t have one, you may need to install it—call an electrician for this part if you’re unsure.
Example: Many garages have outlets on the ceiling near the garage door. If not, use an extension cord temporarily but plan to install a proper outlet.
2. Mount The Opener Unit
- Attach the opener unit to the ceiling bracket.
- Make sure it’s centered above the door for smooth operation.
- Use a drill and screws to secure it.
Practical tip: Leave enough space for wiring and maintenance.
3. Connect Power Wire
- Plug the opener into the outlet.
- If hardwiring, connect the black (hot) and white (neutral) wires.
- Use wire nuts and electrical tape for safety.
Non-obvious insight: Some models need a ground wire (green or bare copper). Don’t skip this—it prevents shocks.
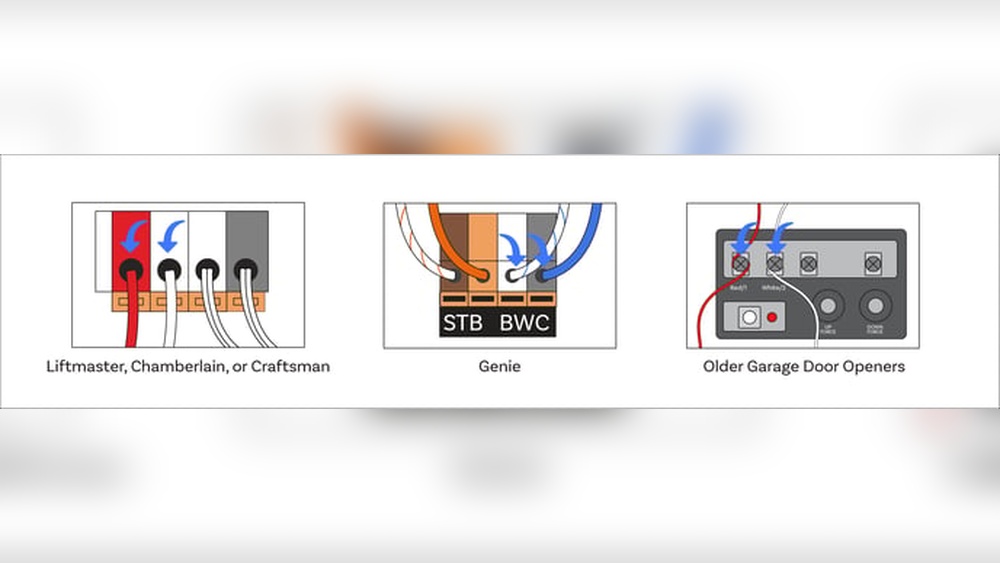
4. Wire The Wall Switch
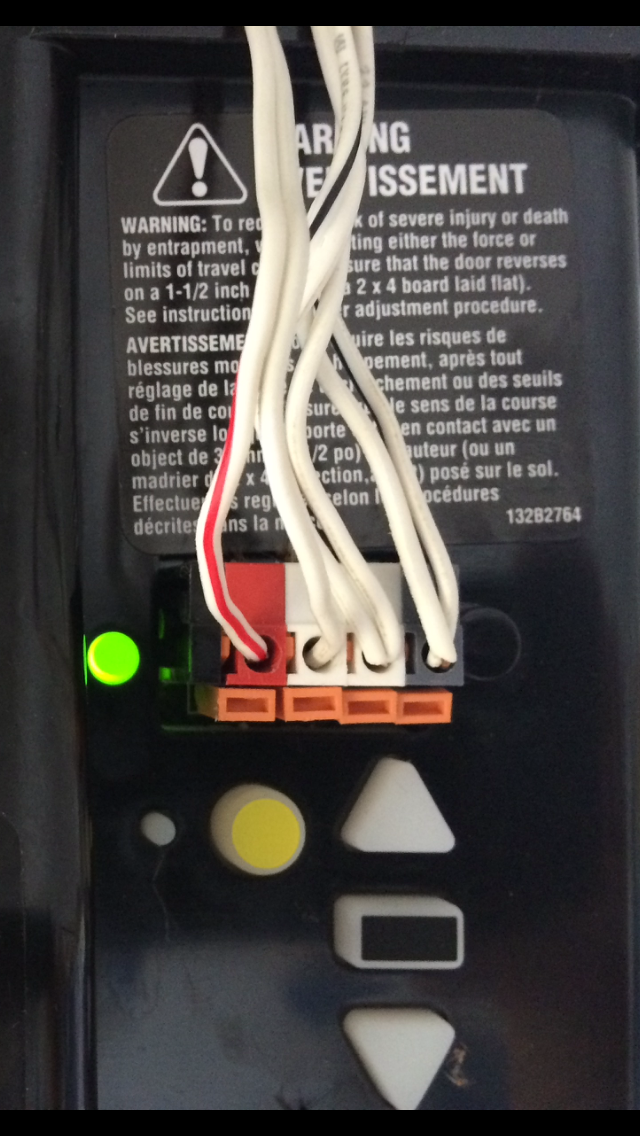
- Run the included wire from the opener unit to the wall switch.
- Attach the wire to terminals marked “wall control” or “push button.”
- Use screws to mount the switch at a comfortable height (about 5 feet).
Beginner mistake: Don’t staple the wire too tightly—it can damage insulation and cause shorts.
5. Wire The Safety Sensors
Safety sensors are required by law in the US. They stop the door if something is in the way.
- Place sensors on both sides of the door, about 6 inches above the floor.
- Run the wire from each sensor to the opener unit.
- Connect wires to terminals labeled “sensor” or “photo eye.”
- Align sensors so lights stay steady—blinking means misalignment.
Example: If your sensors are not aligned, the door will not close. Adjust until the indicator lights are solid.
6. Test The Opener
- Restore power at the breaker.
- Press the wall switch and remote to check operation.
- Try closing the door—block the sensor to confirm safety stops.
- Listen for smooth motor sound and watch for proper movement.
Practical tip: If the door doesn’t move, recheck all wire connections and sensor alignment.
Wiring Comparison: Diy Vs Professional Installation
To help you decide if you want to wire the opener yourself or hire a pro, see this comparison.
| Factor | DIY Wiring | Professional Wiring |
|---|---|---|
| Cost | $50–$200 | $300–$600 |
| Time | 2–4 hours | 1–2 hours |
| Skill Needed | Basic electrical knowledge | Expert |
| Safety | Depends on care | High |
| Warranty | No labor warranty | Usually included |
Tip: DIY saves money but requires careful work. Pros offer speed and warranty.
Common Wiring Problems And How To Fix Them
Beginners often face wiring issues. Here’s how to solve the most common problems.
Loose Connections
- Symptom: Opener works sometimes, not always.
- Fix: Tighten wire nuts, recheck connections.
Sensor Misalignment
- Symptom: Door won’t close, lights blink.
- Fix: Adjust sensors until lights are steady.
Wall Switch Not Working
- Symptom: Remote works, wall switch doesn’t.
- Fix: Replace wire, check terminal connections.
Power Issues
- Symptom: Opener doesn’t power on.
- Fix: Check outlet, breaker, and hardwiring.
Example Table: Troubleshooting Steps
| Problem | Check | Solution |
|---|---|---|
| Door won’t open | Power, wiring, motor | Restore power, fix wires |
| Door stops mid-way | Sensor, track, wiring | Align sensors, clear track |
| Remote doesn’t work | Battery, receiver wire | Replace battery, reconnect |
Non-obvious tip: Sometimes, a faulty sensor wire causes random stops. Replace wires if you see wear.
Credit: community.garadget.com
Upgrading: Smart Garage Door Opener Wiring
Many homeowners upgrade to smart openers. These connect to Wi-Fi for phone control and alerts.
Wiring differences:
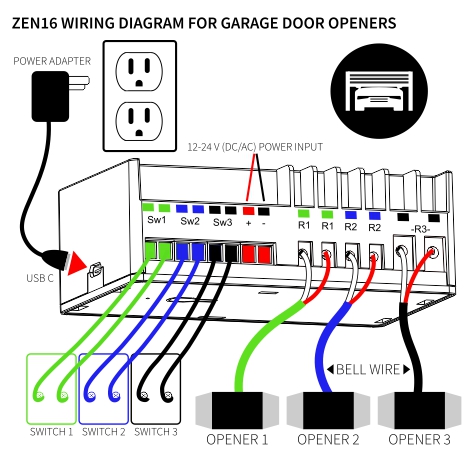
- Requires power for Wi-Fi module
- May need extra wire for data
- Some models use battery-powered sensors
Example: Smart openers from brands like Chamberlain or Genie work with apps, but setup is similar to traditional openers.
Tip: Check compatibility with your existing wiring before buying a smart opener.
Garage Door Opener Wire Types: Comparison
Choosing the right wire is important. See the differences below.
| Wire Type | Gauge | Use | Cost (per ft) |
|---|---|---|---|
| Solid | 18 | Wall switch, sensors | $0.10 |
| Stranded | 22 | Remote receiver | $0.15 |
| Shielded | 18 | Smart opener data | $0.20 |
Tip: Use solid wire for easier installation. Stranded is better for tight bends.

Credit: www.youtube.com
Practical Tips For A Smooth Installation
- Label wires: Use tape to mark sensor and switch wires.
- Plan wire routes: Avoid sharp bends, keep wires neat.
- Check local codes: Some areas require permits for electrical work.
- Test after each step: Don’t wait to check until the end.
Non-obvious insight: Sometimes, garages have metal walls. Use insulated wire clips to avoid shorts.
When To Call A Professional
Some situations need expert help:
- You’re not comfortable with electrical work
- No ceiling outlet available
- Multiple doors or complex setup
- Opener requires new circuit installation
Hiring a professional ensures safety and compliance. If you need advanced wiring, don’t risk doing it yourself.
For official wiring safety guidelines, check the National Fire Protection Association.
Frequently Asked Questions
How Long Does It Take To Wire A Garage Door Opener?
For most beginners, wiring takes 2–4 hours. This includes mounting, running wires, connecting sensors, and testing. If you’re experienced, it may take less time.
What Wire Gauge Should I Use For Sensors And Switches?
Most garage door openers use 18–22 gauge wire. Solid wire is easier to install for sensors and wall switches. Always check your opener’s manual for specific requirements.
Can I Use An Extension Cord For The Opener?
It’s possible, but not recommended for long-term use. Extension cords are not designed for permanent wiring. Install a proper ceiling outlet for safety and reliability.
Why Are My Safety Sensors Blinking?
Blinking lights usually mean misalignment. Adjust the sensors so they face each other directly and the indicator lights turn solid. Check for wire damage or loose connections.
Is It Safe To Wire A Garage Door Opener Myself?
Yes, if you follow safety precautions and turn off power. However, call a professional if you’re unsure or your garage needs new outlets or circuits.
Wiring a garage door opener is a practical skill that boosts home convenience and safety. With careful steps and the right tools, even beginners can do it. Remember to plan, check your connections, and test everything before use. If you ever feel unsure, professional help is always available.
This guide gives you the confidence and knowledge to wire your garage door opener the right way.