Changing the battery in your garage door opener is a simple task that can save you time and frustration. Many people worry when their remote stops working, but often, the solution is just a new battery. With the right steps, you can do this at home in a few minutes—even if you have never tried before.
This guide will walk you through everything you need to know, from identifying your battery type to installing it safely. No special tools or advanced skills are needed.
Why Change Your Garage Door Opener Battery?
A garage door opener relies on batteries for the remote and sometimes for a backup system in the main unit. If the battery is weak, you might notice the door only opens sometimes, or the range gets shorter. In some cases, the keypad outside the garage might stop responding.
Common signs your battery is low:
- Remote only works close to the door
- Keypad does not light up
- Door opens slowly or stops halfway
- Indicator light on opener flashes or stays on
A fresh battery keeps your home secure and your daily routine smooth. It’s also a low-cost fix compared to replacing the whole system.
Types Of Batteries In Garage Door Openers
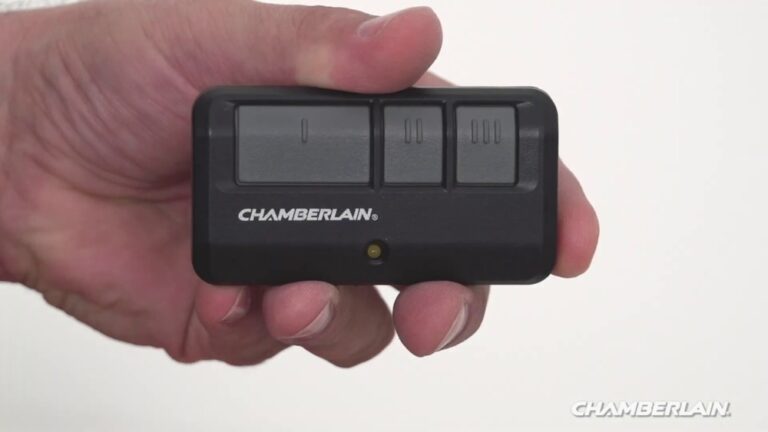
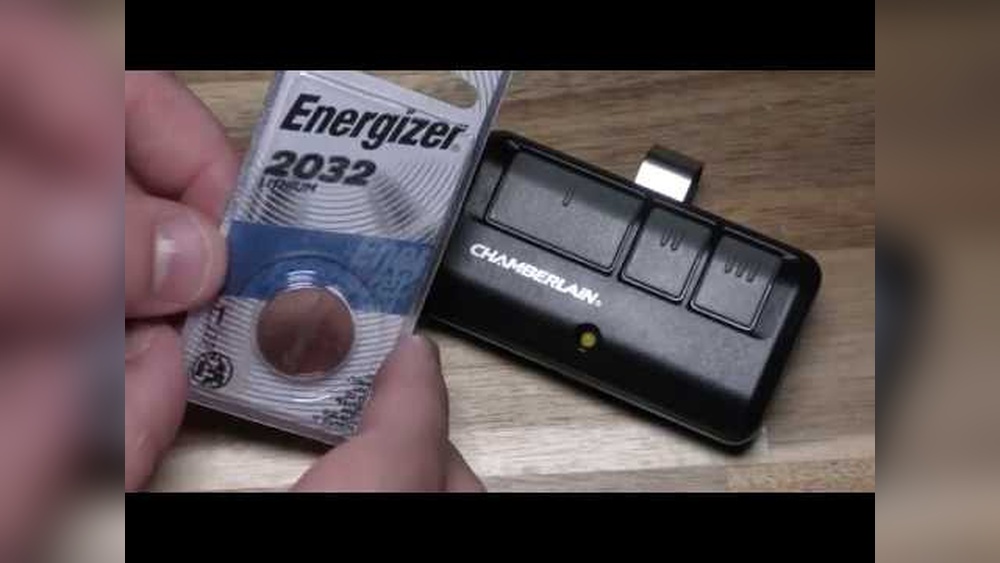
Garage door openers use a few common battery types, depending on the brand and model. Most remotes use small coin or button batteries, while backup systems use larger ones.
Here’s a quick comparison of the most common batteries:
| Battery Type | Used In | Typical Lifespan | Average Cost |
|---|---|---|---|
| CR2032 (3V) | Remotes | 2-3 years | $2-4 |
| AA or AAA (1.5V) | Keypads/Backup | 1-2 years | $1-3 |
| 9V | Keypads/Backup | 1-2 years | $2-5 |
| 12V (A23) | Remotes | 2-3 years | $3-6 |
Tip: Always check your opener’s manual or look inside the remote before buying a replacement battery.

Credit: www.youtube.com
Tools And Preparation
You need only a few items to change a garage door opener battery:
- Replacement battery (type matches your remote or keypad)
- Small Phillips or flat-head screwdriver
- Clean cloth (optional, for cleaning contacts)
- Pen and paper (optional, to note down battery type)
Before starting:
- Make sure you know the exact model of your opener remote or keypad.
- Turn off the opener’s power if you are working inside the main unit.
Insight: Many people forget to check the battery’s orientation (which side is up). Taking a quick photo before removing the old battery can prevent mistakes.
How To Change The Battery In A Garage Door Remote
Most garage door remotes open easily and need no special skills. Here’s a step-by-step guide:
1. Find The Battery Cover.
Look on the back or side of the remote for a sliding or screw-on cover.
2. Open The Cover.
Use your finger or a small screwdriver. Be gentle to avoid breaking the plastic.
3. Remove The Old Battery.
Note the orientation (plus/minus side). Use a cloth if the battery is tight.
4. Insert The New Battery.
Match the orientation with the old battery or the markings inside.
5. Close The Cover.
Make sure it snaps or screws back securely.
6. Test The Remote.
Stand a few feet from the garage door and press the button.
Extra tip: If your remote still does not work, try resetting it or check for corrosion on the battery contacts.

Credit: diy.stackexchange.com
Changing Battery In A Wireless Keypad
Wireless keypads are often mounted outside the garage. The battery change process is similar, but you may need to remove the device from the wall.
1. Locate The Battery Compartment.
Usually at the bottom or back.
2. Open The Compartment.
Some keypads slide open; others have a screw.
3. Take Out The Old Battery.
Most use a 9V or AA/AAA batteries.
4. Insert The New Battery.
Follow the orientation symbols.
5. Close And Reattach The Keypad.
Test the keypad with your code.
Beginner insight: Sometimes the weather seal sticks the battery in place. Use a flat tool to gently lift the battery without damaging the unit.
Replacing Backup Battery In Garage Door Opener Unit
Some openers have a backup battery in the main motor unit. This keeps your door working during a power outage.
- Unplug the opener first for safety.
- Find the battery compartment, usually on the side or back of the unit.
- Open the cover (often one or two screws).
- Remove and replace the battery. Most backup batteries are 12V or a sealed lead-acid type.
- Close the cover and plug the unit back in.
- Test the opener to ensure the new battery works.
Practical example: Chamberlain and LiftMaster openers often use a 12V 5Ah battery. These usually last 1-2 years, depending on use.
Common Garage Door Opener Brands And Batteries
Knowing your brand helps you find the right battery. Here’s a quick reference:
| Brand | Remote Battery | Keypad Battery | Backup Battery |
|---|---|---|---|
| Chamberlain | CR2032, A23 | 9V | 12V 5Ah |
| LiftMaster | CR2032, A23 | 9V | 12V 5Ah |
| Genie | CR2032, AAA | AAA | Optional |
| Craftsman | CR2032 | 9V | 12V 5Ah |
Always double-check with your manual or the manufacturer website for the latest info.
Troubleshooting After Battery Change
Sometimes, a new battery does not fix the problem right away. Here are possible reasons and easy solutions:
- Remote still not working:
- Check battery orientation.
- Look for corrosion or dirt on the contacts.
- Try reprogramming the remote (see your manual).
- Keypad does not respond:
- Make sure the battery is fresh and installed correctly.
- Reset the keypad by removing the battery for 30 seconds.
- Opener unit shows error:
- Some units need a reset after battery replacement.
- Unplug for 30 seconds and plug in again.
Non-obvious insight: Some remotes or keypads require a “wake up” press after battery change. Press and hold any button for 5-10 seconds.
How Often Should You Change The Battery?
Most batteries last 1 to 3 years, but usage, climate, and battery quality matter. If you use your garage door several times a day, the battery may drain faster. Cold weather can also shorten battery life.
Best practice:
- Change the battery once a year, or as soon as you see signs of weakness.
- Write the date on the new battery with a marker.
Safe Battery Disposal
Used batteries should never go in the regular trash. Button cells and 9V batteries can leak chemicals or cause fires.
How to dispose safely:
- Take used batteries to a recycling center or home improvement store.
- Store used batteries in a safe container, away from metal and heat.
- Do not mix old and new batteries in your remote.
For more on battery recycling, check the guidelines at EPA – Used Household Batteries.
Tips For Extending Battery Life
You can get more from your batteries with a few simple habits:
- Use high-quality brands (Duracell, Energizer).
- Store remotes out of direct sunlight and moisture.
- Clean battery contacts with a dry cloth when changing.
- Do not press buttons longer than needed.
Non-obvious tip: If you leave your home for weeks, remove the battery from the remote to prevent leaks.
When To Call A Professional
Most battery changes are easy. But you should call a pro if:
- The remote or keypad still fails after new batteries and resets.
- The main unit’s backup battery is hard to access or requires wiring.
- You see frayed wires, water damage, or sparks.
Safety first—never open the main unit if you are unsure.

Credit: store.geniecompany.com
Frequently Asked Questions
How Do I Know Which Battery My Garage Door Remote Uses?
Open the remote and look at the battery itself. It will have a code (like CR2032 or A23). You can also check your opener’s manual or search your remote model number online.
Do I Need To Reprogram My Remote After Changing The Battery?
Usually, no. Most remotes keep their code after a battery change. But if the remote does not work, check your manual for reprogramming steps.
Why Does My Remote Battery Drain So Fast?
Common reasons include frequent use, poor quality batteries, or a stuck button. Make sure the remote is clean and only press buttons when needed.
Is It Safe To Change The Battery Myself?
Yes, for most remotes and keypads. Always use the correct type and follow the steps above. For backup batteries inside the main opener, unplug the unit first.
What If My Opener Still Doesn’t Work After Changing The Battery?
Check for other issues: battery contacts, wiring problems, or a faulty remote. Try a new battery from a different pack. If problems continue, contact a garage door technician.
Changing the battery in a garage door opener is a quick fix that anyone can do with the right guidance. By following these steps, you can save money, avoid delays, and keep your garage secure. Remember to recycle old batteries, use quality replacements, and check your system once a year.
If you face any issues beyond the battery, don’t hesitate to get professional help. With these tips, your garage door opener will keep working smoothly for years to come.