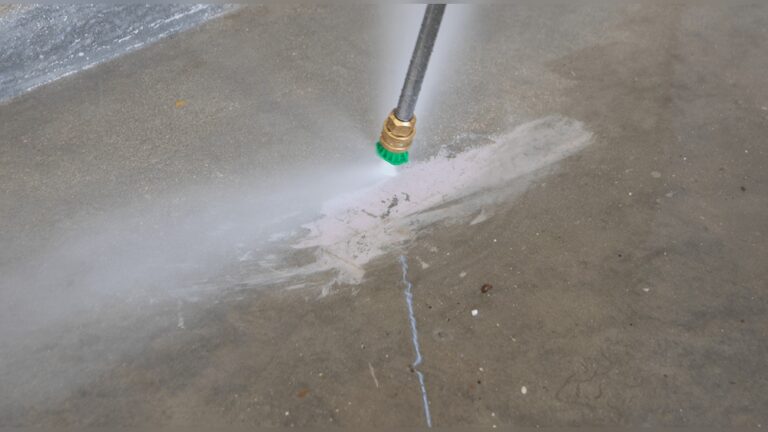
Garage floors are often the most ignored space in a home. Yet, they face heavy use—cars, bikes, dropped tools, oil spills, and even water damage. Over time, cracks, stains, and uneven spots can make your garage look bad and even create safety risks. If you’re noticing damage, you may be thinking about garage floor repair. This guide explains what causes garage floor problems, how to fix them, and what solutions work best for beginners. You’ll also find clear steps, practical examples, and useful tips so you can make smart choices—even if you’ve never done repairs before.
Why Garage Floors Get Damaged
Understanding why your garage floor is damaged helps you fix it better. Most floors are made of concrete, which is strong but not perfect. Common causes include:
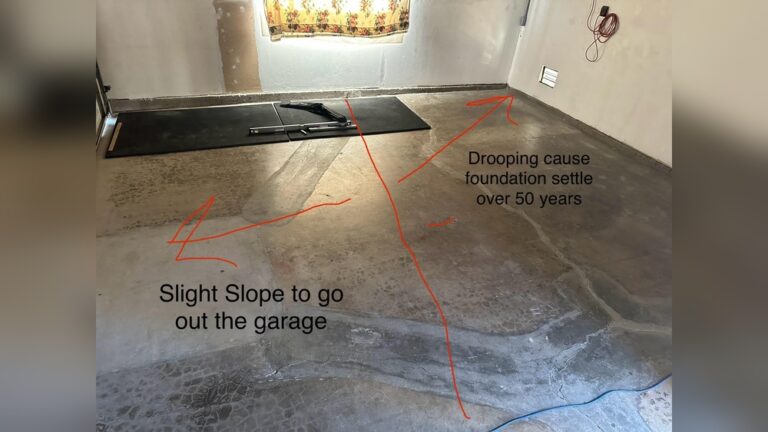
- Cracks from settling: As the ground moves, concrete can crack.
- Moisture: Water leaks or humidity can weaken the floor.
- Heavy loads: Cars, tools, and storage can cause dents or chips.
- Chemical spills: Oil, gasoline, and cleaners can stain or corrode concrete.
For example, if you live in a cold climate, freezing water in cracks makes them worse. In warmer places, heat expands the floor and creates gaps.
Types Of Garage Floor Damage
Different problems need different solutions. Here are the most common types:
- Hairline cracks: Thin, shallow cracks. Usually harmless but can grow.
- Large cracks: Wider, deeper splits. May need urgent repair.
- Surface spalling: Flaking or chipping of the top layer.
- Stains: Oil, paint, rust, or chemical marks.
- Pitting: Small holes caused by corrosion or impact.
- Uneven surfaces: High or low spots, often from bad installation or settling.
Concrete damage is very common. Studies show about 30% of garages have visible cracks within five years of construction.
How To Inspect Your Garage Floor
Before you start repairs, check your floor. Use these steps:
- Sweep away dirt and dust.
- Look for cracks, chips, or stains.
- Use a flashlight to check dark corners.
- Tap the floor with a hammer—hollow sounds may mean deeper damage.
Write down what you see. Take photos if needed. This helps you decide what repair methods to use.
Choosing The Right Repair Method
Not all repairs are the same. Beginners often make the mistake of using the wrong materials or skipping steps. Here’s a comparison of popular repair methods:
| Repair Type | Best For | DIY Difficulty | Estimated Cost |
|---|---|---|---|
| Concrete Patch | Large cracks, chips | Medium | $10–$50 per kit |
| Epoxy Filler | Small cracks, surface | Easy | $20–$60 per kit |
| Resurfacing | Spalling, uneven | Hard | $100–$400 |
| Stain Removal | Oil, paint, rust | Easy | $5–$30 |
If you’re new, start with epoxy filler for small cracks and stain removal for marks. Large repairs may need professional help.
Credit: allgaragefloors.com
Step-by-step Garage Floor Repair For Beginners
Repairing your garage floor can be simple if you follow clear steps. Let’s break down the process for the most common problems.
Fixing Small Cracks
Small cracks are easy to repair. Here’s how:
- Clean the crack: Use a wire brush or vacuum to remove debris.
- Apply epoxy filler: Use a caulk gun or squeeze tube. Fill the crack completely.
- Smooth the surface: Use a putty knife to flatten the filler.
- Let it dry: Wait at least 24 hours before using the garage.
Epoxy fillers are strong and flexible. They resist water and chemicals.
Repairing Large Cracks And Chips
Bigger cracks need stronger products. Follow these steps:
- Widen the crack: Use a chisel to make the crack a bit wider. This helps the patch stick better.
- Clean thoroughly: Remove dust and loose concrete.
- Mix concrete patch: Follow instructions on the package.
- Fill the crack: Use a trowel to press the patch into place.
- Smooth and level: Make the surface flat.
- Cure properly: Let it dry for 48–72 hours.
Concrete patching kits usually contain fast-setting mixes. Always check the label for drying times.
Removing Stains
Stains make your garage floor look dirty. Simple steps can remove most marks.
- Oil stains: Sprinkle cat litter or baking soda. Let it sit, then sweep and scrub with detergent.
- Paint stains: Use paint remover and a brush.
- Rust stains: Apply lemon juice or vinegar. Scrub after 10–15 minutes.
Some stains need special cleaners. Check product labels for concrete-safe options.
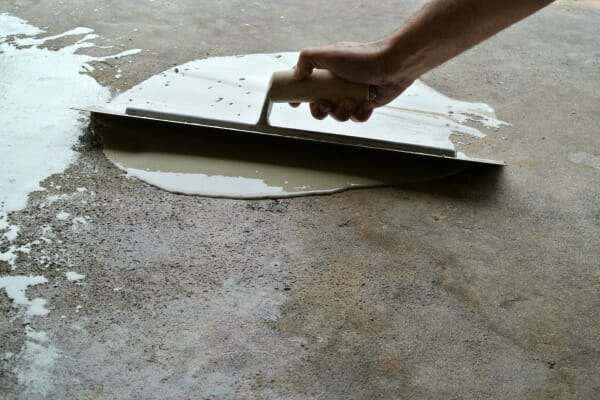
Resurfacing For Spalling And Uneven Floors
If your floor is flaky or has low spots, resurfacing helps. This is more advanced, but possible for careful beginners.
- Clean the floor: Remove all dust and debris.
- Mix resurfacer: Use a bucket and follow instructions.
- Spread evenly: Use a long-handled squeegee or trowel.
- Let it cure: Most resurfacers need 24–48 hours.
Resurfacing creates a new top layer. It covers cracks, chips, and stains.
Essential Tools And Materials
Having the right tools makes repairs easier. Here’s what you’ll need:
- Wire brush
- Putty knife
- Caulk gun
- Trowel
- Concrete patch kit
- Epoxy filler
- Protective gloves
- Safety goggles
- Bucket
- Broom or vacuum
Don’t forget safety. Always wear gloves and goggles when handling chemicals.
Common Mistakes To Avoid
Beginners often make errors that cause future problems. Watch out for these:
- Skipping cleaning: Dirt stops fillers from sticking.
- Using wrong products: Not all fillers work for all cracks.
- Ignoring moisture: Wet floors cause repairs to fail.
- Rushing curing times: Not waiting enough makes repairs weaker.
One non-obvious tip: Always check your garage for water leaks before repairing. Hidden moisture is a leading cause of repair failure.
When To Call A Professional
Some damage is too much for DIY. If you see:
- Cracks wider than 1 inch
- Sections of floor sinking or rising
- Large areas of spalling
- Repeated water leaks
It’s best to call a concrete specialist. Professionals have tools and materials for tough jobs. They can also check for structural issues.

Credit: www.reddit.com
Cost Of Garage Floor Repair
Repair costs depend on the damage and method. Here’s a data table for typical costs:
| Repair Type | DIY Cost | Pro Cost | Expected Lifespan |
|---|---|---|---|
| Small crack repair | $20–$60 | $150–$300 | 5–10 years |
| Large crack repair | $50–$100 | $300–$600 | 10–15 years |
| Resurfacing | $100–$400 | $600–$2000 | 10–20 years |
| Stain removal | $5–$30 | $50–$150 | N/A |
Doing repairs yourself saves money. But always compare your skills to the job.
How To Prevent Future Garage Floor Damage
Once repaired, you want your floor to stay strong. Use these tips:
- Seal the floor: Use concrete sealers to block water and chemicals.
- Clean regularly: Sweep and mop to remove dirt and spills.
- Fix small cracks fast: Don’t wait for them to grow.
- Avoid heavy impacts: Drop tools carefully.
- Use mats under cars: Prevent oil and water stains.
Sealing the floor is a step many beginners skip. It’s affordable and keeps your garage looking good longer.
Real Example: Beginner Repair Success
Let’s look at a real case. John, a first-time homeowner, noticed several hairline cracks and oil stains in his garage. He followed these steps:
- Cleaned the cracks with a wire brush.
- Used epoxy filler to seal the cracks.
- Removed oil stains with baking soda and detergent.
- Added a concrete sealer after repairs.
Six months later, his garage floor looked new. The cracks did not reappear, and stains were gone. John spent about $70 and finished in one weekend.
Non-obvious Insights For Beginners
Two important tips that many miss:
- Temperature matters: Repairs cure best between 50–80°F. Extreme cold or heat slows drying and can cause cracks to return.
- Humidity control: Avoid repairing during high humidity. Moisture in the air affects fillers and patches.
These details are often forgotten by new DIYers but have a big impact on results.

Credit: gfcohio.com
Frequently Asked Questions
What Is The Best Product For Small Cracks?
For small cracks, epoxy filler works best. It’s easy to apply, dries quickly, and resists water and chemicals. Choose a product made for concrete, not wood or metal.
Can I Repair My Garage Floor If It’s Always Damp?
No. You must fix the moisture problem first. Damp concrete won’t let fillers or patches stick. Check for leaks or use a dehumidifier before starting repairs.
How Long Does Garage Floor Repair Last?
Most repairs last 5–15 years if done properly. Using quality materials and following drying times are key. Sealing the floor after repair adds extra protection.
Is Resurfacing Too Hard For Beginners?
Resurfacing is possible for careful beginners, but it takes time and patience. Follow instructions closely. If you’re unsure, start with a small section or ask for help.
Where Can I Find More Detailed Repair Guides?
For more information and step-by-step videos, visit Family Handyman. Their guides are beginner-friendly and cover many garage floor repair methods.
Repairing your garage floor can be simple if you start small and use the right products. With clear steps and a bit of patience, your garage can look clean, safe, and strong again. Remember, prevention and regular care will keep your floor in good shape for years.