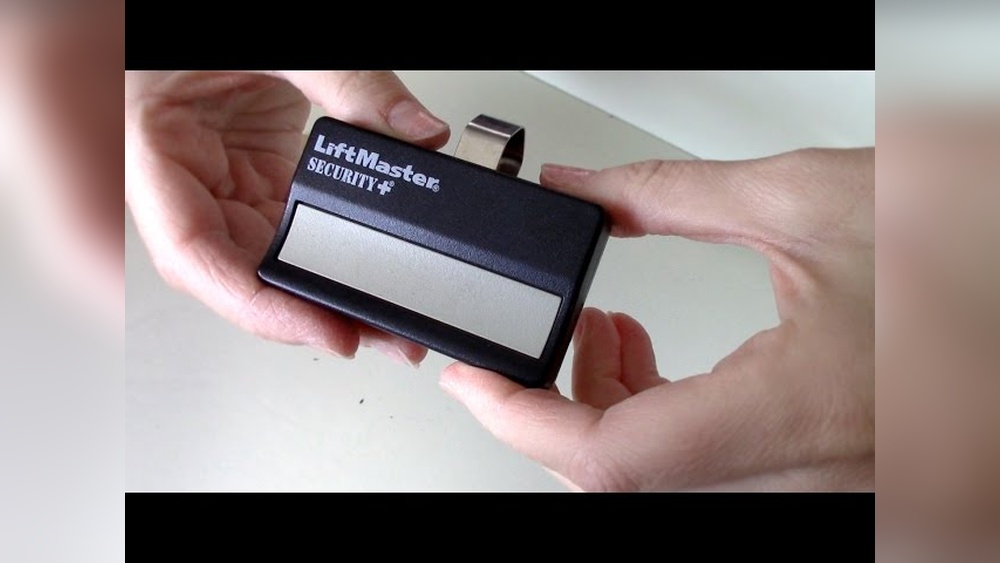
Changing the battery in your garage door opener may sound simple, but it’s a task many homeowners overlook until their remote stops working. If you’re new to home maintenance, knowing how to replace a battery safely and quickly can save you time and frustration.
This guide will walk you through everything you need to know, step by step. By the end, you’ll feel confident handling your garage door opener’s battery, avoid common mistakes, and even troubleshoot issues. Let’s get started.
Why Garage Door Opener Batteries Matter
The garage door opener is a device that uses a remote control to open or close your garage door. Most remotes rely on small batteries, usually coin-cell types like CR2032 or CR2025. When the battery is low, your remote can become unreliable, causing delays or complete failure.
- Convenience: A working remote lets you enter or leave your garage without manual effort.
- Security: A dead battery means you may be stuck outside or unable to secure your garage.
- Maintenance: Changing the battery regularly prevents unexpected problems.
Example: A survey by LiftMaster found that over 60% of garage door issues are related to simple battery problems. Many users mistakenly think their opener is broken when it’s just a dead battery.
Signs The Battery Needs Changing
It’s important to recognize when your garage door opener’s battery is running low. Look for these clear signs:
- Weak signal: You need to press the remote several times or stand closer to the door.
- Delayed response: The door opens or closes slowly after pressing the button.
- Complete failure: Nothing happens when you press any button.
- Blinking light: Many remotes have an LED that flashes rapidly when the battery is low.
Tip: Don’t wait for total failure. Change the battery if you notice any of the above symptoms.
Tools And Materials You Need
Before starting, gather these items to make the process smooth:
- Replacement battery: Check your remote for the exact model. Most use CR2032 or CR2025.
- Small screwdriver: Often, a Phillips or flat-head is needed to open the remote.
- Clean cloth: For wiping battery contacts.
- Gloves (optional): Useful if you want to avoid fingerprints or static.
Important: Using the right battery is essential. A mismatched battery can damage your remote or make it unreliable.
How To Identify Your Garage Door Remote Battery
Finding the correct battery is easy, but beginners often miss this step. Here’s how:
- Check the back of the remote: Most manufacturers print the battery type here.
- Open the remote: Carefully open the battery compartment and look at the battery itself. The model number is printed on it.
- Consult the manual: If you still aren’t sure, check your opener’s user manual.
- Online lookup: Search your remote’s model number on manufacturer websites.
Example: A Chamberlain remote will usually use a CR2032 coin battery, while older Genie models may use AAAs.
Here’s a quick comparison of common battery types used in garage door remotes:
| Brand | Battery Type | Estimated Lifespan | Cost (USD) |
|---|---|---|---|
| Chamberlain | CR2032 | 12-18 months | $2-$4 |
| LiftMaster | CR2025 | 12 months | $2-$3 |
| Genie | AAA | 24 months | $3-$5 |
Step-by-step Guide To Changing The Battery
This process is straightforward, but a few details make a big difference. Follow these steps:
Step 1: Prepare Your Work Area
- Choose a clean, flat surface.
- Keep all tools and the new battery within reach.
Step 2: Open The Remote
- Look for a small screw or latch on the remote’s back.
- Use the screwdriver to remove the screw.
- Gently pry open the remote. Don’t force it—plastic can break.
Step 3: Remove The Old Battery
- Note the battery’s orientation (plus and minus sides).
- Remove the battery using your fingers or a cloth.
- Avoid touching contacts with bare hands if possible.
Step 4: Clean The Contacts
- Use a clean, dry cloth to wipe any dust or corrosion.
- This step helps with good electrical contact.
Step 5: Insert The New Battery
- Place the new battery exactly as the old one (match plus/minus).
- Press it firmly but gently.
Step 6: Close The Remote
- Snap the remote halves together.
- Replace the screw if there was one.
Step 7: Test The Remote
- Stand near your garage door.
- Press the button to ensure it works.
- If the remote fails, check battery orientation or contacts.
Here’s a practical example: A homeowner replaced the battery but forgot to align the plus side properly. The remote didn’t work until they flipped the battery.
Common Mistakes And How To Avoid Them
Beginners often make these errors:
- Wrong battery type: Always check before buying.
- Incorrect orientation: Batteries must match the marked sides.
- Forcing the remote open: Use gentle pressure to avoid breaking it.
- Skipping contact cleaning: Dust can block the signal.
- Throwing away the old battery carelessly: Dispose batteries safely.
Tip: Recycling batteries is better for the environment and keeps your home safe.

Credit: www.youtube.com
Troubleshooting After Battery Replacement
Sometimes, the remote still doesn’t work after you change the battery. Here’s what to check:
- Check battery orientation: Plus and minus must match.
- Inspect contacts: Make sure they’re clean and not bent.
- Test with another battery: Some new batteries may be defective.
- Reprogram the remote: Some brands require you to pair the remote again.
- Check the opener unit: If all remotes fail, the opener may need service.
Here’s a comparison of troubleshooting steps for different scenarios:
| Issue | Possible Cause | Solution |
|---|---|---|
| Remote won’t work | Wrong battery orientation | Flip battery to correct side |
| Weak signal | Dirty contacts | Clean contacts with cloth |
| All remotes fail | Opener issue | Check opener power or call technician |
| Remote flashes but doesn’t operate door | Needs reprogramming | Follow manufacturer pairing steps |
How Often Should You Change The Battery?
Most garage door opener batteries last from 12 to 24 months, depending on usage. Here are some practical guidelines:
- Heavy use: Change every 12 months.
- Standard use: Change every 18-24 months.
- Unused remote: Check battery every year.
Statistic: According to Chamberlain, users who change batteries yearly face 75% fewer remote failures.
Tip: Set a yearly reminder in your phone to check and replace the battery.
Credit: support.chamberlaingroup.com
Extra Tips For Beginners
If you’re new to home DIY, these tips will help:
- Keep spare batteries handy.
- Write down the battery type for future reference.
- Don’t mix old and new batteries—always change both if your remote uses two.
- If your remote feels sticky or the buttons don’t press easily, clean it while changing the battery.
- Always test after replacing to avoid surprises.
Non-obvious insight: Sometimes, the battery compartment has a small spring or clip. Losing it can make the remote unreliable. Be careful when opening.
Safety And Environmental Concerns
Small batteries can be dangerous if swallowed by pets or children. Always:
- Store batteries out of reach.
- Dispose of used batteries at a recycling center.
Environmental tip: One coin battery can pollute thousands of gallons of water if thrown away. Always recycle.
You can find battery recycling locations in your area by searching online or visiting EPA’s Battery Recycling Guide.
When To Call A Professional
If you’ve changed the battery but your remote still doesn’t work, it may be time to seek help:
- The remote is physically damaged (cracked, water inside).
- The opener unit doesn’t respond even with new batteries.
- You’re unsure about reprogramming the remote.
A professional can diagnose deeper issues or help with pairing remotes. Usually, battery replacement is a DIY job, but don’t hesitate to ask for help if needed.
Comparison: Battery Vs. Wired Garage Door Openers
Some garage door openers use wired wall buttons in addition to remotes. Here’s a comparison:
| Feature | Remote (Battery) | Wired Button |
|---|---|---|
| Portability | High | Low |
| Maintenance | Battery needed | None |
| Reliability | Can fail if battery is dead | Works unless power is out |
| Security | Can be lost | Fixed in garage |
Tip: If your remote fails, you can still use the wired button inside the garage until you replace the battery.
Credit: garagedoorchamp.com
Frequently Asked Questions
How Do I Know Which Battery My Garage Door Opener Remote Uses?
Check the back of your remote for battery type information. If not listed, open the compartment and read the battery label. Most remotes use CR2032 or CR2025 coin batteries.
Can I Use A Different Battery Type If I Can’t Find The Exact Model?
No. Always use the exact battery type recommended by the manufacturer. Using the wrong size or voltage can damage the remote.
How Long Do Garage Door Opener Batteries Last?
Most batteries last 12 to 24 months depending on use. Heavy use may require annual changes. It’s best to check and replace batteries regularly.
What Should I Do If My Remote Still Doesn’t Work After Changing The Battery?
Check battery orientation and clean the contacts. If it still fails, try reprogramming the remote or test with another new battery. If all else fails, consult a technician.
Is It Safe To Throw Away Used Batteries In The Trash?
No. Batteries contain chemicals that can pollute water and soil. Take used batteries to a recycling center or follow local disposal guidelines.
Changing the battery in your garage door opener is a simple but important task. With the right tools, careful steps, and attention to detail, you can keep your remote reliable and your garage secure. Remember to check batteries yearly, use the correct type, and recycle old batteries responsibly.
With these tips, even beginners can handle garage door opener maintenance like a pro.