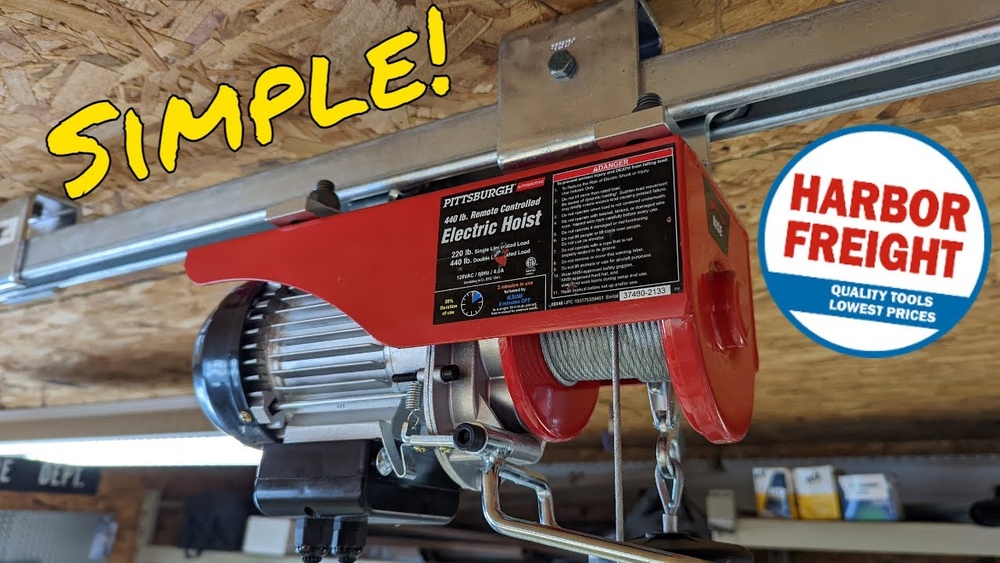
Installing an electric hoist in your garage can make lifting heavy items easy and safe. Whether you want to move engines, store bikes, or organize your workspace, the right hoist helps you do more with less effort. Many homeowners feel unsure about installing a hoist, but with careful planning and the right tools, the process is very manageable—even for beginners.
This guide will walk you through every step, from choosing the best spot to making sure your installation is safe. If you want to avoid costly mistakes and get reliable results, keep reading for clear, practical advice.
Why Install An Electric Hoist In Your Garage?
An electric hoist is a motorized device that lifts and lowers heavy items using a cable or chain. It’s commonly found in garages, workshops, and construction sites. Here’s why it’s a smart addition to your home:
- Reduces physical strain: No need to lift heavy objects by hand.
- Saves time: Lifting is quick and controlled.
- Increases safety: Lowers the risk of injury.
- Maximizes space: Store items overhead and free up floor space.
For example, a 1-ton electric hoist can easily lift a car engine or a stack of lumber, letting one person do jobs that used to require two or three people.
Choosing The Right Electric Hoist
Not every hoist fits every garage or job. Consider these factors before buying:
Weight Capacity
- Common ratings: 440 lbs (200 kg), 880 lbs (400 kg), 1,100 lbs (500 kg), 2,200 lbs (1,000 kg)
- Rule: Pick a hoist rated at least 25% higher than your heaviest load.
Lifting Height
- Standard garages: Ceilings are often 8 to 10 feet high.
- Hoist cable length: Choose a cable that can reach from ceiling to floor, plus extra for safe winding.
Power Supply
- Most homes: Standard 110V power outlets.
- Heavy-duty hoists: May need 220V—check your garage outlets.
Mounting Options
- Ceiling-mount: Saves space, good for center areas.
- Wall-mount: Useful for side lifting or lower ceilings.
Speed
- Single speed: Basic up/down.
- Variable speed: More control, better for delicate items.
Example Comparison
Here’s a simple comparison of three popular hoist models for home garages:
| Model | Weight Capacity | Lifting Height | Power | Speed |
|---|---|---|---|---|
| Model A | 440 lbs | 25 ft | 110V | Single |
| Model B | 880 lbs | 40 ft | 110V | Single |
| Model C | 1,100 lbs | 50 ft | 220V | Variable |
Non-obvious insight: Many beginners forget to check the “lifting height” and buy a hoist that can’t reach from the ceiling to the ground.
Credit: www.vevor.com
Tools And Materials You’ll Need
Before starting, gather all tools and supplies. This saves time and avoids surprises.
- Electric hoist (with mounting hardware)
- Drill and drill bits (for wood or metal, as needed)
- Wrenches or socket set
- Measuring tape
- Level
- Heavy-duty lag bolts or anchor bolts
- Support beam (if your ceiling joists are too weak)
- Stud finder (for wood ceilings)
- Marker or pencil
- Ladder
- Safety glasses and gloves
Practical tip: Have a second person help—holding the hoist overhead alone can be risky.
Planning Your Installation
A successful hoist installation starts with good planning. Don’t rush this part!
Find A Strong Support Point
- Ceiling joist or beam: Must support at least twice your hoist’s max load.
- Don’t mount to drywall or weak boards.
- Check for electrical wires or plumbing in the ceiling.
Data: A standard 2×6 wood joist can support about 800-1,000 lbs if the weight is centered and the joist is in good condition. For heavier loads, use a steel I-beam or reinforce with extra wood.
Decide On Location
- In the center: Best for lifting large items, like engines or kayaks.
- Near a wall: Good for bikes, tools, or items stored against the side.
Example: If you want to lift a car engine, install the hoist above the open engine bay so you can lift straight up.
Mark The Mounting Spots
- Use the stud finder to locate the joist.
- Measure and mark the mounting holes with a pencil.
- Use a level to make sure the hoist will hang straight.
Step-by-step Installation Guide
1. Prepare The Area
- Clear the space below the mounting spot.
- Set up your ladder safely.
- Put on safety glasses and gloves.
2. Attach The Mounting Bracket
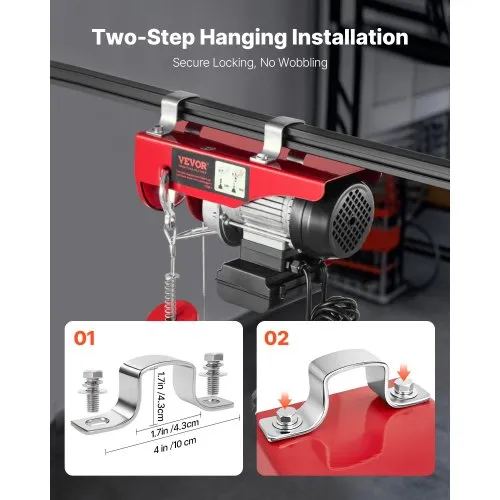
Most electric hoists include a steel mounting bracket.
- Hold the bracket against the joist or beam.
- Drill pilot holes for the bolts.
- Attach the bracket with heavy-duty lag bolts (at least 3/8″ diameter).
- Tighten securely with a wrench.
Non-obvious insight: If your joist runs parallel to the item you’ll lift, add a cross beam (perpendicular) for better support.
3. Mount The Hoist
- With a helper, lift the hoist onto the bracket.
- Insert mounting pins or bolts as per the manual.
- Double-check all connections are tight.
4. Plug In And Test Power
- Plug the hoist into a grounded outlet.
- Keep the cord away from moving parts or water.
- Use the remote control to briefly raise and lower the hook (no load yet).
5. Inspect For Safety
- Check all bolts and supports.
- Make sure the hoist moves smoothly.
- Listen for strange noises—stop if you hear grinding or clicking.
6. Test With A Light Load
- Attach a small weight (like a sandbag or toolbox).
- Raise and lower to check function and stability.
- Watch for sagging beams or loose hardware.
7. Begin Using For Real Loads
- Only lift items under the hoist’s rated capacity.
- Keep hands and body clear during use.
- Never leave a load hanging unattended.
Safety Tips And Common Mistakes
Installing a hoist is not just about mechanics—it’s about safety.
Top safety tips:
- Always check the hoist’s weight rating before every use.
- Inspect bolts and cables monthly.
- Replace worn or damaged parts right away.
- Use a proper lifting sling or hook for each item.
Common mistakes beginners make:
- Mounting to weak structures: Drywall or thin wood won’t hold heavy loads.
- Ignoring cable length: A short cable means you can’t reach the floor.
- Overloading: Lifting more than the rated weight can break the hoist or the ceiling.
- Skipping safety checks: Loose bolts are a leading cause of garage accidents.
Real example: A homeowner in Texas damaged his garage when he mounted a 1,000-lb hoist to a single 2×4. The beam snapped, dropping the load. Always use a strong enough support!

Credit: www.youtube.com
Maintenance And Troubleshooting
A hoist needs basic care to keep working well.
Regular Maintenance
- Lubricate the cable or chain every 6 months.
- Check for frayed wires or damaged hooks.
- Clean the motor area to avoid dust buildup.
- Test the emergency stop if your model has one.
Troubleshooting Common Problems
If your hoist is not working:
- No power: Check outlet, plug, and remote batteries.
- Slow movement: Lubricate cable, check for overload.
- Strange noises: Stop use and inspect for damage.
Quick Reference: Maintenance Tasks
| Task | How Often | Why It Matters |
|---|---|---|
| Inspect bolts and mounts | Monthly | Prevents accidents |
| Lubricate cable/chain | Every 6 months | Ensures smooth lifting |
| Check electrical parts | Yearly | Avoids power failure |
Pro tip: Keep a maintenance log so you remember when each task was last done.
Example Use Cases
You might wonder what you can do with an electric hoist in your garage. Here are a few practical examples:
- Engine swaps: Lift a car engine out for repairs.
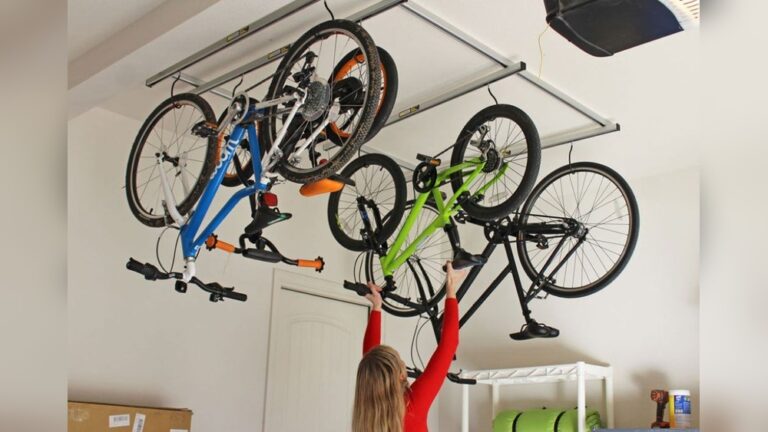
- Bike storage: Hoist bicycles to the ceiling to save floor space.
- Heavy tools: Move table saws or compressors safely.
- Holiday décor: Store bulky items like decorations or kayaks overhead.
Data point: According to the U.S. Consumer Product Safety Commission, over 200,000 garage-related injuries happen each year—often from lifting or dropping heavy items. A hoist reduces this risk.
Cost Considerations
Electric hoists for home garages are affordable and deliver long-term value.
Typical Price Range
- Basic models: $100–$200 (440–880 lbs)
- Mid-range: $200–$350 (1,100 lbs)
- Heavy-duty: $350+ (2,200 lbs and above)
Installation Costs
- DIY: Main cost is your time (1–2 hours for most installs).
- Professional: $100–$300 for labor, more if ceiling needs reinforcing.
Money-saving tip: Reinforce your ceiling beam yourself with a 4×4 wood post if needed.
Summary Table: What Matters Most
Before you buy or install, review these critical points.
| Factor | Why It Matters | Beginner Mistake |
|---|---|---|
| Weight Capacity | Safety and function | Choosing too small |
| Lifting Height | Can reach needed spots | Too short for job |
| Mounting Strength | Prevents accidents | Weak joist or drywall |
| Power Supply | Works in your garage | Wrong voltage |

Credit: www.reddit.com
Frequently Asked Questions
How Much Weight Can My Garage Ceiling Support?
Most modern garage ceilings use 2×6 or 2×8 joists, which can support 800–1,200 lbs if the load is centered and the wood is in good shape. Always check your specific structure and, if unsure, reinforce with extra beams or consult a contractor.
Can I Install An Electric Hoist By Myself?
It’s possible for one person to do the job, but for safety, two people are better. Lifting and holding the hoist overhead while securing bolts is easier with help. Never try to mount a heavy hoist alone.
Do I Need A Permit To Install A Garage Hoist?
In most areas, you do not need a permit for a small, home-use electric hoist. However, if your garage is part of a larger project, or you are modifying structural beams, check with your local building office.
What Maintenance Does An Electric Hoist Need?
Regularly inspect bolts, lubricate the cable or chain, clean the motor, and check for frayed wires. Doing this every few months will keep your hoist safe and running smoothly.
Where Can I Find More Details About Safe Lifting?
You can find comprehensive lifting and safety guidelines from the U.S. Occupational Safety and Health Administration.
Adding an electric hoist to your garage can change how you work and organize. With careful planning, the right tools, and regular maintenance, you’ll lift heavy items safely for years to come. Remember—safety and preparation are just as important as the hoist itself.