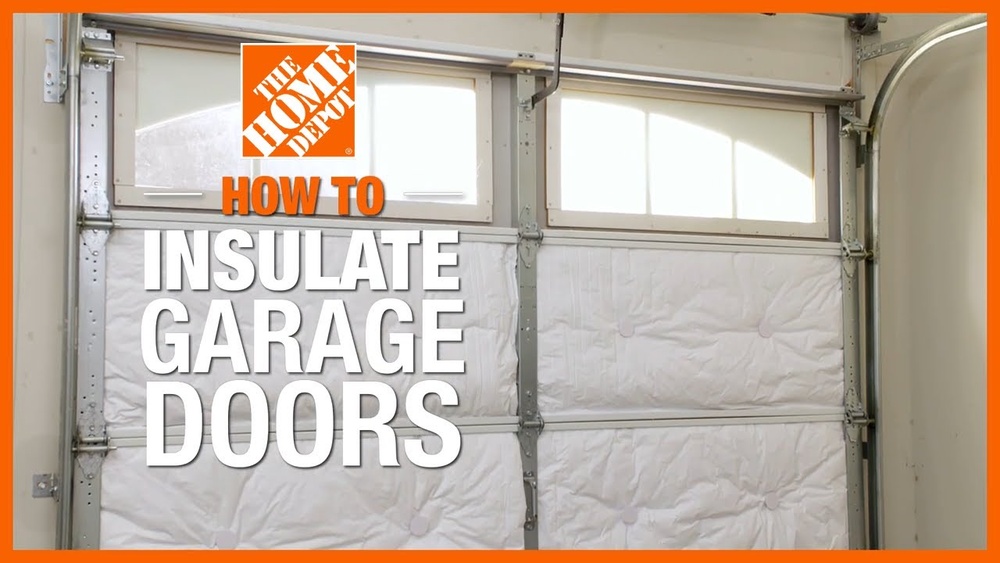
Insulating your garage door is a smart way to improve your home’s comfort and energy efficiency. Many homeowners overlook the garage when thinking about insulation, but this space can be a major source of heat loss in winter and unwanted heat gain in summer.
Whether you use your garage as a workshop, laundry area, or just to park your car, a well-insulated garage door helps keep temperatures stable, reduce noise, and even protect your belongings from extreme weather.
This article guides you through the entire process of how to insulate a garage door, with beginner-friendly steps, practical examples, and clear explanations. By the end, you’ll know exactly what materials to use, how to install them, and how to avoid common mistakes.
Why Insulate Your Garage Door?
Many people ask if it’s worth insulating a garage door. The answer is almost always yes, especially if:
- Your garage is attached to your home (it shares walls with living spaces).
- You use your garage for more than just parking (like a gym or hobby room).
- You want lower energy bills and a more comfortable space.
Key benefits:
- Energy savings: Insulating a garage door can reduce heat loss by up to 70%, according to the U.S. Department of Energy.
- Noise reduction: Insulation helps block street noise and keeps loud garage activities quieter for the rest of your home.
- Protection for items: Extreme cold or heat can damage tools, paint, and even your car’s battery.
- Improved home value: Upgrading your garage is a selling point if you ever move.
Choosing The Right Insulation Material
Not all insulation is the same. The right material depends on your budget, climate, and the type of garage door you have.
Common Garage Door Insulation Types
Here’s a quick comparison of the most popular options:
| Material | R-Value (per inch) | Cost | Best For |
|---|---|---|---|
| Polystyrene Panels | R-3 to R-6 | Low-Medium | Most garage doors |
| Polyurethane Foam | R-6 to R-9 | Medium-High | Maximum insulation |
| Reflective Foil (Radiant Barrier) | R-3 to R-6* | Low | Hot climates |
| Fiberglass Batts | R-3 to R-4 | Low | Metal doors (with backing) |
*Reflective foil’s effectiveness (R-value) depends on installation and air gap.
R-value measures insulation’s resistance to heat flow. Higher numbers mean better insulation.
Factors To Consider
- Garage use: If you use your garage as a workspace, choose higher R-value insulation.
- Climate: Cold climates benefit more from thick foam, while reflective foil works well in hot regions.
- Door type: Sectional garage doors are easier to insulate than one-piece tilt-up models.
Tools And Materials You’ll Need
Before starting, gather these items:
- Insulation material (panels, foam, or kit)
- Utility knife or heavy-duty scissors
- Tape measure
- Straightedge or ruler
- Adhesive (double-sided tape or spray adhesive)
- Aluminum foil tape or duct tape
- Safety gloves and goggles
- Cleaning cloth
Most home improvement stores sell garage door insulation kits that include pre-cut panels and all needed fasteners. Kits are beginner-friendly but sometimes cost more than buying materials separately.
Preparing Your Garage Door
Getting the surface ready is essential for a strong, long-lasting result.
Steps:
- Clean the door: Wipe away dust, oil, and cobwebs. Insulation sticks best to a clean surface.
- Check for damage: Look for rust, dents, or loose hardware. Fix these before adding insulation.
- Measure each panel: Garage doors often have panels of different sizes. Measure each one for a custom fit.
Example: If your garage door has 8 panels, measure width and height of each. Write measurements down before cutting.
Step-by-step: How To Insulate A Garage Door
Let’s break the process into simple steps, suitable for most beginners.
1. Measure And Cut Insulation
- Use a tape measure for each panel’s width and height.
- Add a little extra (about ½ inch) to each measurement. This ensures a snug fit.
- Mark the measurements on your insulation material with a pencil.
- Cut panels using a sharp utility knife and a straightedge for clean lines.
Tip: Wear gloves when handling fiberglass or foam to avoid skin irritation.
2. Attach The Insulation Panels
- Insert each panel into the frame of the garage door. The extra ½ inch helps hold it in place.
- For better security, use double-sided tape or adhesive to stick the panel to the metal.
- Press down firmly to make sure the insulation sticks well.
Common mistake: Using too little adhesive can cause panels to fall off during hot or cold weather.
3. Seal The Edges
- Use aluminum foil tape or duct tape to seal around the edges of each panel. This blocks air leaks and keeps insulation in place.
- Pay special attention to corners and spots where panels meet the frame.
Extra tip: Taping the edges also prevents moisture from getting behind the insulation, which can cause mold.
4. Check Door Balance And Movement
Insulation adds a little weight. After installation:
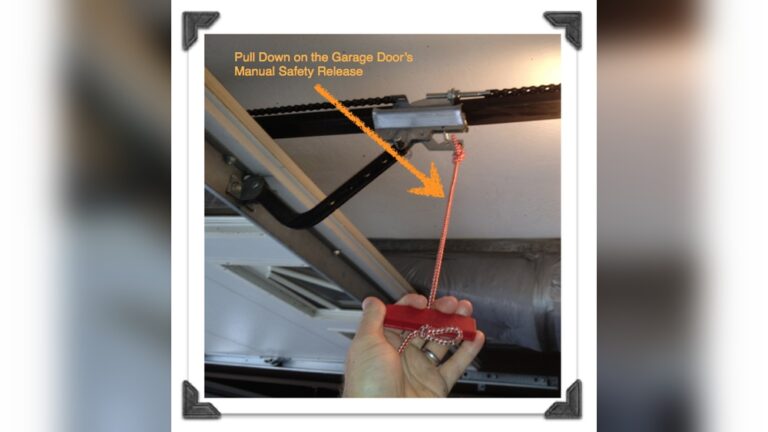
- Open and close the door manually.
- Listen for any new noises or sticking points.
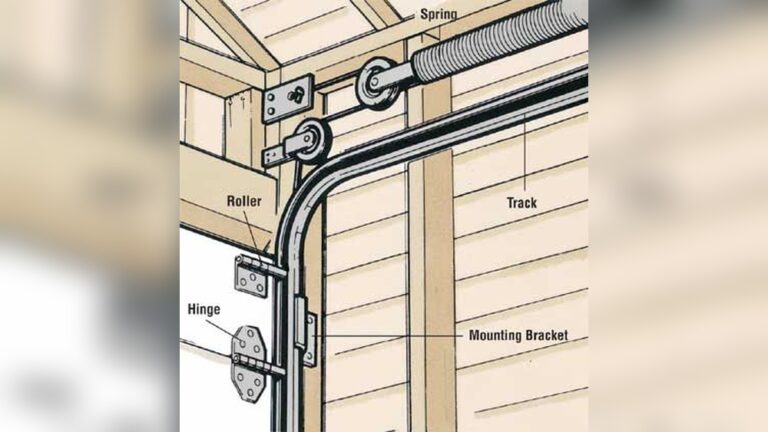
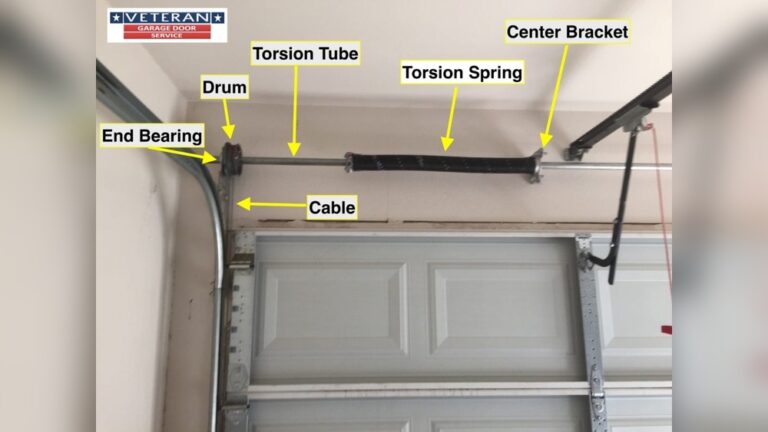
- If the door feels heavy or doesn’t move smoothly, adjust the spring tension or consult a garage door technician.
Most basic insulation adds less than 10 pounds—well within most garage door systems’ limits.
5. Weatherproofing For Best Results
Insulation works best with good weatherstripping around the door.
- Replace old or cracked rubber seals at the bottom and sides.
- Add a threshold seal if you see light coming in under the door.
- Close gaps with foam tape for a tighter seal.
Practical data: Replacing worn weatherstripping can cut air leaks by up to 40%, making insulation much more effective.
Cost, Roi, And Energy Savings
How much can you save, and is it worth the investment?
Typical Costs
| Item | Average Price | Notes |
|---|---|---|
| Garage Door Insulation Kit | $60–$120 | Includes panels for a standard 2-car door |
| DIY Materials Only | $40–$90 | Foam board, adhesive, tape |
| Professional Installation | $200–$500 | Labor included |
Energy Savings Example
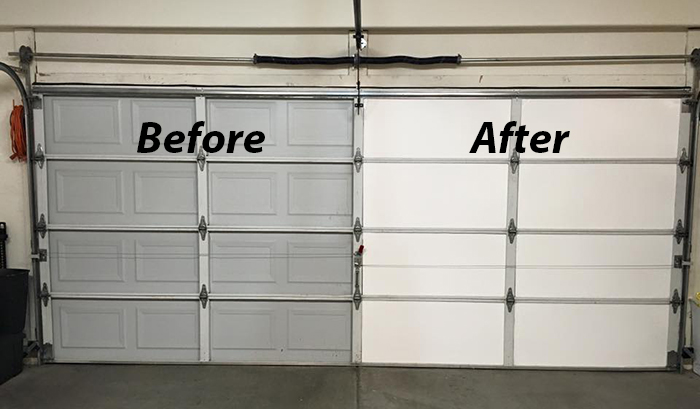
- Insulating an attached garage door can save $100–$200 per year on heating and cooling in cold climates.
- ROI (return on investment) is usually 1–3 years, depending on energy prices and garage use.
Non-obvious insight: Even in milder climates, insulation keeps your garage cooler, which means your car’s AC works less hard and items like paint and batteries last longer.
Credit: www.abettergaragedoorinc.com
Mistakes To Avoid
Beginners often make these errors:
- Skipping the cleaning step: Dust and grease can make insulation fall off.
- Not measuring every panel: Many doors are not perfectly uniform. Custom cuts fit better and look neater.
- Ignoring door weight: Adding too much weight can strain the opener or springs.
- Forgetting weatherstripping: Insulation alone won’t stop drafts.
- Using the wrong adhesive: Some glues don’t stick well to metal or foam.
Extra Tips For Best Results
- If you live in a cold climate, use thicker foam (at least 1.5 inches) for better results.
- For metal doors, always tape edges to avoid condensation and rust.
- Install insulation on a dry day, as moisture can affect adhesive.
- Label each cut panel with its corresponding door section to save time during installation.
- If you plan to paint the inside of your garage, do it before installing insulation for a clean look.

Credit: www.theawesomeorange.com
Maintenance And Longevity
Insulated garage doors need little maintenance, but a few simple checks can keep everything working well.
- Inspect insulation yearly for sagging or moisture.
- Replace damaged panels immediately to prevent heat loss.
- Check weatherstripping every fall and spring.
High-quality insulation lasts 10–20 years if installed correctly.
Environmental Impact
Insulating your garage door helps the environment in several ways:
- Reduces overall home energy use, which lowers your carbon footprint.
- Keeps more consistent temperatures, which means less reliance on heating and cooling.
- Many foam boards are now made with fewer harmful chemicals.
Example: According to the U.S. Environmental Protection Agency, proper insulation can cut your home’s greenhouse gas emissions by 5–10% per year.
When To Consider Professional Help
While most homeowners can insulate a garage door themselves, some situations call for expert help:
- Heavy or oversized doors that need spring adjustments.
- Custom or glass garage doors.
- Damage to the door frame or hardware.
Professionals can also recommend the best insulation for unique climates or garage uses. If your garage has high humidity or water issues, ask about vapor barriers or specialty materials.
Frequently Asked Questions
How Long Does It Take To Insulate A Garage Door?
Most DIY projects take 2–4 hours for a standard two-car garage door. Beginners may take longer, especially if measuring and cutting for the first time.
What Is The Best Insulation For Garage Doors?
Rigid foam board (polystyrene or polyurethane) offers the best mix of R-value, ease of installation, and cost. Reflective foil is best for hot climates with lots of sun.
Can I Insulate A Wooden Garage Door?
Yes. Use rigid foam panels cut to fit each section. Be sure to seal edges well to protect from moisture and insects.
Will Insulation Affect My Garage Door Opener?
In most cases, added weight is not a problem. Standard insulation adds less than 10 pounds. If your door feels heavy or your opener struggles, contact a technician to adjust the spring tension.
Where Can I Find More Information About Home Insulation?
For detailed guides and energy efficiency tips, visit the U.S. Department of Energy website.
Insulating your garage door is a practical project that pays off in comfort, energy savings, and home value. With the right materials and a careful approach, even beginners can achieve professional-looking results. Follow these steps, avoid common mistakes, and enjoy a warmer, quieter, and more energy-efficient garage all year round.

Credit: www.youtube.com