Programming a garage door remote from another remote can seem confusing, especially if you have never tried it before. Many people worry about losing access to their garage or making a mistake. But, with the right steps and clear instructions, you can easily copy your remote’s signal and enjoy the convenience of controlling your garage door without hassle.
This guide breaks down the process for beginners, explains the tools you need, highlights common mistakes, and answers frequently asked questions. You’ll also find helpful tables comparing remote types and practical tips to make the job easier.
Why Program A Garage Door Remote From Another Remote?
There are several reasons you might want to program a garage door remote from another remote:
- You lost your original remote but have a working spare.
- You want to share access with a family member.
- You bought a new universal remote and need to copy the signal.
- Your remote’s buttons are worn out, but the signal still works.
Copying a remote can save time and money. It prevents the need to call a technician or buy expensive replacements. Most modern garage door systems allow for easy programming, but you should always check your model’s compatibility first.
Understanding Remote Types And Compatibility
Before you start, it’s important to know what kind of remote you have. Garage door remotes use different technologies. Some can be programmed directly from another remote, while others require access to the opener unit.
Types Of Garage Door Remotes
Garage door remotes fall into three main categories:
- Fixed Code Remotes
- Use a series of dipswitches for coding.
- Easy to copy if you have physical access.
- Common in older garage door systems.
- Rolling Code Remotes
- Change their code every time they are used.
- More secure and harder to copy directly.
- Require programming via the garage door opener.
- Universal Remotes
- Designed to work with many brands.
- Can often “learn” from another remote.
Compatibility Table
Below is a comparison of remote types and their compatibility with remote-to-remote programming:
| Remote Type | Copying Method | Ease of Programming | Security Level |
|---|---|---|---|
| Fixed Code | Dipswitch Matching | Easy | Low |
| Rolling Code | Opener Unit Required | Moderate | High |
| Universal | Remote-to-Remote Learning | Easy/Moderate | Varies |
Tip: Always check your opener’s manual or look for model information on the back of your remote. If you see dipswitches, it’s a fixed code. If not, it’s likely rolling code.
What You Need Before Starting
To program a garage door remote from another remote, you’ll need:
- The original remote (working)
- The new remote (compatible)
- Access to your garage door opener (optional for some models)
- A flat screwdriver (for opening battery covers)
- Fresh batteries in both remotes
Extra Tip: If your new remote is universal, check the brand compatibility on the packaging or website. Not all universal remotes work with every garage door opener.
Step-by-step Guide: Programming Remote-to-remote
Follow these steps to program your new garage door remote using another remote. If you’re unsure, review your opener’s manual or visit the manufacturer’s support page.
Step 1: Identify Your Remote Type
- Check for dipswitches or labels like “rolling code.”
- Fixed code remotes can be copied directly.
- Rolling code remotes require access to the opener’s “Learn” button.
Step 2: Prepare Both Remotes
- Insert fresh batteries.
- Place both remotes side by side on a flat surface.
- Remove battery covers if needed.
Step 3: Programming Fixed Code Remotes
If both remotes are fixed code:
- Open the battery covers.
- Find the dipswitches inside both remotes.
- Match the switches on the new remote to the pattern on the original remote.
- Close the covers and test the new remote.
Example: If your original remote has switches set to “up, down, up, up, down,” replicate the same pattern.
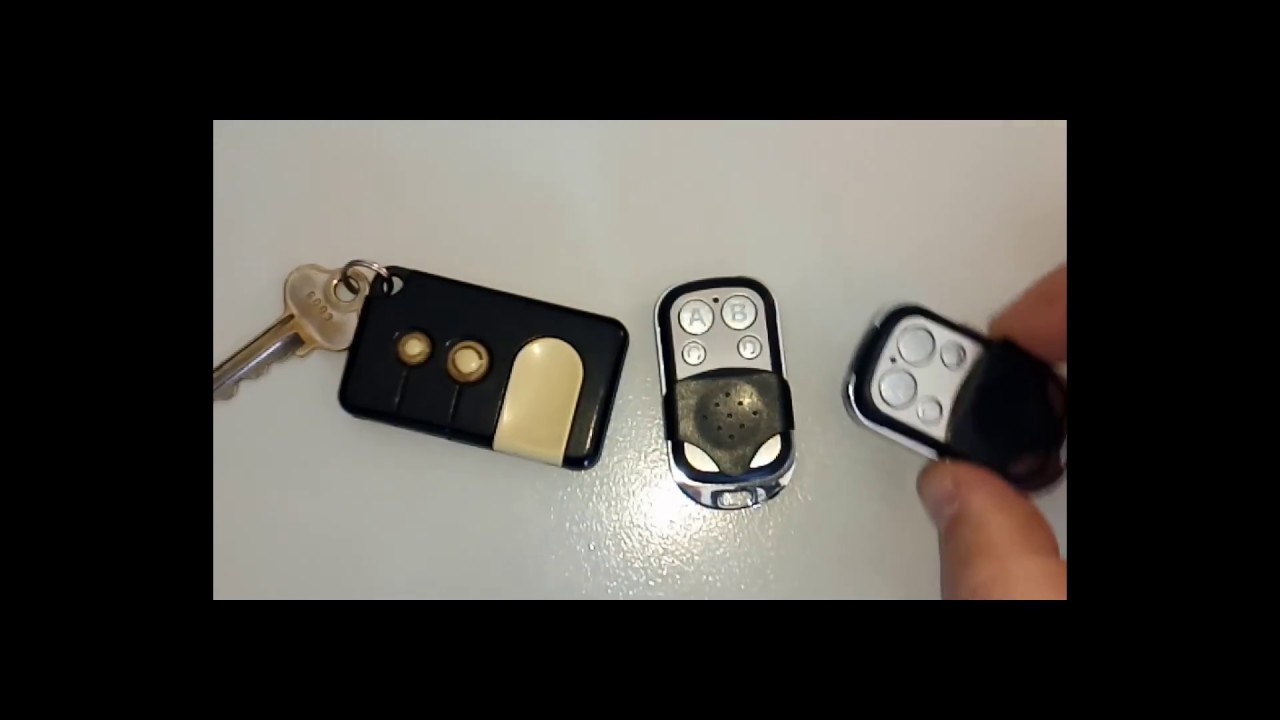
Step 4: Programming Universal Remotes (learning Remotes)
If your new remote is a universal learning remote:
- Press and hold the “learn” button on the new remote.
- Hold the original remote close (1-2 inches apart).
- Press and hold the button on the original remote.
- Wait for the indicator light on the new remote to blink or stay solid.
- Release both buttons.
- Test the new remote by pressing the programmed button.
Tip: Some remotes need you to hold both buttons for up to 30 seconds. Be patient.
Step 5: Programming Rolling Code Remotes
For rolling code remotes, you usually need to use the opener unit:
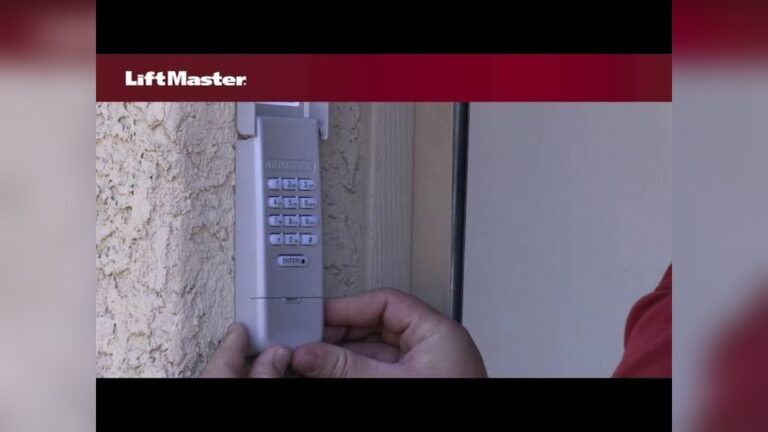
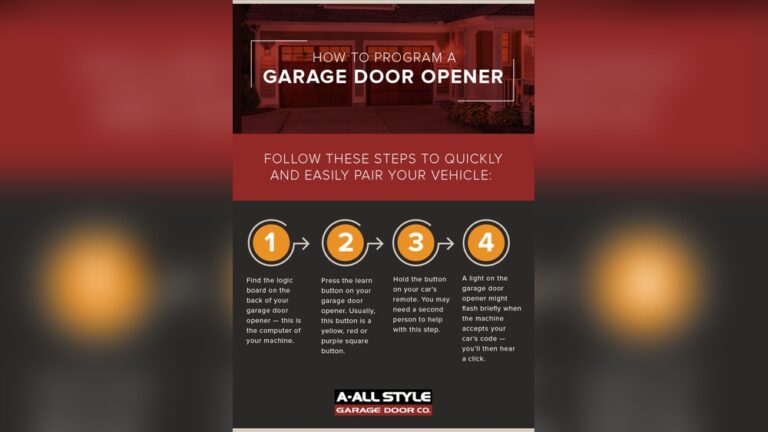
- Find the “Learn” or “Program” button on your garage door opener (usually on the motor unit).
- Press and release the “Learn” button (don’t hold).
- Within 30 seconds, press the button on your new remote.
- The opener’s light should blink or make a clicking sound.
- Test the new remote.
Note: You cannot copy rolling code signals directly from remote to remote. The opener must program the new remote.
Step 6: Test The New Remote
- Stand a few feet from your garage door.
- Press the programmed button.
- The door should open or close.
If the remote does not work, repeat the programming steps or check battery placement.
Credit: www.youtube.com
Common Mistakes And How To Avoid Them
Many beginners make simple mistakes when programming garage door remotes. Here are the most common ones:
- Wrong remote type: Not all remotes can be programmed from another. Check compatibility first.
- Weak batteries: Always use fresh batteries. Low power can cause failed programming.
- Incorrect distance: For learning remotes, keep them close but not touching.
- Missed timing: For rolling code remotes, you must press the new remote within 30 seconds of pressing “Learn.”
- Skimming instructions: Don’t skip the manual. Manufacturers often have unique steps.
Non-obvious insight: Some universal remotes require you to clear existing codes before learning a new one. This step is often overlooked and can cause confusion.
Practical Data: Remote Success Rates
Programming success depends on your remote type and opener brand. Here’s a summary of common brands and their success rates for remote-to-remote programming.
| Brand | Fixed Code | Rolling Code | Universal Learning |
|---|---|---|---|
| Chamberlain | High | Medium | High |
| LiftMaster | High | Medium | High |
| Genie | Medium | High | High |
| Craftsman | High | Medium | Medium |
Example: Chamberlain and LiftMaster remotes often work well with universal remotes, but Genie rolling code remotes may require extra steps.

Credit: www.amazon.com
Troubleshooting Tips
If your new remote does not work, try these troubleshooting steps:
- Check battery polarity.
- Move closer to the garage door opener.
- Reset the remote by removing batteries and reinstalling.
- Try reprogramming using the opener’s “Learn” button.
- Check for interference from Wi-Fi routers or other electronics.
Non-obvious insight: Some garage door systems use frequency bands that may interfere with other household devices. If your remote works sometimes but not always, check for nearby devices operating on similar frequencies.
Security Considerations
Garage door remotes are a target for thieves. Rolling code technology is more secure than fixed code because it changes the signal every time. If you use fixed code remotes, consider upgrading to rolling code for better protection.
- Never share your remote with strangers.
- Erase old codes from the opener when programming new remotes.
- Keep remotes out of sight in your car.
For more information on garage door security, visit Wikipedia.
Real-life Example: Programming A Universal Remote
Let’s look at a practical example. Sarah bought a universal remote for her Chamberlain opener. She had her original remote but wanted to give access to her son.
- Sarah checked her opener’s manual and found it supported remote-to-remote learning.
- She inserted fresh batteries in both remotes.
- She held down the “learn” button on the universal remote and pressed the button on her original remote for 20 seconds.
- The light on the universal remote blinked.
- She tested the new remote, and it worked on the first try.
Sarah avoided common mistakes by reading the manual, using fresh batteries, and following the timing instructions.
Comparison Table: Remote-to-remote Vs Opener Programming
Here’s a comparison of remote-to-remote programming versus programming via the opener unit:
| Method | Ease of Use | Security | Tools Needed | Common Mistakes |
|---|---|---|---|---|
| Remote-to-Remote | Easy | Medium | Two remotes | Wrong distance, weak batteries |
| Opener Unit | Moderate | High | Remote + access to opener | Missed timing, skipped manual |
Insight: Remote-to-remote programming is easier for beginners but not possible for rolling code remotes. Opener unit programming is more secure and works for all remote types.
Credit: pinnaclegaragedoors.com.au
How To Reset Your Garage Door Opener After Programming
Resetting your garage door opener clears old codes and prevents unwanted access. Here’s how to do it:
- Locate the “Learn” button on the opener unit.
- Press and hold the button for 10 seconds until the indicator light turns off.
- This erases all programmed remotes.
- Reprogram your remotes as needed.
Important: Always reset after buying a used home or if you lose a remote.
Frequently Asked Questions
How Do I Know If My Remote Is Compatible With Remote-to-remote Programming?
Check your remote’s manual or search the model number online. Fixed code and universal remotes are usually compatible. Rolling code remotes typically require programming via the opener unit.
Can I Program A Remote Without The Original Remote?
If you have a rolling code system, you can program a new remote using the opener’s “Learn” button. For fixed code systems, you need the original for reference.
Why Does My New Remote Not Work After Programming?
Common causes include weak batteries, incorrect programming steps, or interference from other devices. Recheck compatibility and repeat the steps carefully.
Is Remote-to-remote Programming Safe?
Remote-to-remote programming is safe for fixed code and universal remotes. For rolling code remotes, use the opener unit for higher security. Always erase old codes if you lose a remote.
How Many Remotes Can I Program To My Garage Door Opener?
Most garage door openers support 2–5 remotes. Check your opener’s manual for limits. If you reach the maximum, you may need to erase old codes before adding a new remote.
Programming a garage door remote from another remote is easier than many people think. With the right tools, clear instructions, and a little patience, you can quickly copy your remote’s signal and enjoy reliable access to your garage. Always check compatibility, follow each step, and don’t forget to test your new remote before relying on it daily.
If you run into trouble, check the manufacturer’s website or contact support for help. This guide should make your first programming attempt a success.