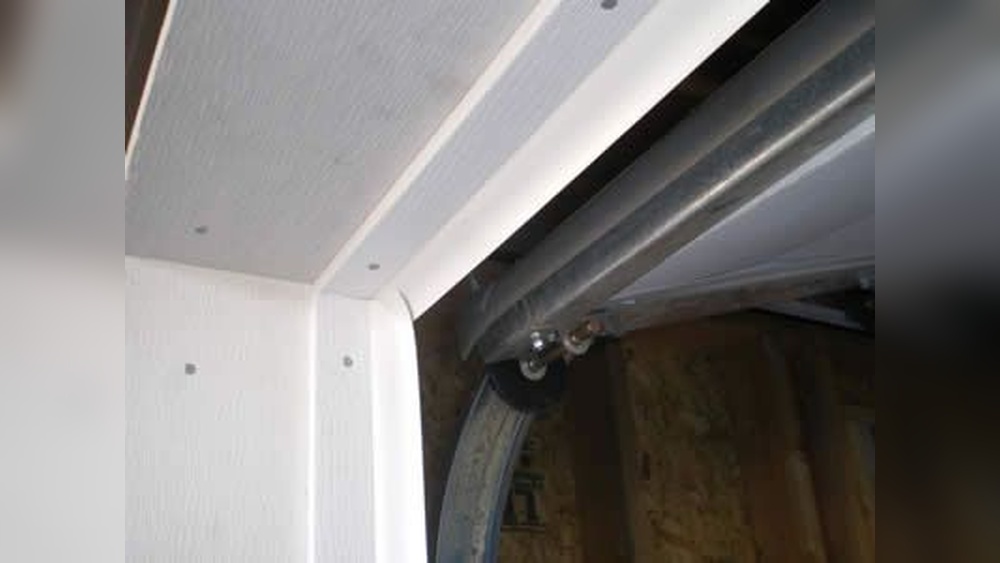
Garage doors are one of the largest openings in any home. Without proper sealing, they can let in dust, pests, rain, and cold air. This is why garage door weather stripping installation matters for every homeowner. If you want to keep your garage comfortable and protect what’s inside, learning how to install weather stripping is a smart, simple upgrade.
Many people believe garage door weather stripping is only for cold climates, but it’s valuable everywhere. In hot, humid, or dry areas, it also helps control temperature and keeps out insects. The good news? Installing weather stripping is a beginner-friendly project.
With a few basic tools and the right materials, you can finish this job in a single afternoon.
What Is Garage Door Weather Stripping?
Garage door weather stripping is a flexible material that seals the gaps around your garage door. Its main job is to block:
- Cold or hot air from outside
- Rain and moisture
- Dust and dirt
- Bugs and small animals
Most weather stripping is made from vinyl, rubber, or foam. It’s installed along the sides, top, and bottom of the garage door.
Common Types
There are several types of garage door weather stripping:
- Bottom seal – Attaches to the lower edge of the door to block gaps at the floor.
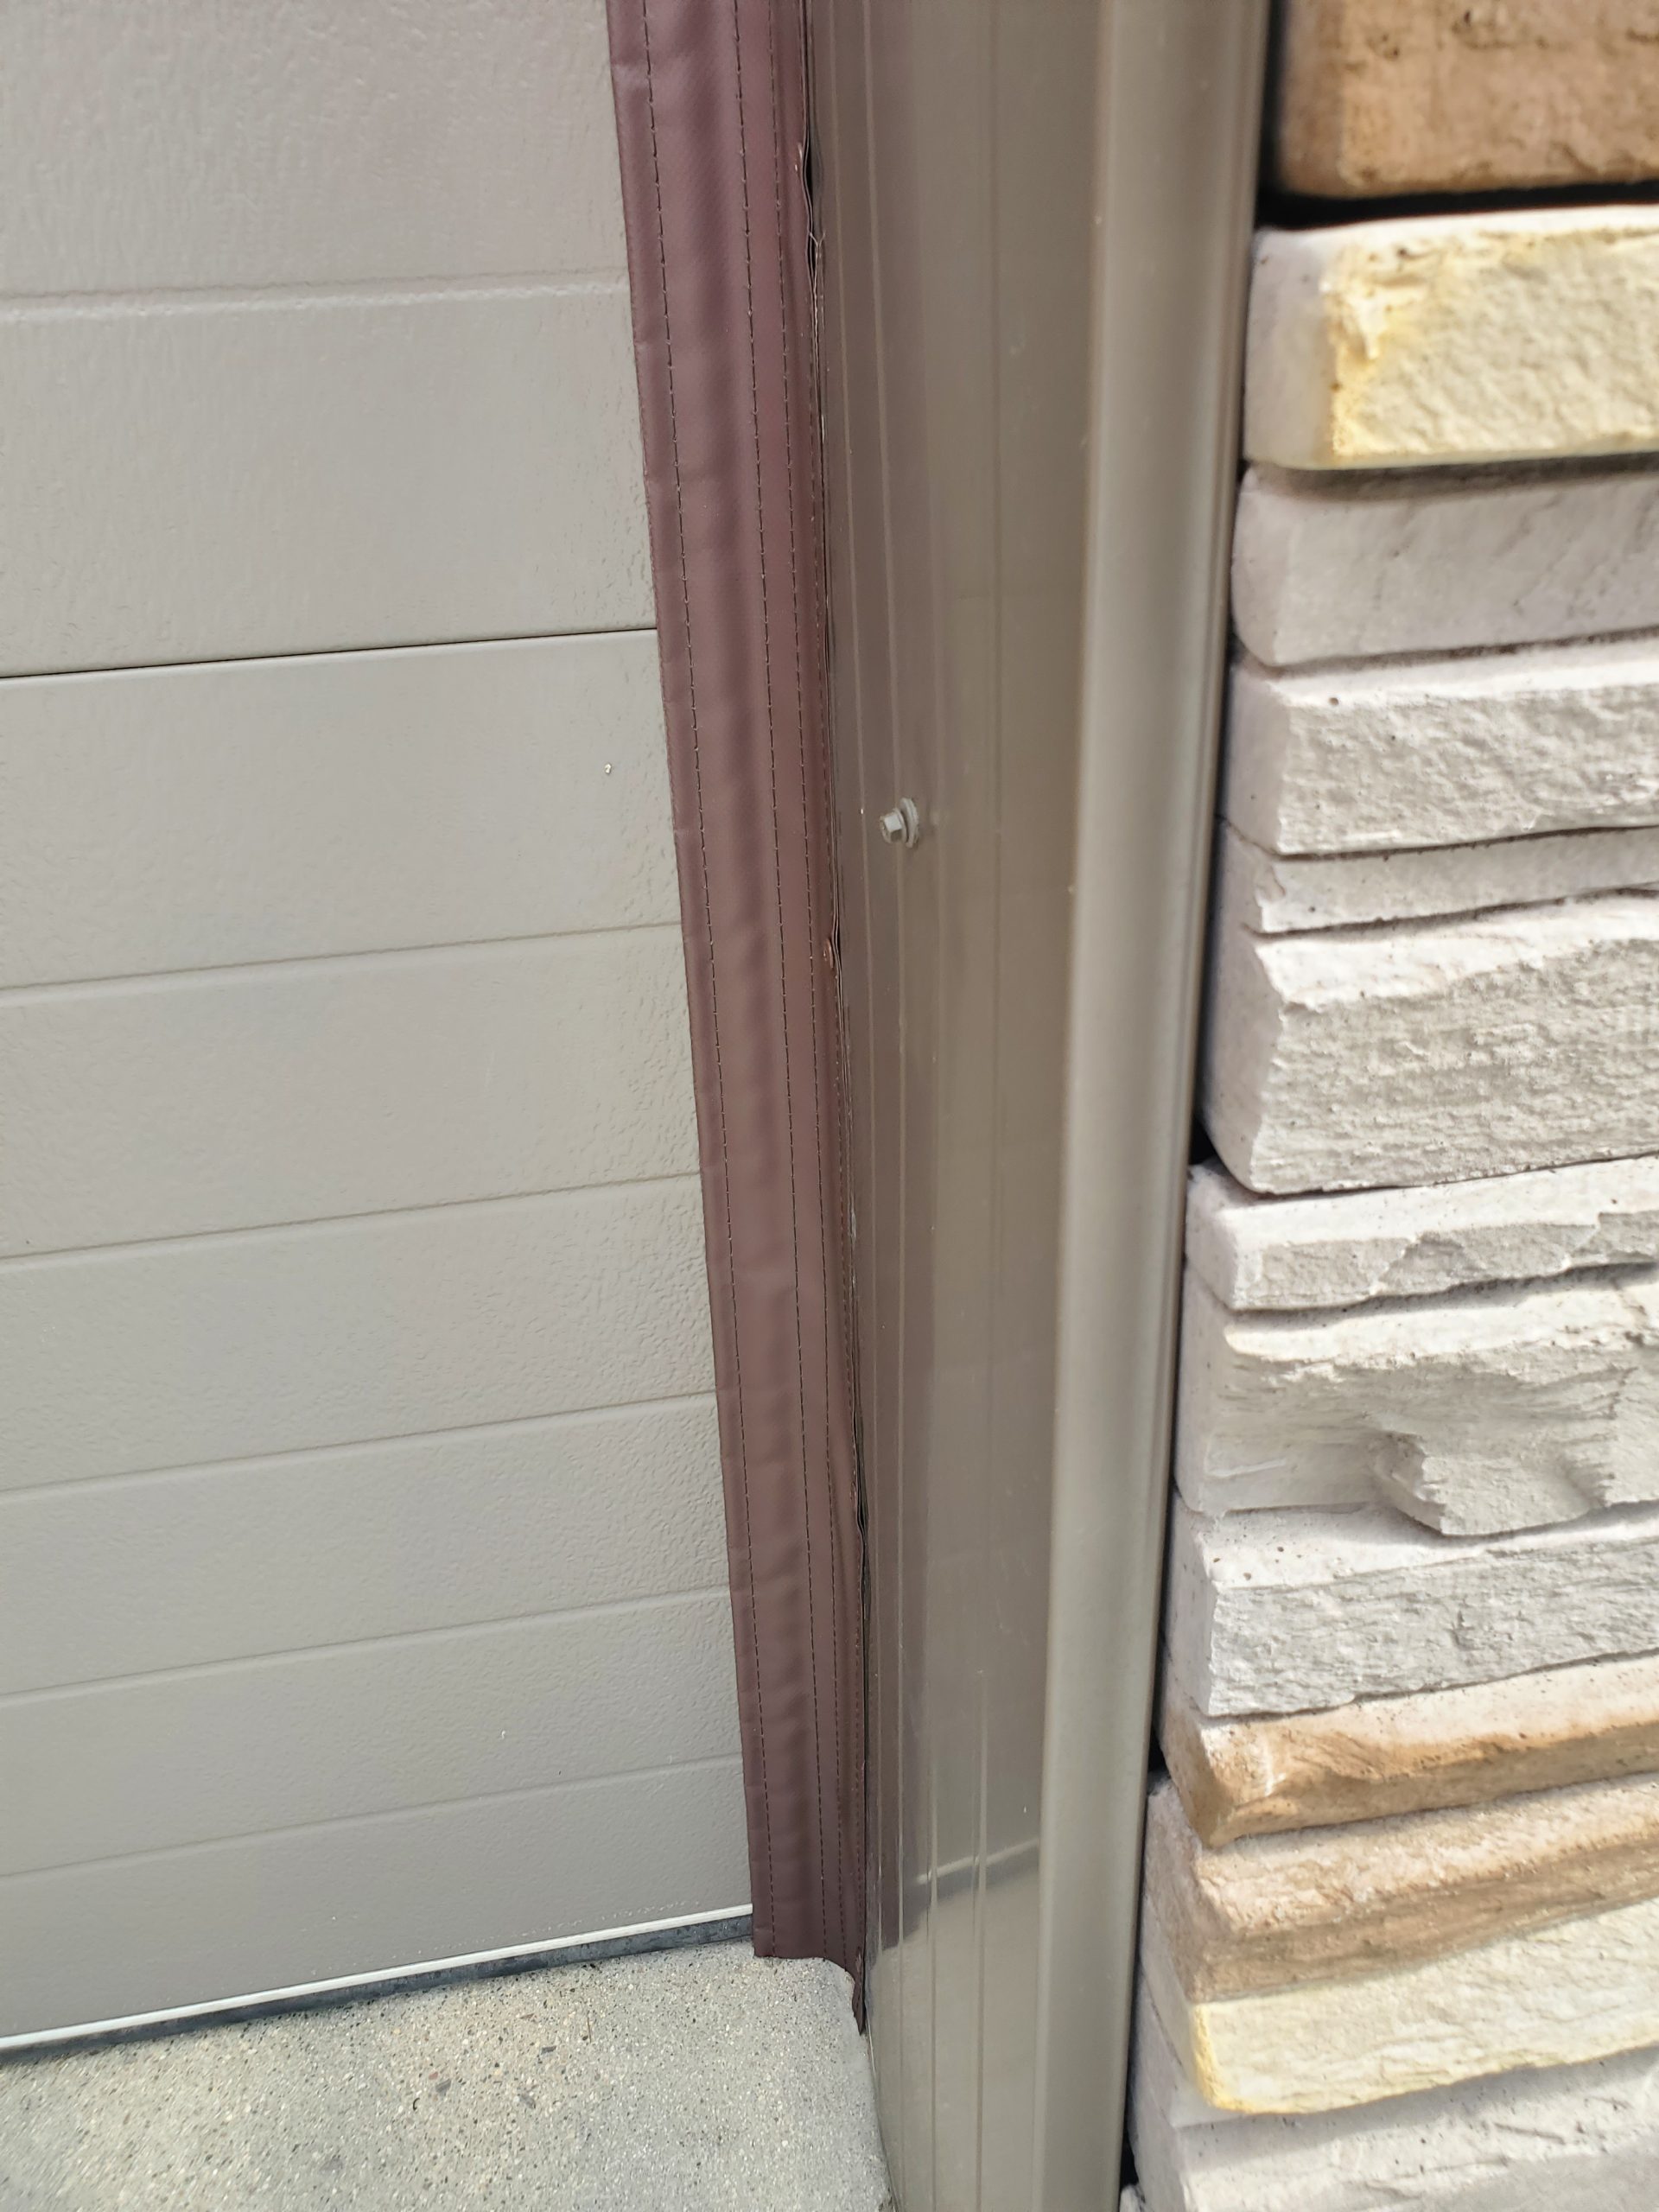
- Side and top seal – Runs along the vertical sides and top edge of the door.
- Threshold seal – Sticks to the garage floor under the door for extra protection.
Each type has its own use, and sometimes you’ll need more than one for full protection.
Why Install Garage Door Weather Stripping?
A well-sealed garage door can make a big difference in your home. Here’s why it’s worth your time:
- Energy savings: Weather stripping keeps outside air out and inside air in. This means your heating or cooling system works less, saving money on energy bills.
- Protects storage: It helps keep out water, rodents, and insects. Your car, tools, and other items stay cleaner and safer.
- Reduces noise: Sealing gaps can make your garage and even your home quieter.
- Increases comfort: Less draft means a more comfortable space, especially if your garage connects directly to your house.
According to the U.S. Department of Energy, proper weather stripping can reduce energy loss by up to 10-15% in some homes.
Choosing The Right Weather Stripping
Not all weather stripping is the same. Choosing the right type for your garage door matters.
Material Types Compared
Here’s a quick look at common materials:
| Material | Durability | Best For | Cost |
|---|---|---|---|
| Vinyl | High | Most climates | Medium |
| Rubber | Very High | Extreme weather | Medium-High |
| Foam | Low | Temporary fixes | Low |
Rubber is often best for very cold or hot climates. Vinyl is durable and flexible, good for most homes. Foam is cheap and easy to install but doesn’t last as long.
Fit And Door Type
Measure your garage door carefully before you buy. Standard residential garage doors are usually 7 or 8 feet tall, but width can vary. Check your door’s brand and style—some seals are made for specific models.
Cost Examples
- Basic vinyl bottom seals: $10–$25 for a standard door
- Heavy-duty rubber threshold kits: $30–$50
- Side/top kits: $15–$40 per set
Most homeowners can fully seal a standard door for under $100.
Tools And Materials Needed
Before starting your garage door weather stripping installation, gather these items:
- Weather stripping (correct length and type)
- Measuring tape
- Pencil or marker
- Scissors or utility knife
- Hammer and nails, or screw gun and screws (some kits use adhesive)
- Cleaning supplies (rag, mild cleaner)
- Ladder (for top seal)
- Safety glasses and gloves
Check your weather stripping kit for any special instructions or extra tools.
Step-by-step Installation Guide
Installing garage door weather stripping is simple if you follow these steps. Here’s a clear guide for beginners:
1. Remove Old Weather Stripping
- Open the garage door.
- Use a pry bar or screwdriver to remove old seals.
- Pull out any nails or screws left behind.
- Clean the area with a rag and mild cleaner. Let it dry.
Tip: Removing all dirt ensures the new seal sticks better and lasts longer.
2. Measure And Cut New Stripping
- Measure the width of the door for the bottom seal.
- Measure each side and the top for side/top seals.
- Mark the weather stripping with a pencil.
- Use scissors or a utility knife to cut pieces to the right length.
Beginner insight: Always cut a little longer than needed—you can trim extra later.
3. Install The Bottom Seal
Most garage doors use a T-style or bulb-style bottom seal.
- Close the door.
- Slide the new seal into the track under the door (for T-style).
- If your door does not have a track, nail or screw the seal in place.
- Make sure the seal sits flat against the ground.
- Trim any extra length.
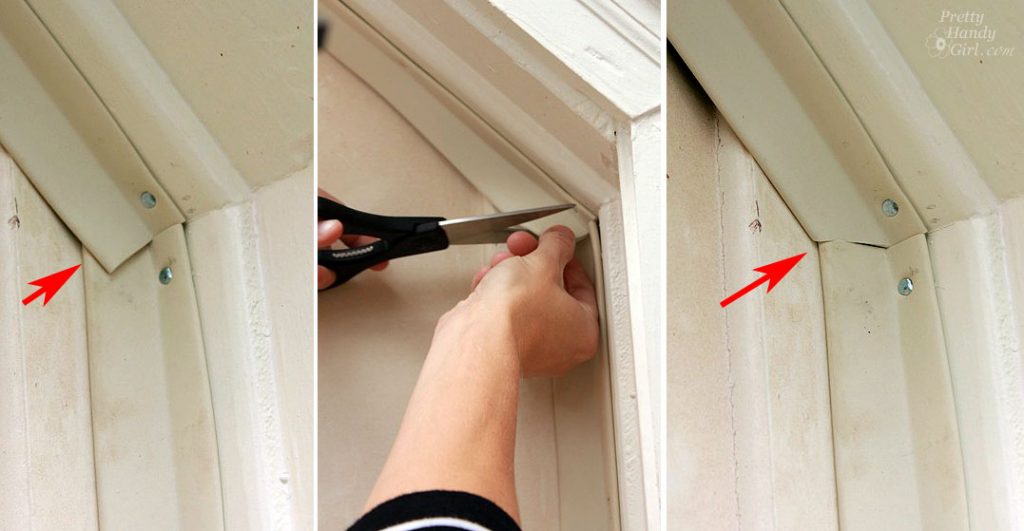
4. Install Side And Top Seals
- Start at one top corner.
- Hold the seal against the door frame, pressing it so it touches the door edge.
- Nail or screw the seal every 8–12 inches.
- Run the seal down both sides, cutting to fit.
- Install the top seal last, overlapping the side pieces for a tight seal.
Tip: For the best seal, push the material firmly but do not crush it.
5. Install A Threshold (optional)
For extra protection, install a threshold seal on the floor.
- Clean the floor where the threshold will go.
- Dry fit the threshold, closing the door to check alignment.
- Mark the position with a pencil.
- Apply adhesive (if included), then press the threshold in place.
- Let it cure as directed before driving over it.
6. Test The Seal
- Close the garage door and check for light or air leaks.
- Adjust or reattach any parts if you see gaps.
- Open and close the door several times to ensure nothing catches.
Common Mistakes To Avoid
Even simple projects can go wrong. Watch for these beginner mistakes:
- Not cleaning the surface: Dirt and oil will make adhesive seals fail quickly.
- Wrong measurements: Always measure twice before cutting.
- Using the wrong material: Foam may seem easy, but it won’t last in high-traffic garages.
- Forgetting the threshold: If you see water marks inside, a threshold may solve the problem.
- Over-tightening fasteners: This can crush the seal, making it less effective.
Maintenance Tips For Long Life
Installing weather stripping is just the first step. To keep it working:
- Inspect seals twice a year for wear or damage.
- Clean seals with mild soap and water—avoid harsh chemicals.
- Replace any section that’s cracked, flat, or missing.
- Keep the garage door track clean so the bottom seal doesn’t get torn.
- In snowy regions, remove ice buildup near the seal to prevent sticking.
With good care, most vinyl or rubber seals last 3–5 years, sometimes longer.
Weather Stripping Vs. Other Garage Sealing Methods
Weather stripping is not the only way to seal a garage. Here’s how it compares to other solutions:
| Method | Ease of Install | Cost | Effectiveness |
|---|---|---|---|
| Weather stripping | Easy | Low | High |
| Expanding foam | Moderate | Low-Medium | Medium |
| Insulated doors | Professional | High | Very High |
| Door sweeps | Easy | Low | Medium |
Weather stripping offers the best balance of cost, ease, and results for most homeowners.
Real-world Example: Quick Upgrade, Big Benefits
Let’s look at a typical example. A homeowner in Chicago installs new rubber weather stripping on their single-car garage door. The materials cost $45 and it took them two hours to finish.
After installation, they noticed:
- The garage stayed 10°F warmer in winter
- Less road salt and dirt blew inside
- No more mice or bugs
They also saw a small drop in their heating bill. This shows how a simple DIY project delivers real value.
When To Replace Weather Stripping
Knowing when to swap out old weather stripping is important. Signs you need new seals:
- Visible cracks, holes, or gaps
- The garage feels drafty or smells musty
- You see water, dust, or pests inside
- The strip is hard, flat, or falling off
If you notice these problems, it’s time for a quick replacement.
Credit: prettyhandygirl.com
Environmental Impact
Using weather stripping is not just good for your home—it’s good for the planet. By stopping drafts, you use less energy for heating and cooling. This reduces your carbon footprint.
Many weather stripping materials are now made from recycled rubber or plastic. When you buy, look for eco-friendly options to make your home even greener.
Professional Installation Vs. Diy
Some homeowners wonder if they should hire a pro. Most basic installations are easy DIY jobs, but you might want help if:
- Your door is very large or heavy
- The frame is damaged or uneven
- You need a custom solution
Professional installation usually costs $150–$300, including materials. For most people, DIY saves money and is just as effective.
Credit: www.snirtstopper.com
Safety Tips
- Always wear gloves when handling metal or rubber strips.
- Use safety glasses if you need to drill or use a hammer.
- If using adhesive, open windows for ventilation.
- Don’t stand on the top step of a ladder.
Frequently Asked Questions
How Often Should I Replace Garage Door Weather Stripping?
Most weather stripping lasts 3–5 years, but check it every year for cracks or gaps. Replace it when you see damage or leaks.
Can I Install Weather Stripping Myself, Or Do I Need A Professional?
Most homeowners can install garage door weather stripping with basic tools. If your door is heavy or the frame is damaged, consider hiring a pro.
What Is The Best Material For Garage Door Weather Stripping?
Rubber is best for extreme climates and heavy use. Vinyl works well for most homes and is easy to install. Foam is less durable and best for quick fixes.
How Do I Know If My Garage Door Needs New Weather Stripping?
Check for drafts, visible light under the door, water inside, or cracks in the seal. If you notice these, it’s time to replace the stripping.
Where Can I Find More Information About Weather Stripping And Energy Savings?
You can find reliable information at the U.S. Department of Energy’s Weather Stripping Guide.
A well-sealed garage keeps your home comfortable, saves money, and protects your belongings. With a little time and the right weather stripping, you can enjoy a cleaner, quieter, and more energy-efficient garage all year round.

Credit: www.youtube.com