If you have a LiftMaster garage door opener, you know how important a working remote is for daily convenience. But what if you need to program a new remote or reprogram an old one? Many homeowners worry this task is difficult. In reality, LiftMaster remote programming is usually simple and can be done in minutes. Learning how to do it yourself can save time, money, and avoid service calls.
This guide explains everything you need to know, step by step. It’s beginner-friendly and covers the most common situations. You’ll also learn how to handle problems, understand different remote models, and avoid mistakes many people make.
Why Program Your Liftmaster Remote?
A garage door remote is more than a small device. It connects you to your home’s security and convenience.
Reasons you might need to program or reprogram your LiftMaster remote:
- You bought a new or replacement remote.
- You moved into a new home.
- Your remote stopped working after a battery change.
- You want to give access to a family member.
- Security reasons (lost/stolen remote).
Programming ensures your remote is synced with your opener and no one else can open your garage without permission.
Understanding Liftmaster Remotes And Openers
Not all remotes or openers are the same. LiftMaster makes several models, and each may use a different programming method.
Here’s a quick overview of the main types you’ll see:
| Remote Model | Typical Frequency | Programming Button Color | Example |
|---|---|---|---|
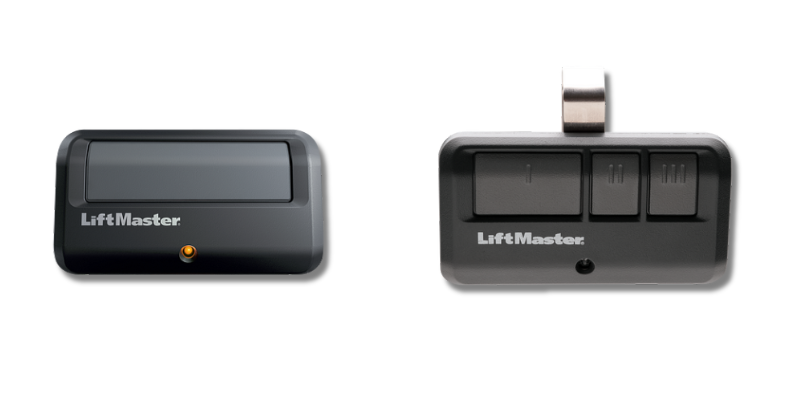
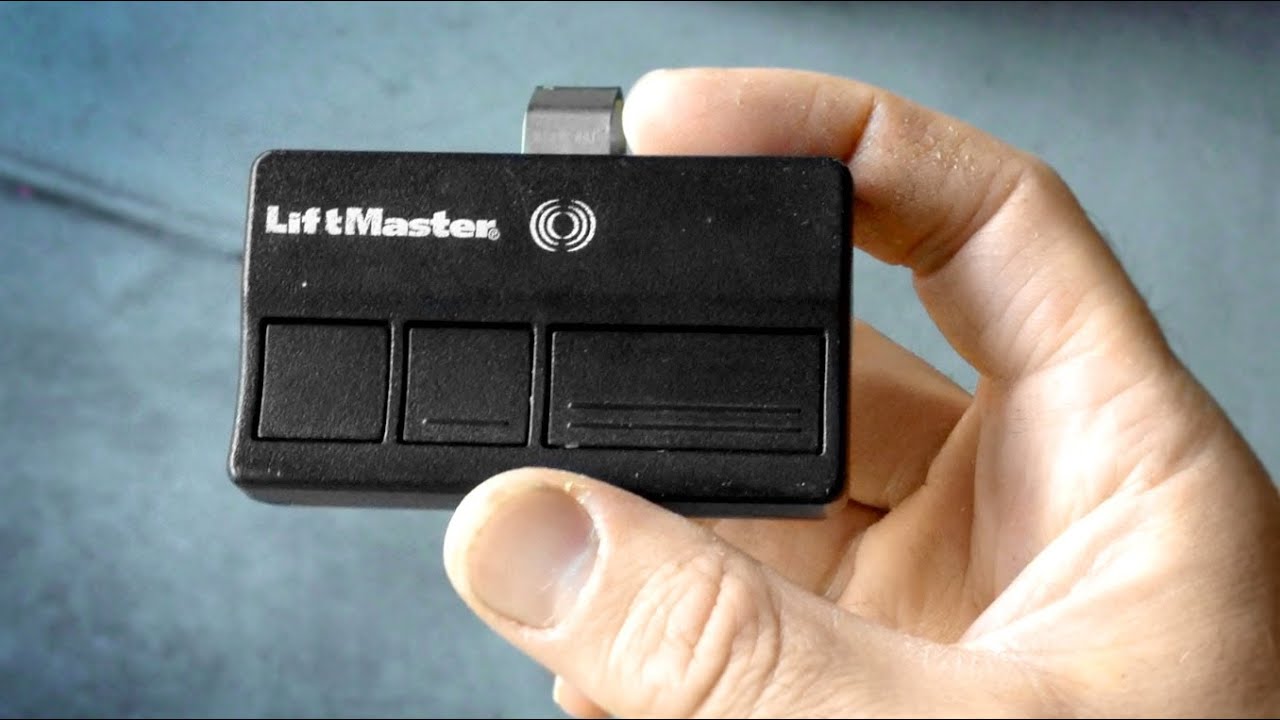
| 371LM, 373LM | 315 MHz | Purple | Single or multi-button |
| 893MAX | 315/390 MHz (dual) | Yellow, purple, red/orange | Universal remote |
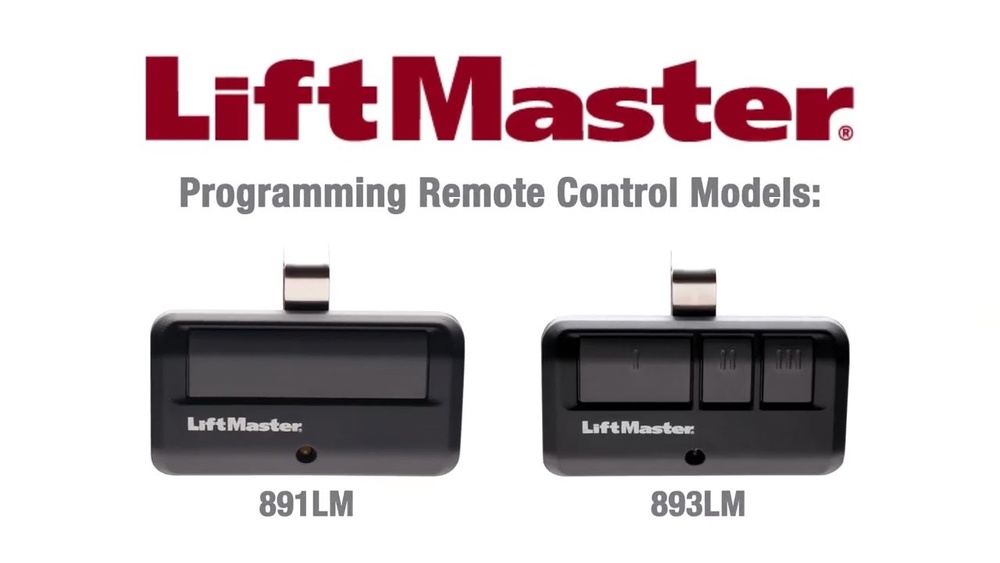
| 893LM | 315 MHz | Purple | 3-button remote |
| 81LM, 971LM | 390 MHz | Red/Orange | Older models |
Tip: The color of the “Learn” button on your opener often tells you which frequency and remote style you need.
How To Find The “learn” Button
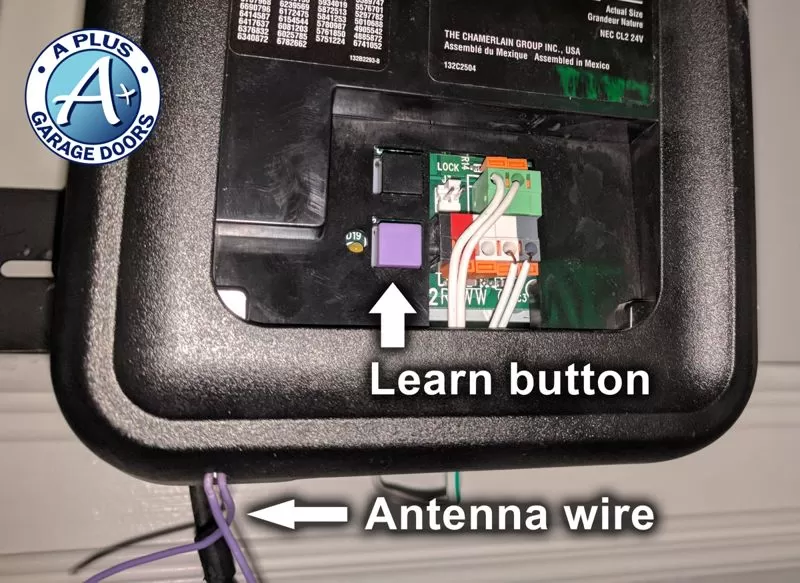
The Learn button is key to programming your remote. It’s located on the garage door opener unit (not the wall button). Here’s how to find it:
- Locate your opener’s ceiling-mounted motor unit.
- Remove the light cover (if needed).
- Look for a small button, usually near the wiring terminals.
- The button is often colored: Yellow, purple, red/orange, or green.
The color tells you the technology and which remotes are compatible.
| Learn Button Color | Years Used | Remote Frequency |
|---|---|---|
| Green | 1993-1997 | 390 MHz |
| Red/Orange | 1997-2005 | 390 MHz |
| Purple | 2005-2011 | 315 MHz |
| Yellow | 2011-present | Security+ 2.0 (310/315/390 MHz) |
Non-obvious insight: Some remotes can work with more than one frequency. Always check your opener’s Learn button color to buy the right remote.
Step-by-step: Programming A Liftmaster Remote
Now, let’s program your remote. The steps are similar for most models, but always check your manual if you’re unsure.
1. Clear The Area
Make sure you’re standing on a stable ladder if needed. Keep pets and children away.
2. Have Your Remote Ready
Know which button you want to program (if your remote has more than one).
- Press the Learn Button
- Press and release the Learn button on your opener.
- The indicator light will glow for 30 seconds (or start blinking).
- Press Remote Button
Within 30 seconds, press and hold the button on your remote you want to use.
5. Wait For Confirmation
The opener light will blink or you’ll hear a click. This means programming was successful.
6. Test The Remote
Press the remote button. The door should open/close.
Extra tip: If you hold the Learn button for too long (about 6 seconds), you’ll erase all programmed remotes. Be careful if you only want to add a new remote.
Programming A Liftmaster Max Remote
The MAX series (like 893MAX) can be used with different openers. Here’s how:
- Press and hold the program button (usually on the back) until the LED turns on.
- Press the button you want to use.
- Choose your opener’s Learn button color (see chart above).
- Follow the specific programming sequence for that color. For example, with yellow Learn buttons, you may need to press the remote button three times.
Always read the MAX remote’s instructions. The sequence changes based on opener age.
Credit: utahgaragedoors.net
Common Problems And Solutions
Even simple tasks can hit a snag. Here are some frequent issues and how to fix them:
- Remote won’t program:
- Check the battery (new batteries often solve the issue).
- Make sure you’re within range (stand under the opener).
- Use the correct button sequence.
- Multiple remotes stopped working:
- You may have cleared the memory. Reprogram each remote.
- Remote works, but wall button doesn’t:
- This is usually a wiring or opener problem, not programming.
- Remote only works sometimes:
- Interference from LED bulbs, Wi-Fi routers, or metal objects near the opener can cause problems. Try replacing nearby bulbs with garage door-compatible LED bulbs.
Beginner mistake: Forgetting to replace old batteries or trying to program from too far away.
Erasing All Remotes (for Security)
If you lose a remote or move into a new home, it’s smart to erase all old remotes. Here’s how:
- Hold the Learn button for about 6-10 seconds until the indicator light turns off.
- All programmed remotes are now erased.
- Program remotes you still have, following the steps above.
Security tip: This keeps previous owners or lost remotes from accessing your garage.
How Many Remotes Can Be Programmed?
Most modern LiftMaster openers can remember up to 5 remote controls and 1 keyless entry keypad at the same time. Older models may have fewer slots.
If you reach the limit:
- The oldest remote will be erased when you add a new one.
- You’ll need to reprogram any remotes that no longer work.
Keyless Entry And Wireless Keypads
LiftMaster also sells wireless keypads that mount outside your garage. Programming these is similar:
- Press the Learn button on your opener.
- Within 30 seconds, enter your chosen PIN on the keypad, then press Enter.
Some keypads require you to set a PIN before programming. Always follow the instructions for your specific model.
Note: Keypads and remotes use the same memory slots on the opener.
Credit: www.doorvana.com
Example: Programming A 893lm Remote
Imagine you just bought a new 893LM remote and your opener has a purple Learn button.
- Press and release the purple Learn button.
- The indicator light glows.
- Within 30 seconds, press and hold the button on your new remote.
- The opener light blinks. Release the button.
- Test the remote. The door opens.
This process is nearly the same for most LiftMaster models from 2005 to 2011.
When To Call A Professional
Most programming can be done by following the steps. But in some cases, you should call a professional:
- Your opener does not respond to any remote, keypad, or wall button.
- The opener is more than 20 years old (parts may be outdated).
- You see damaged wiring or water inside the opener.
- You want to add advanced features (like MyQ smart home integration).
A professional can also help if you need to program multiple remotes for commercial properties.
Safety Tips
Programming is usually safe, but keep these points in mind:
- Never stand under the garage door while testing.
- Use a sturdy ladder.
- Keep children and pets away.
- If the door moves unexpectedly, stop and check for obstacles.
Comparing Liftmaster With Other Brands
How Does Liftmaster Remote Programming Compare To Other Major Brands?
| Brand | Programming Difficulty | Max Remotes | Unique Features |
|---|---|---|---|
| LiftMaster | Easy (few steps) | 5 | Security+ 2.0, MyQ support |
| Chamberlain | Easy (same as LiftMaster) | 3-5 | MyQ, HomeLink compatible |
| Genie | Moderate (PIN for some models) | 7 | Intellicode, Aladdin Connect |
| Craftsman | Easy (similar process) | 5 | Some models use LiftMaster tech |
Insight: LiftMaster and Chamberlain use very similar technology and remotes are often interchangeable.
Advanced Features: Myq Integration
Many newer LiftMaster openers offer MyQ technology, which lets you control your garage door with a smartphone app. To connect your remote and MyQ:
- Download the MyQ app.
- Follow the pairing instructions for your opener model.
- You may need Wi-Fi in your garage.
This adds extra security and convenience. However, MyQ does not replace the need for a physical remote—both can be used together.
For more on MyQ features, see the official LiftMaster MyQ page.
Practical Troubleshooting Tips
Many users get stuck at simple points. Here are some practical tips:
- Replace batteries in all remotes at the same time to avoid confusion.
- If your remote only works up close, check for interference or a weak battery.
- Keep the opener’s antenna hanging down for best range.
- If programming fails, unplug the opener for 1 minute, then try again.
Beginner insight: Some LED bulbs in the opener can cause range issues. Try removing them to see if range improves.
Credit: www.youtube.com
Maintaining Your Liftmaster Remote
Keeping your remote working smoothly is easy:
- Replace the battery every 1-2 years.
- Keep the remote clean and dry.
- Don’t store remotes in hot cars (heat can damage electronics).
- If you lose a remote, erase all codes and reprogram (for security).
Taking a few small steps can prevent problems later.
Frequently Asked Questions
How Do I Know Which Liftmaster Remote To Buy?
Check your opener’s Learn button color and the model number. Match these with the remote’s specifications. If unsure, check the LiftMaster website or ask a dealer.
Can I Program A Universal Remote To My Liftmaster Opener?
Yes, many universal remotes work with LiftMaster openers. Make sure the remote supports your opener’s frequency and technology (Security+ or Security+ 2. 0).
What Should I Do If My Remote Stops Working After Changing The Battery?
Try reprogramming the remote. Sometimes, battery changes reset the code. If that fails, check for battery orientation and try a fresh battery.
How Many Remotes Can I Add To My Liftmaster Opener?
Most models support up to 5 remotes and 1 keypad. If you add more, older remotes may be erased.
Is Liftmaster The Same As Chamberlain?
They are made by the same parent company and use similar technology. In many cases, remotes are interchangeable if they match the frequency and Learn button color.
Programming your LiftMaster remote is a quick and practical skill every homeowner can learn. With clear steps, a little patience, and these troubleshooting tips, you’ll keep your garage secure and convenient for years to come.