Replacing your garage door seal is one of those home maintenance jobs that can make a big difference, but many people put it off. If you notice light, water, dust, or even pests coming in under your garage door, your seal is likely worn out. A new seal helps keep your garage dry, clean, and energy-efficient. Many homeowners think this is a complicated job, but with the right guide, it’s simple—even for beginners. Let’s walk through everything you need to know to replace a garage door seal, from choosing the right materials to getting the job done right the first time.
Why Replace Your Garage Door Seal?
A damaged seal does more than let in cold air. Here’s why you should care:
- Energy savings: Reduces heating and cooling loss.
- Pest control: Keeps out insects, mice, and other small animals.
- Water protection: Stops rain and snow from entering.
- Cleaner garage: Blocks dust, leaves, and debris.
Most garage door seals last 2–5 years before they crack, flatten, or tear. If you see daylight under your door or feel a draft, it’s time to replace the seal.
Types Of Garage Door Seals
Not all seals are the same. Understanding your options helps you pick the right one for your home.
| Seal Type | Best For | Lifespan (avg.) |
|---|---|---|
| Bottom Seal (U-shape, T-shape, Bulb) | Standard residential garages | 2-5 years |
| Threshold Seal | Extra water protection, uneven floors | 3-7 years |
| Weatherstripping (Side/Top) | Drafts, full door coverage | 3-6 years |
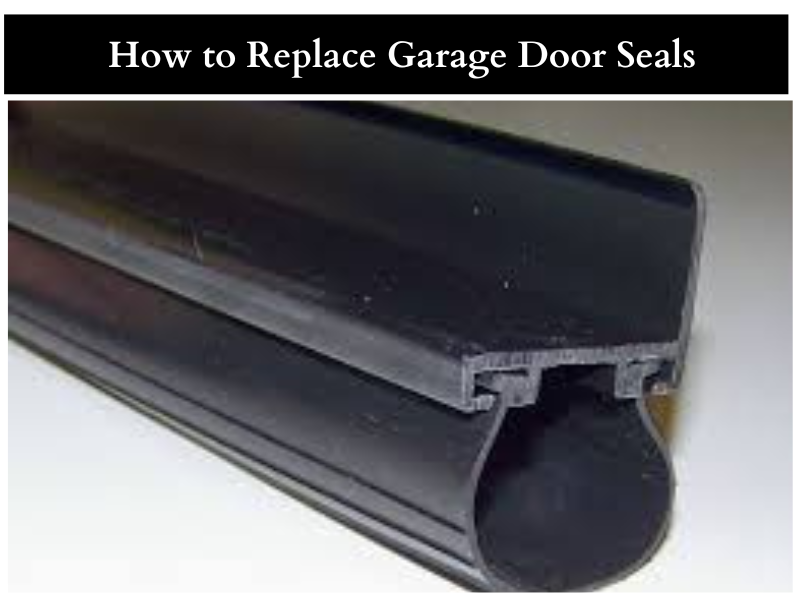
Bottom seals are most common and fit into a track or are nailed to the door. Threshold seals attach to the garage floor for extra defense. Weatherstripping is used for the sides and top.
Pro tip: Always check your garage door type (wood, metal, or vinyl) before buying a seal. Some seals are designed for specific door materials.
Credit: doordoctor.com
Tools And Materials You’ll Need
Having the right tools makes the job faster and easier. Here’s what you need for a standard bottom seal replacement:
- New garage door bottom seal (measure your door’s width)
- Tape measure
- Flathead screwdriver
- Utility knife
- Pliers
- Rubber mallet (optional, for tight fits)
- Cleaning cloth or brush
- Soapy water (for cleaning the track)
- Silicone spray (helps slide the seal in, not required)
If your seal is nailed on (not in a track), you may also need:
- Hammer
- Galvanized nails or screws
- Drill (for screws)
Beginner insight: Most garage doors are 8, 9, 16, or 18 feet wide. Always measure your door before buying a seal. Don’t guess!
How To Remove The Old Garage Door Seal
Before adding a new seal, you have to get rid of the old one. This part is straightforward:
- Open the garage door enough to access the bottom edge.
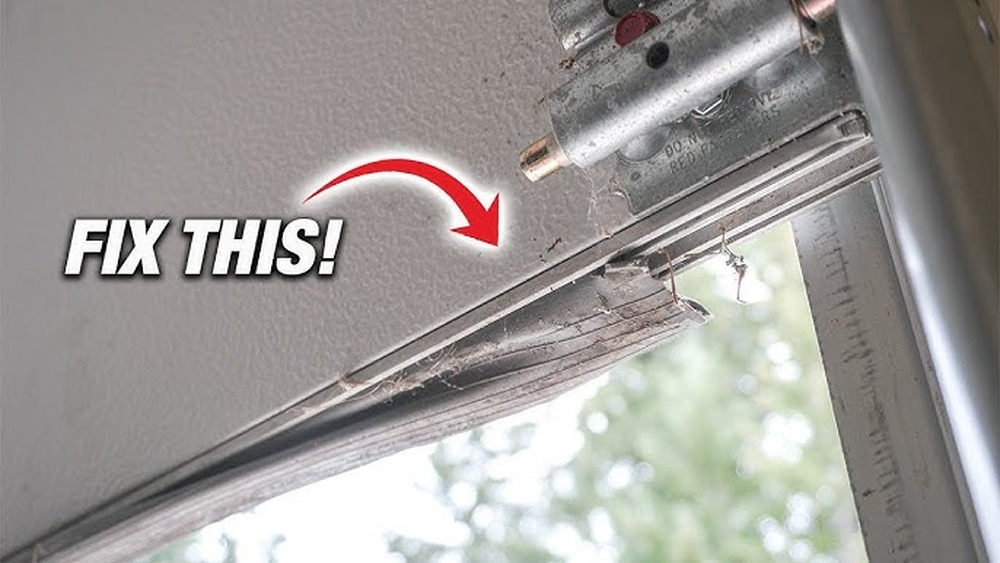
- Locate the ends of the old seal. If it’s in a track, you’ll see it slide into a groove.
- Loosen the seal using a flathead screwdriver. Pry up one end gently.
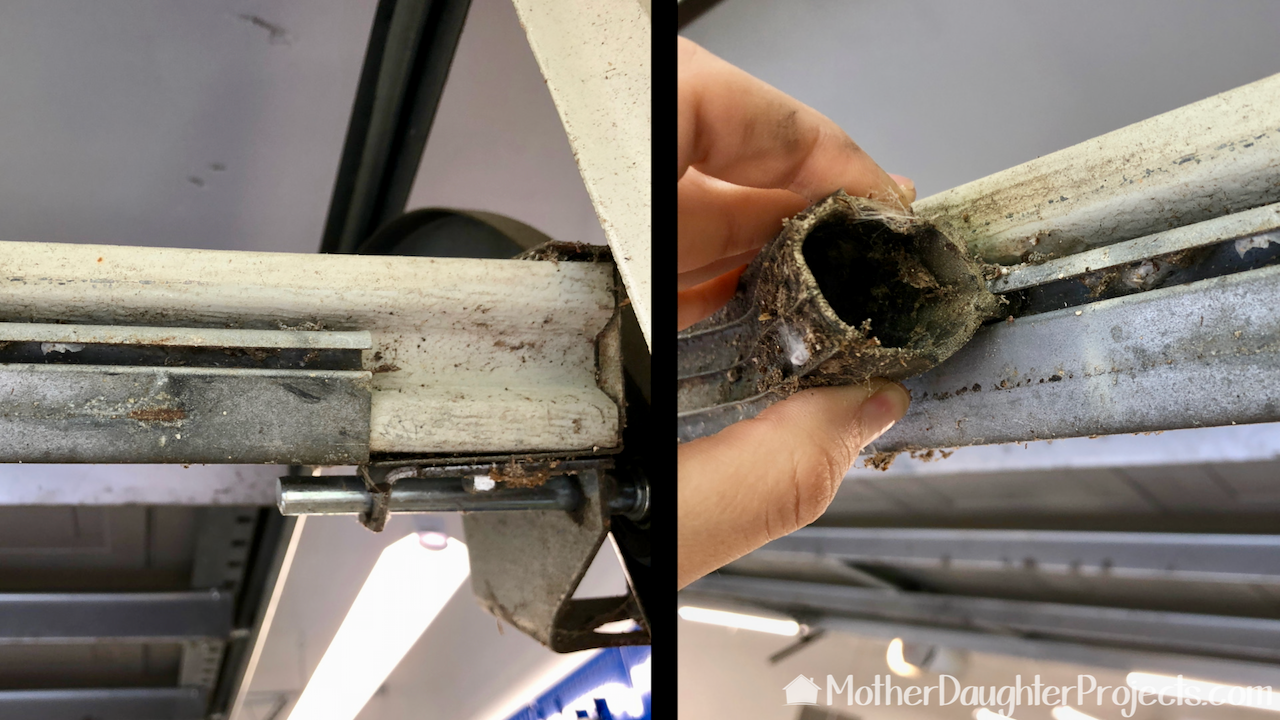
- Pull the seal out. Use pliers if it’s stuck or brittle. For nailed seals, remove nails or screws first.
- Clean the track or door bottom. Use soapy water and a brush to remove dirt. Let it dry completely.
Common mistake: Skipping the cleaning step. Dirt and old glue can stop the new seal from fitting properly.
Choosing The Right Replacement Seal
Picking the correct seal is crucial. Here’s how to get it right:
- Check your door type: Metal doors usually have a track for T-shaped or bulb seals. Wooden doors often use nail-on seals.
- Measure the width and thickness: Most seals come in standard widths (usually 1.5–3 inches).
- Look at the groove shape: Match U-shape, T-shape, or bulb with your current seal or track.
Here’s an example of common seal profiles:
| Profile | Appearance | Fits |
|---|---|---|
| T-Shape | Flat with a single T rib | Double channel tracks |
| U-Shape | Tube with open sides | Single channel or flat bottom |
| Bulb | Round, flexible | Irregular or rough concrete |
Non-obvious tip: If your garage floor is uneven, consider a bulb seal or a threshold seal for better contact and sealing.
Installing The New Garage Door Seal
This is the main event. Take your time, and the results will last for years.
Step 1: Prepare The Door
- Lower the garage door so you can reach the bottom easily.
- Double-check the track is clean and dry.
Step 2: Cut The New Seal
- Measure the width of your garage door.
- Cut the new seal to size with a utility knife.
- Leave an extra inch—better to trim later than cut too short.
Step 3: Insert The Seal
- If your seal slides into a track, spray a little silicone lubricant inside the track.
- Squeeze the seal’s edges and fit them into the track.
- Slide the seal along the full width. Go slowly; don’t pull too hard.
- For nail-on seals, align the seal and nail or screw every 6–12 inches.
Step 4: Trim And Tuck
- Once the seal is in place, trim any excess at the ends.
- Tuck the ends tightly to prevent water leaks.
Step 5: Test The Seal
- Close the garage door.
- Check for gaps by looking for light or feeling for drafts.
- Adjust if needed. The seal should press firmly against the floor but not lift the door.
Non-obvious insight: If your garage door opener suddenly struggles after replacement, the new seal may be too thick. Use a thinner seal or adjust the opener’s force settings.
Common Problems And How To Fix Them
Most issues are simple to solve:
- Seal won’t slide in: Clean the track better, or use silicone spray.
- Seal too long/short: Always cut after a dry fit. Don’t guess the length.
- Still leaking: Check for uneven floors. Add a threshold seal if needed.
- Seal wears out quickly: Choose quality EPDM rubber. Cheaper vinyl seals crack faster in sun and cold.
How Much Does It Cost?
Replacing a garage door seal is budget-friendly:
- DIY cost: $10–$40 for a standard seal
- Pro installation: $60–$120 (labor + materials)
Compared to the cost of water damage or higher energy bills, this small investment saves money.
When To Call A Professional
Some situations need expert help:
- Heavy doors: If you have a double garage door, it can be awkward to lift or hold.
- Custom doors: Non-standard sizes or old wood doors may need custom seals.
- Damaged tracks: Bent or rusted tracks require repair before installing a new seal.
If you’re not sure, most pros offer quick quotes. But for most standard homes, you can DIY in under an hour.
Maintenance Tips For A Long-lasting Seal
A little maintenance goes a long way:
- Check the seal every 6 months for cracks, tears, or flattening.
- Keep the track clean to prevent sticking and tearing.
- Lubricate the seal with silicone spray once a year to keep it flexible.
- Sweep debris away from the garage door regularly.
Beginner tip: Avoid using oil-based lubricants—they break down rubber and shorten seal life.
Credit: www.motherdaughterprojects.com
Real-world Example
Let’s say you have a 16-foot metal garage door with a T-shaped seal. You notice water coming in after heavy rain. You measure the seal and find it’s 3 inches wide. You buy a 16-foot T-shaped EPDM rubber seal for $28.
After removing the old seal, cleaning the track, and sliding in the new one, the leaks stop. The whole job takes 45 minutes, and you save about $90 compared to hiring a pro.
Environmental And Energy Impact
A well-sealed garage door reduces heating and cooling loss. According to the U.S. Department of Energy, up to 30% of a home’s energy loss comes from gaps and leaks around doors and windows. Sealing your garage is a simple way to improve energy efficiency, especially if your garage is attached to your house.
By blocking drafts and moisture, you also reduce mold growth and protect stored items from rust or rot. Small tasks like this add up to a healthier, greener home.

Credit: www.youtube.com
Frequently Asked Questions
How Do I Know Which Garage Door Seal I Need?
Check the bottom of your garage door for a track or groove. Measure the width and thickness of your old seal. If possible, bring the old seal to the hardware store, or look for the door model and check the manufacturer’s website for recommendations.
Can I Replace A Garage Door Seal In Winter?
Yes, but rubber seals are stiffer in cold weather. Let the new seal sit indoors for a few hours to soften before installing. This makes it easier to fit into the track.
How Often Should I Replace My Garage Door Seal?
Most seals last 2–5 years depending on weather and usage. Inspect the seal every six months for cracks, tears, or flattening. Replace if you see light under the door or feel drafts.
What’s The Difference Between A Bottom Seal And A Threshold Seal?
A bottom seal attaches to the door itself, while a threshold seal sticks to the garage floor. Threshold seals are best for very uneven floors or to block heavy rain, but they do not move with the door.
Where Can I Find More Information About Garage Door Maintenance?
The International Door Association provides tips, safety info, and maintenance resources. Visit the IDA Consumer Resources page for details.
Replacing your garage door seal is a simple project that gives big results. With a few tools and a little time, you’ll keep your garage clean, dry, and comfortable all year round. Whether you do it yourself or hire help, a good seal protects your home and saves money.
Now, you’re ready to tackle the job with confidence.