How Many Turns On A Garage Door Spring
A garage door is one of the largest moving parts in a home. It relies on strong springs to lift and lower smoothly. If you ever need to adjust or replace a garage door spring, knowing how many turns it needs is essential for safety and correct operation.
Many homeowners ask, “How many turns on a garage door spring? ” Getting this right can prevent injuries and expensive repairs. In this guide, you’ll learn exactly how to calculate the turns, see real-life examples, and get practical advice for beginners.
Why Garage Door Springs Matter
Garage door springs are not just metal coils. They carry most of the door’s weight. When you open or close the door, the torsion springs twist and release energy, making the door feel much lighter.
- Without springs, the door would be almost impossible to lift.
- Proper tension makes the door easy to move and keeps it balanced.
- Incorrect tension can cause the door to slam shut or not open fully.
Most residential garage doors use torsion springs mounted above the door. Some older models use extension springs along the sides, but torsion springs are more common today.
Types Of Garage Door Springs
Before adjusting, you need to know your spring type:
- Torsion spring: Sits above the door horizontally. It twists to store energy.
- Extension spring: Runs along the sides. It stretches and contracts.
Most homes use torsion springs because they are safer and last longer. They also provide smoother motion.
Torsion Springs Vs. Extension Springs
Here’s a simple comparison for clarity:
| Spring Type | Location | Action | Safety |
|---|---|---|---|
| Torsion Spring | Above door | Twists | Higher |
| Extension Spring | Sides of door | Stretches | Lower |
If you see a long tube above your door, you likely have torsion springs. If springs run along the sides, you have extension springs. This article focuses mainly on torsion springs, as they are the standard for most modern homes.
How To Calculate The Turns On A Garage Door Spring
The number of turns needed depends on the height and weight of your garage door. If you apply too few turns, the door will be heavy and hard to open. If you apply too many, the door may fly up dangerously.
Standard Calculation
Most residential garage doors are 7 feet tall. The basic rule is:
- One full turn per foot of door height
For a 7-foot door, you need 7 turns.
If your door is 8 feet tall, use 8 turns. Always round up for partial feet.
Step-by-step Example
Let’s say you have a standard 7-foot door:
- Measure the door height (in feet).
- Use one full turn for each foot.
- For a 7-foot door, wind the spring 7 times.
If your door is 7. 5 feet, round up to 8 turns.
Why The Number Matters
Correct turns mean:
- The door opens smoothly.
- The door stays balanced at mid-position.
- The opener motor doesn’t strain.
- Safety for you and your family.
Too few turns: Door feels heavy, won’t open fully, opener may fail.
Too many turns: Door may jerk upward, springs wear out faster, risk of injury.
Practical Data Table
Here’s a quick reference for common door sizes:
| Door Height (ft) | Recommended Turns |
|---|---|
| 7 | 7 |
| 8 | 8 |
| 9 | 9 |
| 10 | 10 |
For most homes, stick with 7 turns for a 7-foot door.
How To Wind Garage Door Springs Safely
Winding garage door springs is risky. The springs are under high tension and can cause serious injury if handled incorrectly. Beginners should read this section carefully.
Safety Precautions
- Always wear safety glasses.
- Use winding bars (never screwdrivers).
- Never stand directly in front of the spring.
- Clear the area before starting.
Step-by-step Winding Process
- Disconnect the opener: Unplug the motor and remove any automatic opener.
- Lift the door: Open it fully and secure with clamps.
- Insert winding bar: Place into the winding cone.
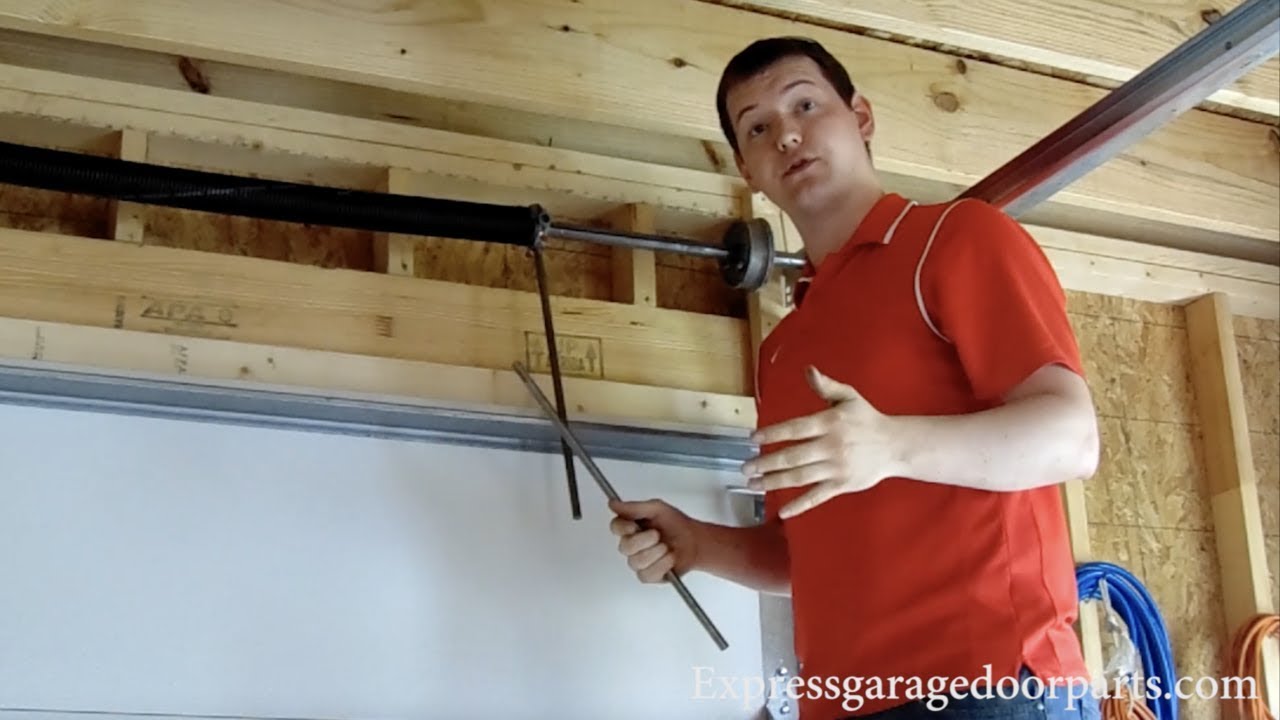
- Turn the spring: Rotate slowly. Each 180-degree turn counts as half a turn.
- Count turns: For a 7-foot door, wind 7 full turns (14 half-turns).
- Lock the spring: Tighten set screws securely.
Example Calculation
If you need 7 turns:
- Place the winding bar in the cone.
- Turn the bar upward until it reaches the top. That’s half a turn.
- Repeat until you reach 7 full turns.
If you lose count, start over. Never guess.
Common Mistakes Beginners Make
- Using the wrong tools (dangerous).
- Not counting turns properly.
- Forgetting safety gear.
- Over-winding or under-winding.
- Not checking balance after adjustment.
Always test the door after winding. Open it halfway and let go. If it stays, the tension is correct. If it moves up or down, adjust by half-turns.
Real-world Examples
Let’s look at practical scenarios:
- Standard 7-foot door
- Needs 7 turns.
- Most US homes fall in this category.
- 8-foot commercial door
- Needs 8 turns.
- Heavier doors may require stronger springs.
- 6-foot custom door
- Needs 6 turns.
- Always round up if unsure.
Data Table: Door Height Vs. Turns Needed
| Door Height | Turns Needed | Common Use |
|---|---|---|
| 6 ft | 6 | Custom homes |
| 7 ft | 7 | Standard homes |
| 8 ft | 8 | Commercial, large homes |
If your door is not standard, always check the manufacturer’s instructions.
Important Factors Affecting Spring Turns
Door height is not the only factor. Here are other things that change the number of turns:
- Door weight: Heavier doors need stronger springs, not more turns.
- Spring size: Larger springs may need fewer turns.
- Number of springs: Double doors often use two springs.
- Cable drum size: Some drums require slightly more or fewer turns.
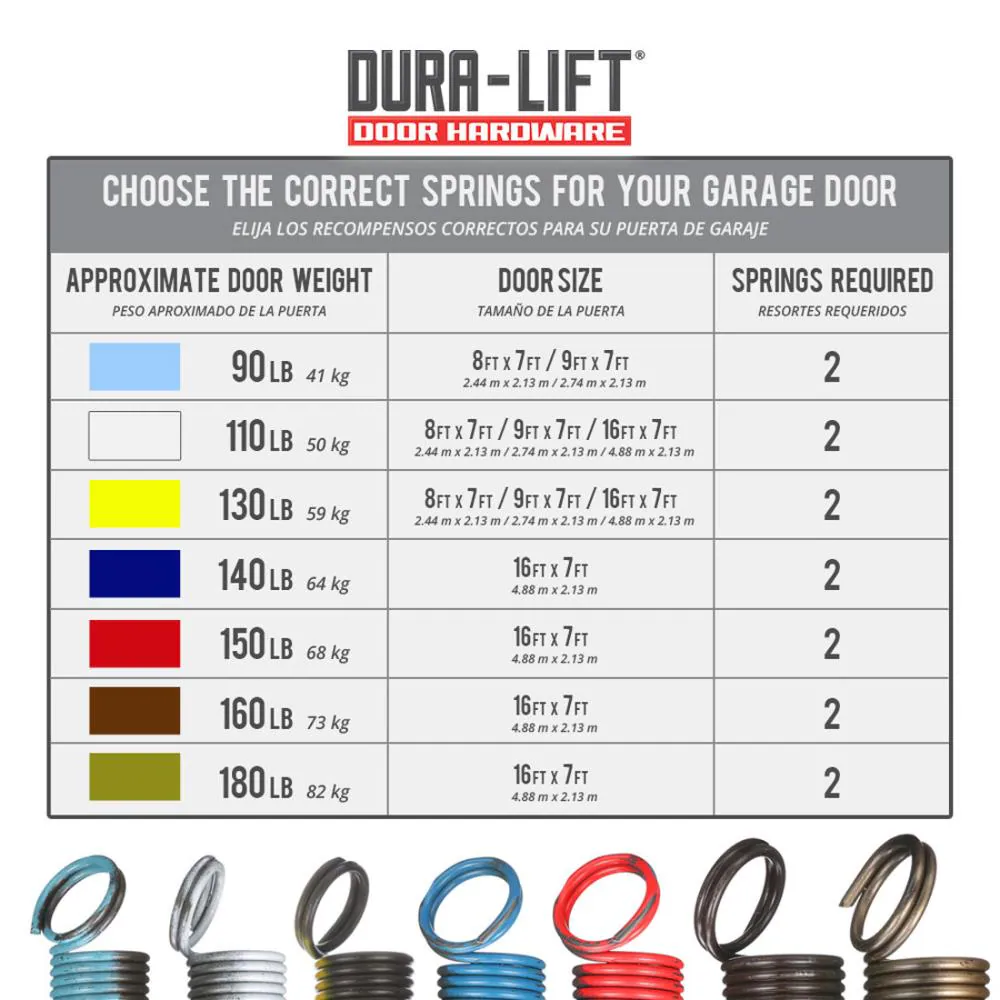
Cable Drum Example
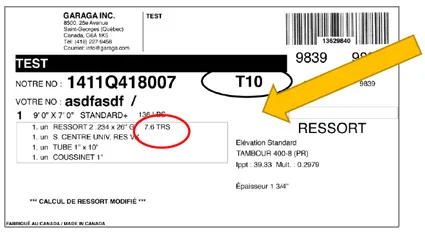
Most residential drums require 7 turns for a 7-foot door. Some specialty drums may need 8 or even 9 turns. Always check markings or instructions.
Credit: www.lopezgaragedoor.com
Signs Your Spring Has Wrong Tension
After winding, observe the door:
- If it stays open halfway, tension is correct.
- If it falls, add more turns.
- If it shoots up, reduce turns.
Door should move smoothly. No jerking or loud noises.
Practical Tips For Beginners
- Mark the shaft before winding to count turns easily.
- Never force the spring. If you feel resistance, stop.
- Lubricate springs after winding to prevent rust.
- If unsure, call a professional.
Many beginners miss the importance of cable drums. If your door uses a different drum, adjust turns as needed. Also, always check balance at the halfway position.
Diy Vs. Professional Help
Adjusting garage door springs is possible for handy homeowners but dangerous for beginners. Consider these points:
- If you feel unsure, hire a pro.
- Professional installers use special tools and know the correct tension.
- Mistakes can cause injury or expensive repairs.
According to the International Door Association, garage door spring accidents are a top cause of home injuries. Always prioritize safety.
Extra Insights Most Beginners Miss
- Half-turn adjustment: Sometimes, the best tension is not a full turn. Try adjusting in half-turns for perfect balance.
- Spring lifespan: Torsion springs typically last 10,000 cycles. If your door feels heavy, the spring may be worn out—not just under-wound.
- Lubrication matters: Lubricate springs after winding to reduce friction and noise.
Many homeowners think more turns equal better performance. In reality, too many turns cause faster wear and dangerous operation. Always use the minimum required turns for your door height.
When To Replace Vs. Adjust Springs
If your spring is rusted, cracked, or has gaps, replace it. Adjusting a damaged spring is unsafe. New springs come with manufacturer instructions—follow them for turns.
If the door feels heavy after adjustment, the spring may be too weak or worn. Replacement is safer than over-winding.
Credit: www.youtube.com
Garage Door Spring Maintenance Tips
- Check springs every six months.
- Listen for squeaks or jerks.
- Lubricate with silicone spray.
- Look for gaps in coils (a sign of wear).
- Never ignore heavy or noisy doors.
A well-maintained spring ensures smooth operation and longer lifespan.
Where To Find More Information
For detailed spring specifications and safety advice, visit the Wayne Dalton Garage Door Blog. This site provides expert tips, diagrams, and troubleshooting guides.
Credit: www.garaga.com
Frequently Asked Questions
How Do I Know If My Spring Has The Correct Number Of Turns?
Open the door halfway and let go. If it stays, tension is correct. If it moves up or down, adjust by half-turns.
Can I Wind Garage Door Springs Myself?
It’s possible, but risky for beginners. Use proper tools and safety gear. If unsure, hire a professional.
What Happens If I Put Too Many Turns On My Spring?
Too many turns make the door fly up quickly. It can damage the door and cause injuries. Reduce turns for safe operation.
How Often Should Springs Be Adjusted Or Replaced?
Springs last about 10,000 cycles (open and close). If your door feels heavy, check tension. Replace springs if they are worn, rusted, or cracked.
What Tools Do I Need To Wind Garage Door Springs?
Use winding bars, safety glasses, and clamps. Never use screwdrivers—they can slip and cause injury.
A garage door works best when its springs are wound just right. By following the steps above, you can keep your door safe, smooth, and reliable. If you’re ever unsure, professional help is the safest choice. Proper maintenance and correct turns will protect your door—and your home—for years to come.