Finishing a garage is a smart way to add value to your home, gain usable space, and make your property more appealing. Many homeowners start with an unfinished garage that feels cold and cluttered. Turning it into a clean, comfortable area can be a challenge, especially if you’re new to DIY projects.
This guide will help you step-by-step, using simple language and practical advice. Whether you want a workshop, extra living space, or just better storage, you’ll find everything you need to transform your garage. Along the way, you’ll learn not just the basic steps, but also some practical tips to avoid frustration and make your project smoother.
Planning Your Garage Finish
Before you start, it’s important to plan. Good planning saves money and time. Think about your goals for the space:
- Workshop: Needs strong lighting and work surfaces.
- Storage: Needs shelves and cabinets.
- Living Area: Needs insulation, heating, and maybe plumbing.
Ask yourself these questions:
- How will you use the finished garage?
- What is your budget?
- Do you need permits?
Most cities require permits if you change electrical, plumbing, or insulation. Check local codes before you begin. If you skip permits, you might face problems later when selling your home or getting insurance.
It’s also smart to measure your garage and make a simple drawing. Mark where you want shelves, benches, or outlets. This helps you buy the right amount of materials and avoid mistakes. If you have a single-car garage, be realistic about how much can fit.
Overcrowding will make the space less useful.
Setting A Realistic Budget
Garage finishing can cost from $1,500 to $10,000, depending on size and features. For a basic finish (drywall, paint, storage), expect $1,500–$3,000. For a luxury conversion (living space), it can be $8,000 or more.
Use this simple cost breakdown:
- Drywall and insulation: $1,000–$2,000
- Flooring: $500–$2,000
- Storage: $300–$1,000
- Lighting and electrical: $500–$2,000
Remember to set aside extra money for surprises. For example, you may find hidden problems like old wiring or leaks. Experts recommend adding 10–15% to your budget for these unexpected costs. If your garage is detached, you might need to spend more on heating or electricity than an attached garage.
If your budget is tight, start with basic steps: insulation, drywall, and paint. You can add storage and nicer flooring later. Some homeowners finish their garage in stages, spreading the cost over several months.
Preparing The Garage
A clean workspace makes the project easier. Clear out everything before you start. Working in a cluttered space can lead to accidents or missed problems.
Cleaning And Inspecting
- Remove all items.
- Sweep and vacuum the floor.
- Check walls and floors for cracks, moisture, or mold.
If you see water damage, fix leaks before you continue. Mold should be removed with a bleach solution. Address foundation cracks with a sealant. Also, check for signs of pests like insects or rodents. If you see droppings or nests, take care of these before sealing walls.
It’s helpful to take “before” photos. These pictures help if you need to show insurance a claim, or just to see your progress.
Addressing Moisture And Ventilation
Garages often have moisture problems. Good ventilation prevents mold and rot.
- Use a dehumidifier if you live in a humid area.
- Check for proper ventilation: Install vents or fans if needed.
If your garage smells musty, it may have hidden moisture. Look for wet spots on the floor, especially after rain. You can tape a piece of plastic to the floor for 24 hours—if water collects underneath, there is a moisture problem.
Don’t block vents when finishing walls. Air flow is important for both safety and comfort. If you plan to park cars inside, make sure exhaust fumes can escape.
Insulating The Garage
Insulation is key for comfort. It keeps the garage warm in winter and cool in summer. It also reduces noise.
Types Of Insulation
There are three main types:
- Fiberglass batts – Easy for beginners, affordable, fits between wall studs.
- Foam board – Good for thin walls, higher R-value per inch.
- Spray foam – Best for tricky spaces, but more expensive.
Here is a simple comparison:
| Type | R-Value (per inch) | Cost (per sq ft) | Difficulty |
|---|---|---|---|
| Fiberglass batts | 2.9–3.8 | $0.40–$0.60 | Easy |
| Foam board | 4.0–6.0 | $0.70–$1.00 | Medium |
| Spray foam | 6.0–7.0 | $1.00–$1.50 | Hard |
If your garage ceiling is open, don’t forget to insulate above as well. Heat rises, so ceiling insulation makes a big difference in comfort.
How To Install Insulation
- Measure wall cavities.
- Cut insulation to fit snugly.
- Wear gloves and a mask (fiberglass can irritate skin).
- Fill all gaps. Seal around windows and doors.
Tip: Don’t compress insulation—it reduces its effectiveness.
Spray foam is best for small gaps or around window frames, but it’s tricky to remove if you make a mistake. Beginners often forget to seal the garage door or the area where the wall meets the floor; use weather-stripping here to avoid drafts.
If you plan to heat or cool the garage, check the R-value (insulation strength) recommended for your climate zone.
Adding Drywall And Wall Finishes
Drywall gives your garage a finished look. It also helps with fire safety.
Drywall Installation Steps
- Measure walls and cut drywall sheets.
- Screw sheets into wall studs (every 12–16 inches).
- Tape seams and cover with joint compound.
- Sand smooth when dry.
Many beginners forget to stagger drywall seams. Staggering increases strength.
Tip: Use moisture-resistant drywall for garages.
If you have high ceilings, you may need help lifting drywall into place. For corners, use metal corner bead for clean, straight edges. Don’t rush the joint compound—let it dry fully before sanding or painting. This avoids cracks later.
Painting And Wall Options
Paint makes the garage feel clean and bright. Choose a semi-gloss or satin finish. These are easier to clean.
Other wall finish options:
- Slatwall panels: Good for hanging tools.
- Plywood: Strong, supports heavy items.
If you want to hang shelves or cabinets, mark the wall studs before covering them up. Take a picture or make a map, so you know where to drill later. For a more modern look, use epoxy paint on the lower half of the wall—it resists scuffs and stains.

Credit: www.familyhandyman.com
Upgrading The Garage Floor
A finished garage floor is safer and easier to clean.
Floor Types
There are several choices:
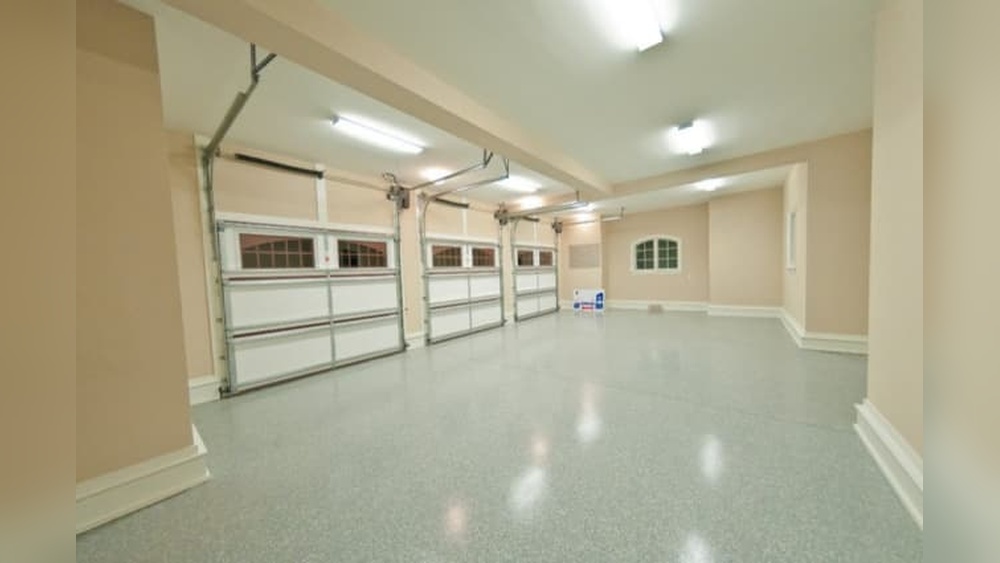
- Epoxy coating: Durable, resists stains, looks shiny.
- Interlocking tiles: Easy to install, colorful.
- Concrete stain or paint: Cheap, improves look.
Here’s a quick comparison:
| Floor Type | Durability | Cost (per sq ft) | Installation |
|---|---|---|---|
| Epoxy | High | $3–$7 | Medium |
| Tiles | Medium | $2–$5 | Easy |
| Paint | Low–Medium | $1–$2 | Easy |
If your garage gets very cold, choose materials that won’t crack or peel. Interlocking tiles can be removed one at a time for cleaning or repair.
How To Apply Epoxy
- Clean and dry floor.
- Fill cracks with concrete filler.
- Mix epoxy and apply with a roller.
- Let dry for 24–48 hours.
Epoxy tip: Avoid applying epoxy in humid weather—it can bubble.
For best results, follow the manufacturer’s directions closely. Some kits include color flakes for a decorative look. If you park cars inside, look for “hot tire” resistance in the product description.
Electrical And Lighting Improvements
Good lighting is important for safety and comfort. Upgrading outlets is also smart.
Lighting Options
- LED ceiling lights: Bright, energy-saving.
- Task lighting: For workbenches.
- Motion sensor lights: For convenience.
Tip: LED lights last up to 25,000 hours and use 75% less energy than old bulbs.
If your garage is dark, add more fixtures rather than just brighter bulbs. Spread light evenly to avoid shadows. Under-cabinet lights are great for hobby areas. If you use power tools, make sure light switches are easy to reach.
Adding Electrical Outlets
If you plan to use tools or appliances, add outlets.
- Place outlets every 6–8 feet.
- Use GFCI outlets for safety (required by code).
You may need a licensed electrician for new wiring. Never overload circuits.
Before drilling, always check for wires or pipes in the wall. Use outlet covers with child safety locks if kids visit the garage. For charging electric tools, consider a USB outlet.

Credit: www.youtube.com
Storage Solutions And Organization
A finished garage should stay tidy. Good storage prevents clutter.
Popular Storage Options
- Wall shelves: Use vertical space.
- Overhead racks: Store large items like bikes.
- Cabinets: Lock up chemicals or valuable tools.
Here is a storage comparison:
| Storage Type | Cost (approx.) | Space Saved | Best For |
|---|---|---|---|
| Wall shelves | $50–$200 | Medium | Boxes, tools |
| Overhead racks | $100–$300 | High | Bikes, bins |
| Cabinets | $150–$500 | Low–Medium | Chemicals, valuables |
Non-obvious insight: Label storage bins clearly. This saves time finding things.
To keep things organized, sort items by how often you use them. Place seasonal items up high, and daily items within easy reach. Pegboards are handy for tools—you can see everything at a glance.
Heating, Cooling, And Comfort
If you’ll spend time in the garage, add climate control.
Heating Options
- Electric heaters: Easy for small garages.
- Infrared heaters: Heat objects, not air.
- Mini-split systems: Expensive, but efficient.
A portable electric heater is usually enough for a single-car garage. For larger spaces or if you plan to use the garage year-round, a mini-split system can heat and cool efficiently with low energy costs. Always keep heaters away from flammable materials.
Cooling Options
- Fans: Cheap, move air.
- Portable AC units: Good for summer.
- Insulation: Keeps garage cool naturally.
Example: An insulated garage with a small electric heater stays comfortable in winter, even in cold states.
If you live in a hot climate, add window shades or reflective film to reduce heat from sunlight. Always check that your garage door is sealed to keep cold or hot air from escaping.

Credit: www.reddit.com
Finishing Touches
Small details make your garage feel complete.
- Paint doors and trim for a polished look.
- Add weather stripping to doors for energy savings.
- Hang hooks for coats or sports gear.
- Install a smart garage door opener for convenience.
Non-obvious tip: Use light colors for walls and floors. This makes the garage feel bigger and brighter.
Consider adding a floor mat by the door to catch dirt and water. If you use the garage as a workshop, install a fire extinguisher and first aid kit nearby.
Common Beginner Mistakes
Many beginners make the same errors. Avoid these:
- Skipping insulation—leads to cold, damp garage.
- Using regular drywall—should use moisture-resistant.
- Overloading circuits—can cause fire risk.
- Forgetting permits—risk fines and delays.
Practical advice: Double-check measurements before cutting materials.
Another common mistake is storing flammable liquids near heaters or electrical outlets. Always read safety warnings on your materials and tools. Take your time with each step; rushing leads to more repairs later.
Benefits Of A Finished Garage
A finished garage improves your home in many ways:
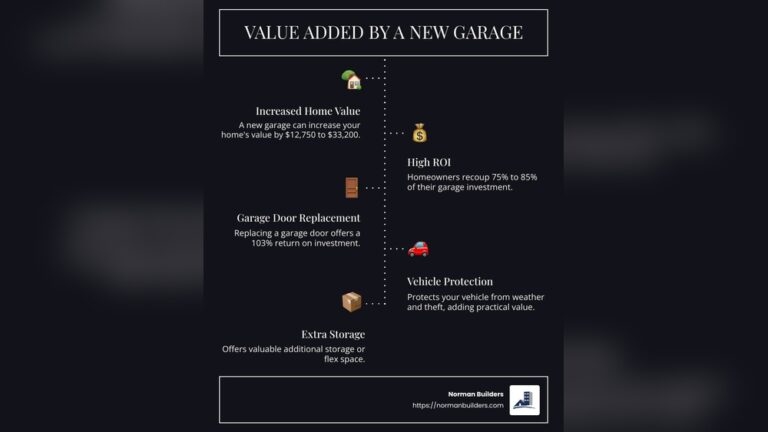
- Increases property value—up to 10% in some markets.
- Adds usable space for hobbies or storage.
- Creates a safer, cleaner environment.
- Makes your home more attractive to buyers.
According to the National Association of Realtors, finished garages are among the top features buyers want (NAR Research).
A finished garage also means less dust and fewer pests. You’ll spend less time searching for items and more time enjoying your space. If you ever sell your home, a neat garage leaves a strong impression.
Frequently Asked Questions
How Much Does It Cost To Finish A Garage?
Costs range from $1,500 for basic finishes to $10,000 for high-end conversions. Most homeowners spend around $3,000–$5,000 for drywall, paint, storage, and lighting.
Do I Need A Permit To Finish My Garage?
Yes, if you add insulation, change electrical wiring, or convert to living space. Always check local building codes before starting.
Can I Finish My Garage Myself?
Yes, many steps are DIY-friendly: cleaning, painting, storage. For electrical and plumbing, hire a licensed professional.
What Is The Best Insulation For Garages?
Fiberglass batts are easiest for beginners. For thin walls or better performance, use foam board or spray foam.
How Long Does It Take To Finish A Garage?
Most projects take 2–4 weeks. Cleaning and prepping: 2–3 days. Insulation and drywall: 3–5 days. Flooring and painting: 2–4 days. Storage and finishing touches: 1–2 days.
Finishing your garage is a rewarding project. With careful planning and smart choices, you can create a space that’s clean, comfortable, and adds real value to your home. Start simple, focus on each step, and enjoy your new garage for years to come.
If you ever feel stuck, remember that even small improvements make a big difference over time.