Programming a garage remote can sometimes feel confusing, especially if your opener does not have a Learn button. Most online guides focus on using the Learn button, but many older or less common garage systems use different methods. If you’ve lost your manual, or your system looks different, you’re not alone. With the right steps, you can often program your remote successfully—even without that button. This article explains how, using clear language, practical advice, and easy examples.
Why Some Garage Openers Do Not Have A Learn Button
Not all garage door openers are the same. Many brands and models made before the mid-1990s use different technology. Instead of a Learn button, these openers use dip switches or other manual programming techniques. Here’s why:
- Older technology: Before rolling code systems, remotes used fixed codes set by small switches.
- Brand variations: Some brands, like older Genie, Chamberlain, or Craftsman models, used unique programming methods.
- Security reasons: Fixed code systems are less secure but were standard before security codes became common.
Understanding your garage opener type is the first important step.
Identifying Your Garage Door Opener Type
Before you start, you need to know which kind of system you have. Look for these clues:
- Dip switches: Small toggle switches inside the motor unit or remote.
- Wired wall controls: Some systems require you to program the remote using the wall button.
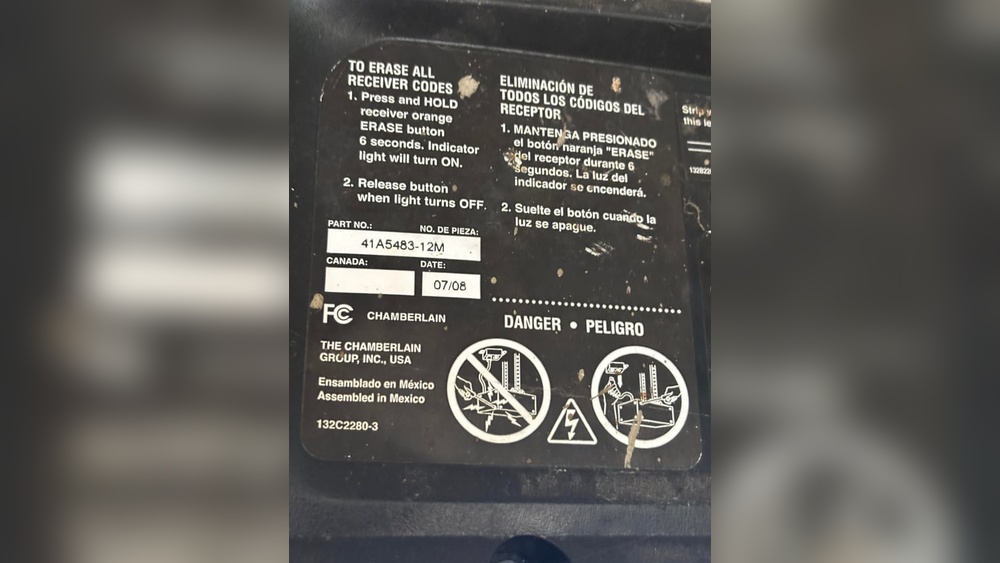
- Model number: Check the label on your motor unit and remote. Search online for the manual if you’re unsure.
Here’s a quick comparison of common garage opener programming methods:
| Opener Type | Programming Method | Common Brands | Security Level |
|---|---|---|---|
| Dip Switch | Manual switch matching | Genie, Chamberlain, Linear | Low |
| Learn Button | Button press sequence | LiftMaster, Craftsman, Chamberlain (new) | Medium/High |
| Wall Console | Button sequence at wall control | Genie, Overhead Door | Medium |
If you see a row of small switches, you have a dip switch system. If your wall button is digital, there may be a programming sequence using the wall control.
How Dip Switch Garage Remotes Work
Dip switches are tiny levers inside your remote and opener. They create a unique code to match your remote to your garage. You must set the switches in the remote to match those in the opener. Here’s how dip switches work:
- Each switch is either up or down.
- Most remotes have 8, 9, or 12 switches.
- The pattern creates a specific radio code.
- Both the remote and opener must have the same pattern to work.
This method is simple, but not as secure as modern rolling code systems.
Step-by-step: Programming A Garage Remote Without A Learn Button
Let’s walk through how to program your garage remote if your opener does not have a Learn button.
1. Open The Garage Door Opener And Remote
- Unplug the opener for safety.
- Use a screwdriver to open the motor unit’s cover.
- Find the row of dip switches inside the opener.
- Open your remote’s battery cover to find its dip switches.
2. Copy The Dip Switch Pattern
- Carefully look at the dip switches in your opener.
- Write down the pattern: “up, down, up, up…” or use a photo.
- Set the remote’s dip switches to match exactly.
- Use a small tool like a pen tip or tweezers to move the switches.
- Double-check the pattern—one wrong switch will stop it from working.
3. Test The Remote
- Plug in the opener again.
- Stand a few feet away, press the remote button.
- The garage door should open or close.
If it works, you’re done. If not, check the switches again or replace the battery.
4. Troubleshooting Tips
- Make sure both the opener and remote use the same frequency (usually written on the remote).
- Check for corrosion or dirt on the dip switches.
- Try a new battery in the remote.
- Test at a closer range to rule out interference.
Programming Using Wall Console (no Learn Button)
Some openers allow you to program remotes using a wall control panel. Here’s a common process:
- Stand near the wall button inside your garage.
- Hold the “Program” or “Set” button on the wall control (sometimes a small recessed button).
- While holding, press the button on your new remote until the opener light blinks or you hear a click.
- Release both buttons. Test the remote.
This method varies by brand and model. Always check your opener’s model number and look for an online manual if you’re unsure.
Example: Genie Wall Console Programming
Some Genie garage openers use a wall console for programming:
- Press and hold the “Program” button on the wall console until the indicator light blinks.
- While holding, press the button on your remote.
- Wait for the opener’s lights to blink, then release both buttons.
- Test the remote.
If the process fails, repeat the steps slowly. Timing matters.
What If You Have No Manual Or Information?
Many users find themselves with a remote but no manual, and the opener’s label may be faded. Here’s what you can do:
- Search the opener’s brand and model number online.
- Visit forums or the manufacturer’s website for guides.
- Ask a local garage door technician for advice.
- Consider buying a universal remote (see next section).
Universal Garage Remotes Without Learn Button
Universal remotes can often work with older openers, even without a Learn button. These remotes come with dip switches or special programming options.
- Read the packaging to confirm compatibility with your opener’s brand and frequency.
- Set the dip switches on the universal remote to match your opener’s pattern.
- Some universal remotes let you select a brand and enter a code.
Here’s a quick look at how universal remotes compare:
| Remote Type | Programming Method | Compatibility | Price Range |
|---|---|---|---|
| Original Remote | Dip switch or brand-specific | High (single brand) | $20-50 |
| Universal Remote | Dip switch/brand code | Medium/High (multi-brand) | $15-35 |
Universal remotes are a good option if you can’t find your opener’s original remote.
Common Problems And Solutions
Programming without a Learn button is not always smooth. Here are some common issues and how to solve them:
- Remote doesn’t work: Double-check the dip switch pattern. One switch in the wrong position will stop it from working.
- Opener does not respond at all: Make sure the remote’s battery is fresh and installed correctly.
- Interference: Other wireless devices can interfere. Test with all other electronics off.
- Wrong frequency: Old openers may use 288 MHz, 310 MHz, 390 MHz, or 433 MHz. The remote and opener must match.

Credit: www.reddit.com
Safety And Security Tips
Older garage door systems with dip switches are less secure. Here’s how to protect your home:
- Change the dip switch pattern from the factory default.
- Never share your pattern with neighbors or workers.
- Upgrade to a rolling code opener if security is a concern.
- Consider adding a keypad entry or smart garage controller for more control.
When To Upgrade Your Garage Door Opener
If your system is over 20 years old, you may want to upgrade. Here’s why:
- Modern openers use rolling codes, which are much more secure.
- New remotes have better range and reliability.
- Parts for older systems can be hard to find.
- Smart openers work with apps and home automation.
Upgrading is a good choice if you want better security or need to replace a failing system.

Credit: www.reddit.com
Real Example: Programming An Old Chamberlain Remote
Let’s say you have a Chamberlain opener from 1992. There’s no Learn button, but you see 9 dip switches inside.
- Open the motor unit and remote.
- Set the 9 dip switches in the remote to match the opener.
- Insert a new battery.
- Test the remote. The door should move.
If it doesn’t work, clean the switches and try again. If it still fails, the remote or opener may be too old or damaged.
Important Tips Beginners Miss
Many first-time users miss these small but important details:
- Remote battery strength: Weak batteries can still power lights but not send a strong enough signal.
- Opener power cycle: Always unplug and plug back in after setting dip switches to reset the receiver.
- Exact match required: Even one dip switch in the wrong position will prevent the remote from working.
These simple steps can save you hours of frustration.
Data: How Common Are Non-learn Button Openers?
According to industry data, about 20% of openers in use today are older models without a Learn button. These are most common in homes built before 1995, but some brands continued using dip switches into the early 2000s. Upgrading these systems is becoming more popular for better security and convenience.
Additional Resources
If you need more detailed information, many manufacturers offer free manuals and guides online. For example, the Wikipedia page on garage door openers gives a good overview of different opener technologies and history.
Credit: mygarageblog.com
Frequently Asked Questions
How Do I Know If My Garage Opener Uses Dip Switches?
Open your garage door opener’s main unit or remote control. If you see a row of small switches (usually 8-12), you have a dip switch system. The switches may be labeled ON/OFF or 1/0.
Can I Program A Universal Remote To Work With My Old Opener?
Yes, if the universal remote supports your opener’s frequency and programming method. Set the dip switches in the universal remote to match your opener. Always check the packaging for compatibility.
What If My Remote And Opener Have Different Numbers Of Dip Switches?
Both devices need to have the same number of switches for a match. If they do not, you need to buy a compatible remote with the correct number of switches.
Is It Safe To Use A Dip Switch Garage Opener?
Dip switch systems are less secure than modern rolling code openers. It is safe for basic use, but consider upgrading for better security. Never share your dip switch pattern with anyone you do not trust.
What Should I Do If My Remote Still Does Not Work?
Double-check the dip switch pattern, replace the battery, and ensure the remote uses the same frequency as the opener. If it still does not work, the remote or opener may be broken or too old. Contact a garage door technician for help.
Programming a garage remote without a Learn button may seem old-fashioned, but with these steps, you can get your system working again. By understanding your opener, matching dip switches, and following practical tips, you can solve the problem yourself—no expert needed.
If all else fails, consider upgrading for better security and peace of mind.