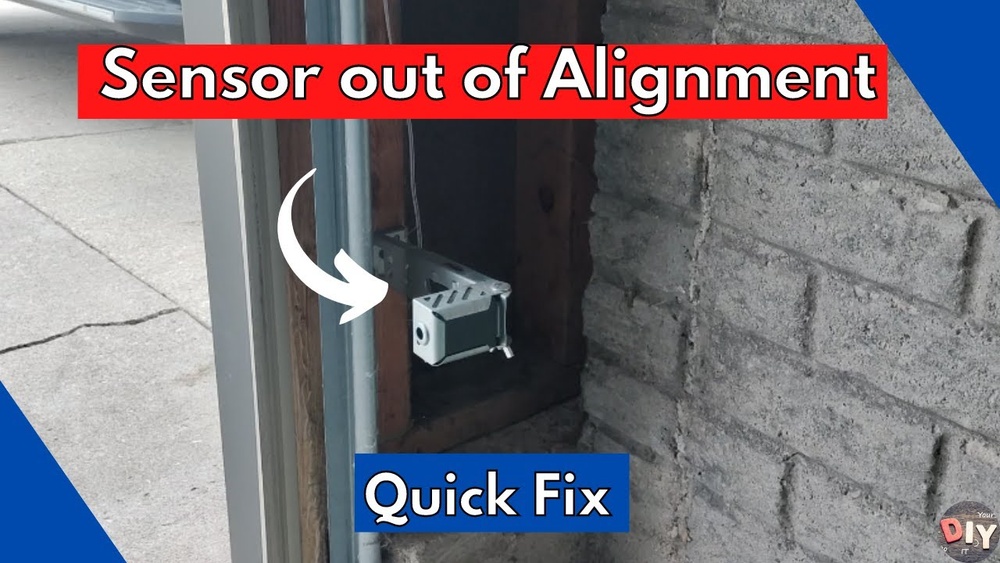
Garage Door Sensor Not Working: Beginner-friendly Troubleshooting And Solutions
A garage door that won’t close or open smoothly is frustrating, especially when you depend on it every day. One common cause is a garage door sensor not working. These sensors are safety devices that stop the door if something is in the way. But when they fail, your garage door might refuse to close or reverse unexpectedly. If you’re a beginner with little technical experience, fixing this problem can feel overwhelming. This guide will help you understand how garage door sensors work, why they fail, and what you can do—step by step—to get your system working again.
How Garage Door Sensors Work
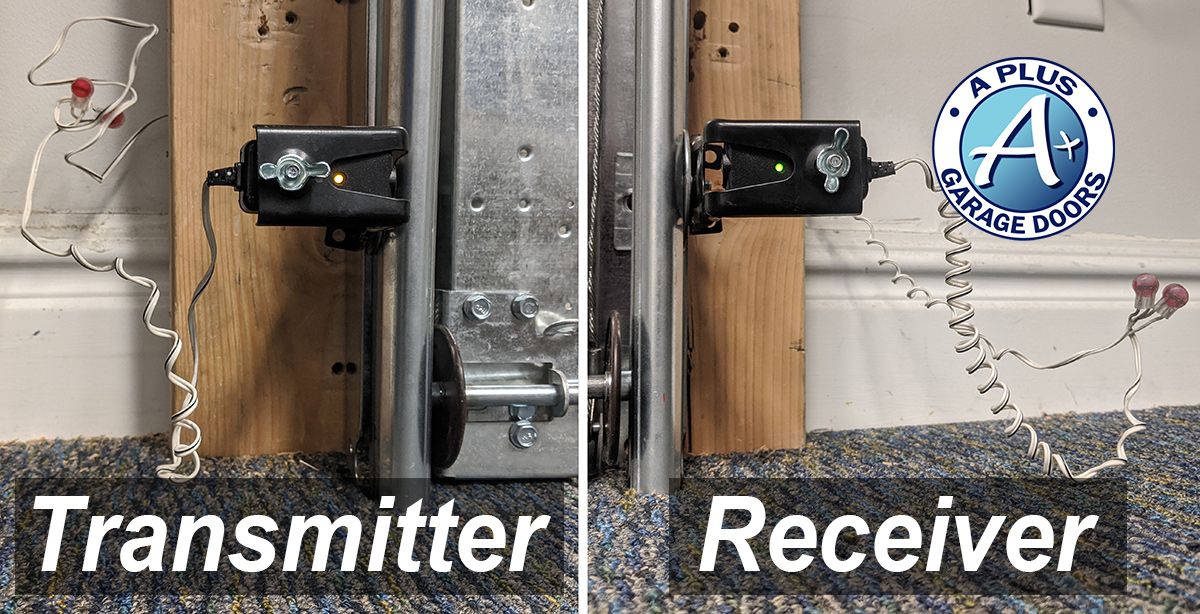
Garage door sensors are usually found near the bottom of each side of your garage door track. Their main job is to prevent the door from closing on objects, pets, or people. Here’s what you need to know:
- Photoelectric eyes: Most sensors use infrared beams. When something blocks this invisible beam, the door won’t close.
- Safety reverse: If the sensor detects an object, the opener reverses the door or stops it from closing.
- LED indicators: Each sensor usually has a light. Green or red LEDs help you see if the sensor is working or blocked.
Example: If your child’s bike is in the doorway, the sensor beam is interrupted and the door will not close.
Common Signs Your Garage Door Sensor Is Not Working
Recognizing the problem helps you act quickly. Look for these typical signs:
- Garage door won’t close: The door starts to close but reverses or stays open.
- Blinking lights: The opener’s light blinks, or the sensor LED flashes instead of staying solid.
- Manual closing needed: You have to hold down the wall button to close the door completely.
- No response: Pressing the remote or wall switch does nothing.
Non-obvious insight: Sometimes, the door will close just fine but won’t open with the remote. This can also be a sensor-related issue if the system is miswired or the opener is confused by signal errors.
Quick Troubleshooting Steps
Start with these simple checks before calling a professional. Most sensor issues are easy to spot and fix.
- Check for Obstructions
- Remove any objects blocking the sensor beam.
- Clean cobwebs, dust, and leaves from the sensor lenses.
- Inspect LED Lights
- Both sensors should show a solid light.
- If one or both lights are off or blinking, there’s a problem.
- Clean the Sensors
- Use a soft cloth to gently wipe the lenses. Even a thin layer of dust can block the beam.
- Check Sensor Alignment
- Both sensors must point directly at each other.
- Gently adjust the sensors until both LEDs are solid.
- Test the Door
- Try closing the door again with the remote or wall button.
- If it works, you’ve solved the problem.
Pro tip: If the door only closes when you hold the wall button, it’s almost always a sensor issue.
Main Causes Of Garage Door Sensor Failure
Understanding what can go wrong helps you prevent future problems. Here are the most common reasons sensors fail:
- Dirt or Debris: Even a small amount can block the infrared beam.
- Misalignment: Sensors get bumped out of place easily.
- Wiring Problems: Damaged or loose wires can cut power to the sensors.
- Sunlight Interference: Direct sun can confuse the sensor’s eye.
- Water Damage: Rain or sprinklers might cause corrosion.
- Physical Damage: A bike, broom, or car may hit and break the sensor.
Practical data: In a survey of garage door repairs, more than 60% of sensor issues were caused by misalignment or dirty lenses.

Credit: spectrumoverheaddoor.com
How To Realign Garage Door Sensors
If cleaning and clearing don’t work, alignment is the next thing to check.
Step-by-step Realignment
- Loosen the wing nuts holding each sensor.
- Move the sensors until both LEDs are solid (not blinking).
- Tighten the nuts gently, making sure sensors don’t move out of position.
- Test the door several times to confirm it works.
Non-obvious insight: Sometimes, garage doors vibrate enough during opening and closing to slowly move sensors out of alignment over weeks or months. Checking alignment every few months prevents sudden failures.
What To Do If Cleaning And Alignment Don’t Work
If your sensors are clean and aligned but still not working, deeper troubleshooting is needed.
Check The Wiring
- Look for disconnected, frayed, or pinched wires near the sensors and the opener.
- If you see exposed copper or broken insulation, the wire should be repaired or replaced.
Test The Power
- Both sensors should have power. If both lights are off, there might be a blown fuse or a wiring problem at the opener.
- Try plugging another device into the same outlet as the opener to confirm power is working.
Swap Sensors (if Possible)
- If you have the same model sensors, switch them to see if the problem follows the sensor or stays on the same side. This helps identify if the sensor itself is bad.
Practical example: If you swap the left and right sensors and the issue moves to the other side, you know the sensor is faulty, not the wiring.
When To Replace Your Garage Door Sensor
Sometimes, sensors just wear out. Here’s how to know when replacement is needed:
- The sensor has physical cracks or water inside.
- The LED never turns on, even with good wiring.
- You’ve tried all the troubleshooting steps without success.
Cost data: Replacement sensors for most brands cost between $15 and $45. Most homeowners can install them with a screwdriver.
How To Replace A Garage Door Sensor
If you need to replace a sensor, follow these basic steps:
- Turn Off Power: Unplug the opener or turn off the circuit breaker.
- Remove Old Sensor: Unscrew it and disconnect the wires.
- Connect New Sensor: Attach wires to the new sensor (match wire colors if possible).
- Mount and Align: Screw in the new sensor and realign.
- Test the System: Plug in the opener and try closing the door.
Pro tip: Always check your garage door opener manual for the correct sensor model. Using the wrong sensor can cause more problems.

Credit: www.youtube.com
Common Mistakes Beginners Make
Knowing what to avoid can save time and money.
- Forcing the door closed: Never try to force the door down if the sensors are blocking it.
- Ignoring blinking lights: Blinking LEDs are not normal; they point to a problem.
- Skipping cleaning: Many people replace sensors when a simple cleaning would fix the issue.
- Wrong wiring: Mixing up the sensor wires can cause them to fail, even if installed correctly.
Preventive Tips For Long-term Sensor Health
To keep your garage door sensors working well:
- Clean sensor lenses every two months.
- Check alignment after any accidental bump or storm.
- Keep the area around sensors clear of tools, bikes, and toys.
- Inspect wiring once a year for signs of wear.
Sensor Brands And Compatibility
Not all sensors fit every opener. Here’s a quick comparison of popular garage door opener brands and their sensor compatibility:
| Brand | Sensor Type | Universal Compatibility |
|---|---|---|
| Chamberlain/LiftMaster | Photoelectric | No (Brand-specific) |
| Genie | Photoelectric | Some universal models |
| Craftsman | Photoelectric | No (Brand-specific) |
Tip: Always check your opener’s model number before buying new sensors.
What If Your Garage Door Sensor Is Still Not Working?
If you’ve tried all the steps above and your garage door sensor is not working, it may be time to call a professional. Some issues, like faulty circuit boards or deep electrical problems, need expert tools and knowledge.
Real-world data: According to the International Door Association, about 20% of garage door sensor repairs require professional help due to electrical or logic board issues.
For more technical details, you can visit the Wikipedia page on garage door openers.
Credit: utahgaragedoors.net
Data: Garage Door Sensor Troubleshooting Outcomes
Here’s a snapshot of common troubleshooting actions and their success rates based on customer reports:
| Action | Success Rate | Time Needed |
|---|---|---|
| Cleaning lenses | 40% | 2 minutes |
| Realigning sensors | 30% | 5 minutes |
| Repairing/replacing wiring | 10% | 15 minutes |
| Replacing sensors | 15% | 20 minutes |
| Calling a professional | 5% | 1-2 hours |
Insight: Most sensor problems are solved without spending money or calling a technician.
Safety Reminder
Never bypass or disable your garage door sensors. They are important for preventing injuries and property damage. Disabling the sensor only to “get by” can lead to accidents, especially with children or pets nearby.
Frequently Asked Questions
Why Does My Garage Door Close Only When I Hold The Wall Button?
This means the opener is in safety override mode. It lets you close the door only by holding the button, which disables the sensors. Usually, this happens because the sensors are dirty, misaligned, or not working.
Can Sunlight Affect Garage Door Sensors?
Yes. Direct sunlight can sometimes confuse the sensor’s eye, especially in the afternoon. If your sensor faces the sun, try shading it or adjusting its angle slightly.
How Do I Know If My Garage Door Sensor Is Broken?
If the LED light on the sensor will not turn on, even with good wiring and alignment, the sensor may be broken. Swapping sensors (left to right) can confirm if the sensor or the wiring is at fault.
Is It Safe To Bypass Garage Door Sensors?
No, it is not safe. Garage door sensors protect against injury and accidents. Never bypass them except during temporary troubleshooting, and restore them right away.
How Often Should I Clean Garage Door Sensors?
Cleaning the sensor lens every 2–3 months is a good habit. Dust, cobwebs, and debris build up faster than most people expect.
A working garage door sensor is key to both safety and convenience. With simple checks, cleaning, and alignment, you can fix most problems yourself. Remember, these sensors are designed to be beginner-friendly. Don’t panic if your garage door sensor is not working—just follow the steps above, and you’ll likely solve the issue in minutes.
If the problem remains after all troubleshooting, calling a pro is the smart move. Regular maintenance keeps your garage door running safely for years.