If your Liftmaster garage door keypad stops working, a dead battery is often the reason. Replacing the battery is simple, but many people feel unsure about the process. This guide will help you complete the Liftmaster keypad battery replacement quickly, even if you are a beginner. You’ll learn to recognize battery issues, choose the right battery, and avoid common mistakes. Let’s make sure your garage door opens smoothly every time.
Why Your Liftmaster Keypad Needs A Battery Replacement
Many Liftmaster keypads are powered by batteries. Over time, these batteries lose power and need to be changed. A weak battery leads to problems such as:
- The keypad not lighting up when you press the buttons
- The garage door not responding to your code
- Needing to press buttons many times before it works
Most batteries last between 1 to 2 years, but cold weather, frequent use, or old keypads can shorten battery life. If you notice any of the problems above, it’s time to check your battery.
Common Types Of Liftmaster Keypad Batteries
Liftmaster keypads use a few common battery types. Knowing which one you need saves you time and frustration. The most widely used batteries are:
- 9V (rectangular battery): Used in older and some current models
- AAA batteries: Some newer wireless keypads use two or more AAA batteries
- CR2032 or CR2450 coin cells: Found in compact or slim keypads
Check your keypad’s manual or open the battery compartment to see the required type. If you’ve lost your manual, you can often find this information on the inside cover of the battery compartment.
Battery Type Comparison
Here’s a quick look at the most common batteries for Liftmaster keypads:
| Battery Type | Typical Lifespan | Common Models |
|---|---|---|
| 9V | 12–24 months | 877LM, 878MAX |
| AAA | 12–18 months | 877MAX |
| CR2032 | 8–12 months | 878MAX, 877LM |
Tip: Choose a high-quality brand for longer life.
Credit: support.chamberlaingroup.com
Signs Your Keypad Battery Needs Changing
Not sure if the battery is the issue? Look for these signs:
- Dim or no backlight when you press keys
- Keypad does not beep or make sounds
- Inconsistent operation (works some days, not others)
- Garage door opens with remote but not with keypad
If your keypad shows these symptoms, replace the battery before calling a technician.
How To Replace Your Liftmaster Keypad Battery (step-by-step)
You don’t need special tools or skills for this job. Here’s a clear, beginner-friendly guide:
- Gather Supplies
- New battery (check type beforehand)
- Small Phillips or flathead screwdriver (if needed)
- Clean cloth (optional)
- Open the Keypad Cover
- Most Liftmaster keypads have a front cover. Flip it open.
- For weatherproof models, you may need to slide or gently pull the keypad from its mounting plate.
- Locate the Battery Compartment
- Look for a small door or panel on the back or bottom of the keypad.
- Remove the screw, if present, and open the compartment.
- Remove the Old Battery
- Carefully take out the old battery.
- Check for corrosion (white or green powder). If present, clean with a dry cloth.
- Insert the New Battery
- Place the new battery in the same position as the old one.
- Ensure the positive (+) and negative (−) ends match the markings.
- Close the Compartment and Keypad
- Secure the battery cover and screw (if needed).
- Snap or slide the keypad back into place.
- Test the Keypad
- Enter your garage code.
- Watch for lights or sounds that confirm the keypad is working.
- Try opening your garage door.
Note: Some keypads reset after battery replacement. If your code does not work, follow the programming steps in your manual.
Example: 877max Keypad Battery Change
The Liftmaster 877MAX uses a 9V battery.
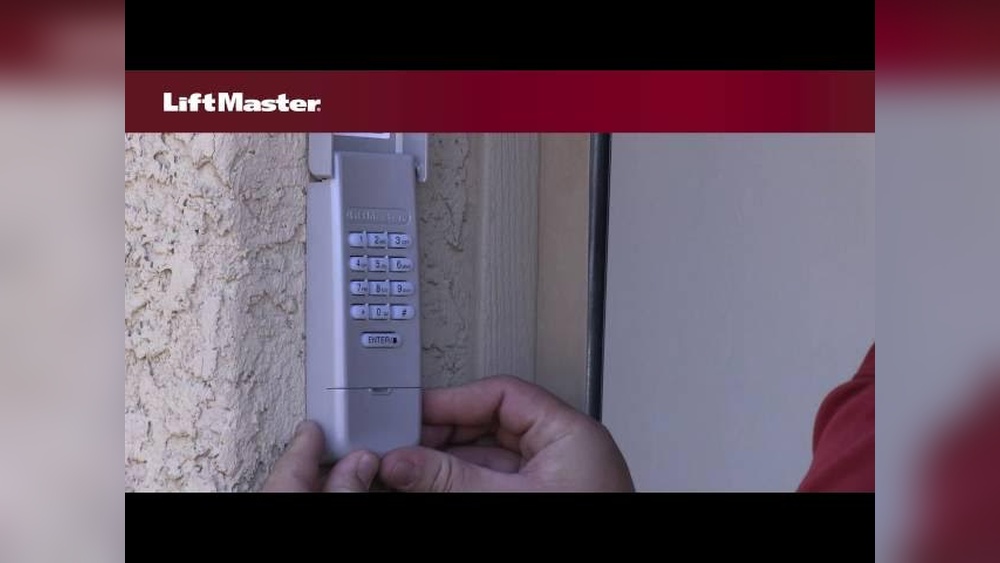
- Open the cover.
- Slide the keypad up and off the wall.
- Open the battery compartment on the back.
- Swap out the 9V battery.
- Reattach the compartment cover.
- Slide the keypad back onto the wall mount.
This process takes less than 5 minutes.
Programming Your Keypad After Battery Replacement
Most Liftmaster keypads will keep your code during a quick battery change. However, on older models, the code may reset if the battery is out for too long.
If your code does not work after you replace the battery:
- Press and hold the ‘Learn’ button on your garage door opener motor until the indicator light turns on (usually 6 seconds).
- Within 30 seconds, enter your desired PIN on the keypad and press the ‘Enter’ button.
- The garage door opener light should blink or you’ll hear a click, confirming the code is accepted.
Always test the keypad after programming.
Common Mistakes And How To Avoid Them
Changing a Liftmaster keypad battery is simple, but mistakes do happen. Here are some pitfalls to watch out for:
- Forgetting the code: If you don’t remember your keypad code and need to reprogram, check the manual or manufacturer’s website for instructions.
- Wrong battery type: Double-check the size and voltage before buying.
- Inserting battery backward: Match the + and − signs inside the compartment.
- Not cleaning corrosion: Corrosion can prevent good contact. Wipe away any buildup before installing the new battery.
- Leaving the compartment open: Always close the battery cover tightly to protect against rain or insects.
By avoiding these mistakes, your keypad will be ready to use right away.

Credit: www.youtube.com
When To Call A Professional
If your keypad still does not work after replacing the battery:
- Check if the garage door opener works with the remote. If yes, the problem is likely the keypad.
- Try reprogramming the keypad.
- Inspect for physical damage, water inside, or broken wires.
If you cannot solve the problem, contact a professional garage door technician or Liftmaster support. Sometimes, keypads just wear out and need replacement after many years.
Advantages Of Timely Battery Replacement
Replacing your keypad battery as soon as you notice problems offers several benefits:
- Security: Prevents being locked out of your garage
- Convenience: No need to carry a remote all the time
- Reliability: Ensures family or guests can access your garage
It’s a small task that saves you hassle and worry later.
How To Extend Your Liftmaster Keypad Battery Life
Want to change batteries less often? Try these simple tips:
- Use premium batteries from reputable brands
- Avoid pressing keys for long periods
- Install the keypad in a location protected from rain and direct sun
- Clean the contacts every 1-2 years to prevent corrosion
- Remove the battery if you won’t use the keypad for months (e.g., long vacation)
Following these practices can help your battery last up to 2 years.
How Liftmaster Keypads Compare To Other Brands
You may wonder how Liftmaster keypads perform compared to other brands like Genie or Chamberlain. Here’s a quick comparison for battery life and ease of replacement.
| Brand | Average Battery Life | Battery Replacement Difficulty |
|---|---|---|
| Liftmaster | 12–24 months | Easy |
| Genie | 8–18 months | Moderate |
| Chamberlain | 12–24 months | Easy |
Liftmaster and Chamberlain are especially beginner-friendly, with easy-to-open battery compartments and clear programming steps.
Real User Example: Solving A Liftmaster Keypad Issue
Maria from Ohio had trouble with her Liftmaster keypad. The garage door would not open, even though the remote worked fine. She checked online and found advice about battery replacement.
- Maria opened her keypad and saw a 9V battery.
- She noticed the old battery had white powder on the contacts.
- After cleaning the contacts and installing a new battery, the keypad worked instantly.
- She was able to avoid a costly service call.
This experience shows how a simple battery swap can fix most keypad problems.
Environmental Impact Of Battery Disposal
When you replace your battery, don’t throw the old one in the trash. Batteries contain chemicals that can harm the environment.
- Take old batteries to a recycling center or a store that accepts used batteries.
- Never burn or crush batteries.
- Store used batteries out of reach of children and pets until you recycle them.
For US recycling locations, you can use the EPA’s battery recycling guide.

Credit: diy.stackexchange.com
Troubleshooting: If Your Keypad Still Doesn’t Work
If a new battery does not fix your keypad:
- Check for stuck keys or visible damage.
- Reprogram the keypad as described earlier.
- Try a second new battery in case the first was faulty.
- Make sure the garage door opener is plugged in and working.
If these steps don’t solve the issue, the keypad may need replacement.
Frequently Asked Questions
How Often Should I Change My Liftmaster Keypad Battery?
Most users need to replace the battery every 12 to 24 months. If you use the keypad often or live in a cold climate, check the battery yearly.
What Battery Does My Liftmaster Keypad Use?
Most use a 9V battery, but some models use AAA batteries or CR2032 coin cells. Open your keypad or read the manual to be sure.
Will I Lose My Code If I Change The Battery?
On most modern keypads, your code stays programmed during battery change. On older models, you might need to reprogram the code if the battery is out for a long time.
What If The Keypad Still Doesn’t Work After Changing The Battery?
Try reprogramming the keypad. Make sure you installed the battery correctly. If it still won’t work, the keypad may be damaged and need replacement.
Can I Use Rechargeable Batteries In My Liftmaster Keypad?
It’s best to use regular alkaline batteries. Rechargeable batteries may not fit well or provide enough voltage for reliable operation.
Replacing your Liftmaster keypad battery is a quick and simple job that most homeowners can do themselves. With the right battery and a few minutes of your time, you’ll restore full access to your garage and avoid unnecessary service calls.
Remember to recycle old batteries and check your keypad regularly to keep it working at its best.