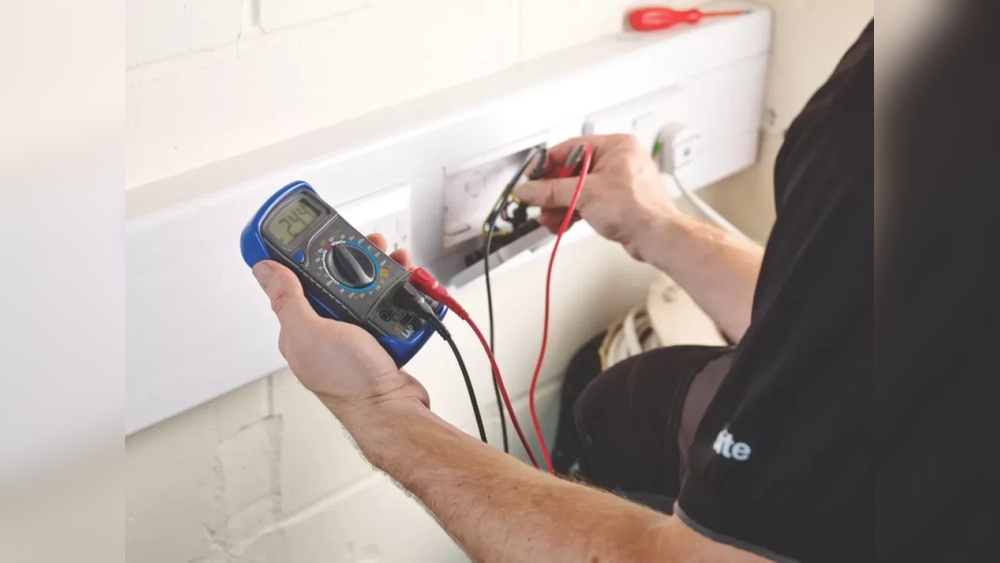
Testing garage door sensors can seem difficult if you have never used a multimeter before. But with a bit of patience and the right steps, you can check these small but important devices yourself. This guide will help you understand garage door sensors, why they sometimes fail, and how to use a multimeter to test them properly. Whether you’re a homeowner, a DIY enthusiast, or just want to save on repair bills, this article will give you clear, step-by-step instructions.
What Are Garage Door Sensors And Why Do They Matter?
Garage door sensors are safety devices found at the bottom of most modern garage doors. Their main job is to stop the door from closing if something or someone is in the way. This prevents accidents and protects your family, pets, and car.
Key facts about garage door sensors:
- Usually installed 4-6 inches above the ground on both sides of the door.
- Work in pairs: One sends an infrared beam, the other receives it.
- If the beam is blocked, the door will not close.
Most problems with garage doors that won’t close are caused by sensor issues. Dust, misalignment, or broken wires can all cause the system to fail. Testing with a multimeter helps you find if the sensor is truly bad or just dirty.
Common Signs Of Faulty Garage Door Sensors
Knowing the symptoms of bad sensors will save time. Here are the most common signs:
- Garage door won’t close or reverses suddenly.
- LED lights on sensors are off, blinking, or dim.
- Door only closes when you hold the wall button.
- “Obstruction” error on the opener’s display.
Not every symptom means the sensor is dead. Sometimes, it’s just dirt or something blocking the beam.

Credit: www.youtube.com
Tools Needed For Testing
Before you start, gather these simple tools:
- Digital multimeter (set to measure resistance and voltage)
- Screwdriver (to open sensor covers)
- Clean cloth (for removing dust)
- Electrical tape (if you find loose wires)
- Small ladder (if your sensors are mounted high)
Choosing a good multimeter is important. Even a basic model is enough for this job.
Quick Comparison: Basic Vs. Advanced Multimeter
Here’s a simple table to compare what you need:
| Feature | Basic Multimeter | Advanced Multimeter |
|---|---|---|
| Measures Voltage | Yes | Yes |
| Measures Resistance | Yes | Yes |
| Auto Range | No | Yes |
| Price | Low | Higher |
A basic multimeter is enough for garage sensor testing.
Safety First: What To Do Before Testing
Many people skip safety steps and end up with shocks or damaged sensors. Here’s what you should do:
- Turn off power to the garage door opener at the breaker panel. This prevents electric shock.
- Make sure the area is dry and your hands are not wet.
- Tell others not to use the garage door while you work.
Following these steps keeps you safe. Never test live wires unless you are trained.
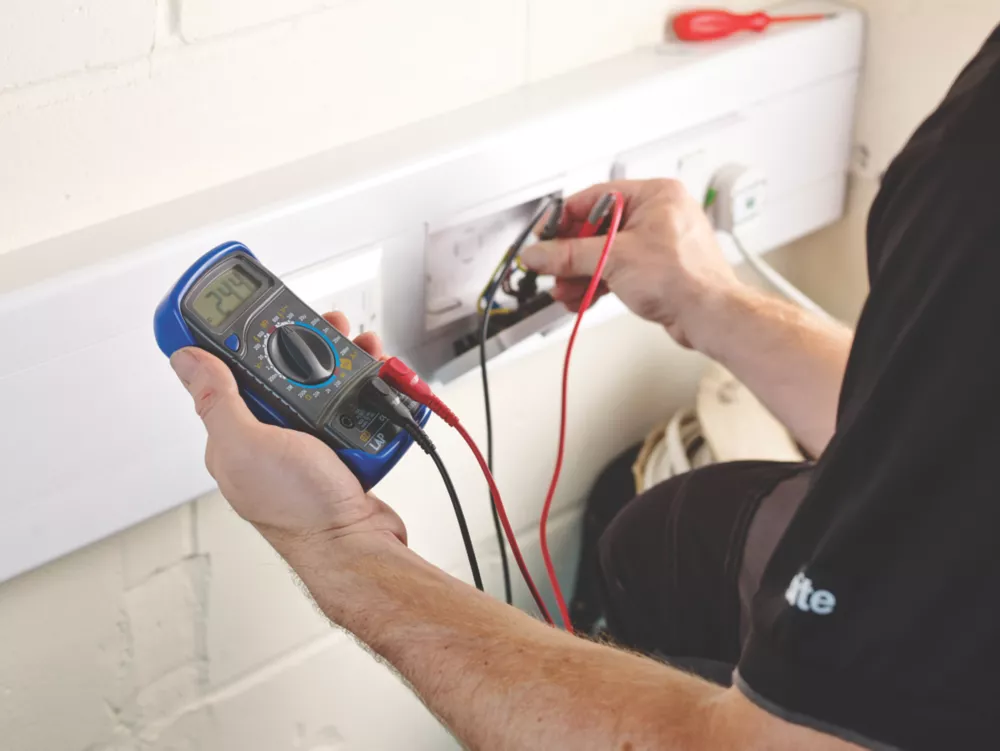
Credit: garage-door-ottawa.com
How Garage Door Sensors Work
Understanding the basics helps you test smarter. Here’s how they function:
- One sensor (the sender) shoots an invisible infrared beam across the door opening.
- The other sensor (the receiver) waits for this beam.
- If the beam is clear, the door will close. If not, the door stops or reverses.
Most sensors use 12V DC power. Damaged wires, dirt, or misalignment can interrupt this.
Step-by-step: How To Test Garage Door Sensors With A Multimeter
Now let’s get to the main steps. Move slowly and check each part.
1. Inspect The Sensors Visually
Before using a multimeter, look for simple problems:
- Are the sensor lenses dirty? Clean gently.
- Are the LED lights on both sensors? One should be green, the other amber (colors may differ by brand).
- Are the sensors aligned? Both should face each other directly.
Beginner tip: If the LED is off, there may be no power, so check wires first.
2. Check The Power Supply
You’ll need to test for voltage at the sensor wires.
- Set your multimeter to measure DC voltage (usually V with a straight line).
- With the garage door opener powered, touch the black lead to the ground wire and the red lead to the power wire (usually black and white wires).
- You should see around 12V DC (range: 10-15V). If not, the opener or wiring may be bad.
Non-obvious insight: Sometimes, the power supply only fails on one side. Test both sensors.
3. Test Sensor Continuity (resistance)
This checks if the sensor’s internal circuit is complete.
- Turn off power to the opener.
- Disconnect the sensor wires from the opener terminals.
- Set your multimeter to resistance mode (Ω symbol).
- Touch the probes to each wire coming from the sensor.
- A good sensor usually shows some resistance (not infinite, not zero).
Typical reading: 1kΩ to 10kΩ (varies by brand).
If you see “OL” (open line) or no change, the sensor is likely broken.
4. Test The Sensor Signal
Some sensors output a small signal to the opener. To check:
- With power on, set your multimeter to DC voltage.
- Place the probes on the signal and ground wires.
- Block the sensor beam with your hand and check if the voltage changes.
Example: The reading might drop from 5V to 1V when the beam is blocked. No change means the sensor isn’t sending a signal.
Non-obvious insight: Some sensors use pulsed signals. Your basic multimeter may not detect these, but you’ll still see a change in voltage.
5. Check Sensor Wiring
Loose or corroded wires are a common cause of sensor failure.
- Inspect the wire connections at both the sensor and opener.
- Wiggle wires gently and watch the LED. Flickering means a bad connection.
- If you find a loose wire, strip the end, twist it tightly, and secure with a wire nut or tape.
Practical Example: Real-life Sensor Testing
Imagine your garage door won’t close, and one sensor LED is off. Here’s what you might do:
- Clean both lenses and realign the sensors.
- LED stays off, so you use your multimeter and find 0V at the sensor wires.
- Trace the wire back to the opener and find a break in the wire.
- After fixing the wire, the LED comes on and the door works.
This process shows how a multimeter helps you find the real problem instead of guessing.
Data Table: Typical Sensor Readings
Here’s a guide to common readings you might see:
| Test Point | Expected Reading | Problem If Not Met |
|---|---|---|
| Power (DC V) | 10-15V | No power, bad wiring or opener |
| Continuity (Ω) | 1k-10kΩ | Sensor circuit open/broken |
| Signal Change (DC V) | 3-5V change | Sensor not working or blocked |
Always compare your results with your sensor’s manual if possible.
Common Mistakes When Testing Sensors
Many beginners make small errors that waste time. Avoid these:
- Forgetting to turn off power before testing continuity.
- Touching the metal probes together while powered, causing sparks.
- Testing only one sensor when both can fail.
- Ignoring dirty lenses or misalignment.
Pro tip: Always test both sensors and their wires for a complete check.
What If The Sensors Pass All Tests?
If your sensors test fine but the door still won’t close, consider these:
- The opener’s control board may be faulty.
- There could be interference from sunlight or nearby lights.
- The wall button wiring might be shorted.
In these cases, call a professional or check the opener’s manual for advanced troubleshooting.

Credit: www.youtube.com
When To Replace Garage Door Sensors
Sensors are not expensive. If you find:
- No voltage at the sensor and wiring is good.
- Infinite resistance (open circuit) on a sensor.
- No signal change when blocking the beam.
It’s time to buy a new pair. Most universal sensors cost $20–$40 and fit many openers. Always replace both sensors at the same time.
Table: Top Garage Door Sensor Brands
If you need replacements, these are some popular brands and their features:
| Brand | Price Range | Compatibility | Warranty |
|---|---|---|---|
| Chamberlain | $25–$35 | Most openers | 1 year |
| Genie | $20–$30 | Genie openers | 1 year |
| Craftsman | $25–$40 | Craftsman, LiftMaster | 1 year |
Check your opener’s manual for best compatibility.
Extra Tips For Reliable Sensor Performance
To keep your sensors working well:
- Clean the lenses every few months.
- Check alignment if the door is hit or sensors are bumped.
- Replace wires if they look old or damaged.
- Protect sensors from direct sunlight, which can cause false errors.
Advanced tip: Install a small sun shield or shade over each sensor if your garage gets very bright.
Where To Find More Help
If you get stuck, you can find detailed wiring diagrams and troubleshooting guides at the Garage Door Opener Wikipedia page. Always consult your garage door opener’s manual for sensor wiring colors and expected voltages.
Frequently Asked Questions
How Do I Know If My Garage Door Sensor Is Bad Or Just Dirty?
Look at the sensor LED lights. If they are on but blinking, try cleaning the lenses with a soft cloth. If the lights are off after cleaning, the sensor may be faulty.
Can I Use Any Multimeter To Test Garage Door Sensors?
Yes. Even a simple, low-cost digital multimeter is enough for most tests. Just make sure it can measure DC voltage and resistance (Ω).
What Voltage Should Garage Door Sensors Get?
Most sensors receive 12V DC, but some models use 24V or 5V. Check your opener’s manual for the exact voltage.
Is It Safe To Test Sensors With The Power On?
You can test voltage with the power on, but always turn off power before testing resistance or disconnecting wires to avoid electric shock.
Why Does My Garage Door Only Close When I Hold The Wall Button?
This usually means the sensors are blocked, dirty, or not working. The wall button overrides the safety system, allowing the door to close.
Testing garage door sensors with a multimeter is a simple DIY skill that can save you money and time. By following the steps in this guide, you can fix most sensor problems yourself. Always work safely, double-check your readings, and don’t hesitate to call a professional if you find a bigger issue with your garage door system.