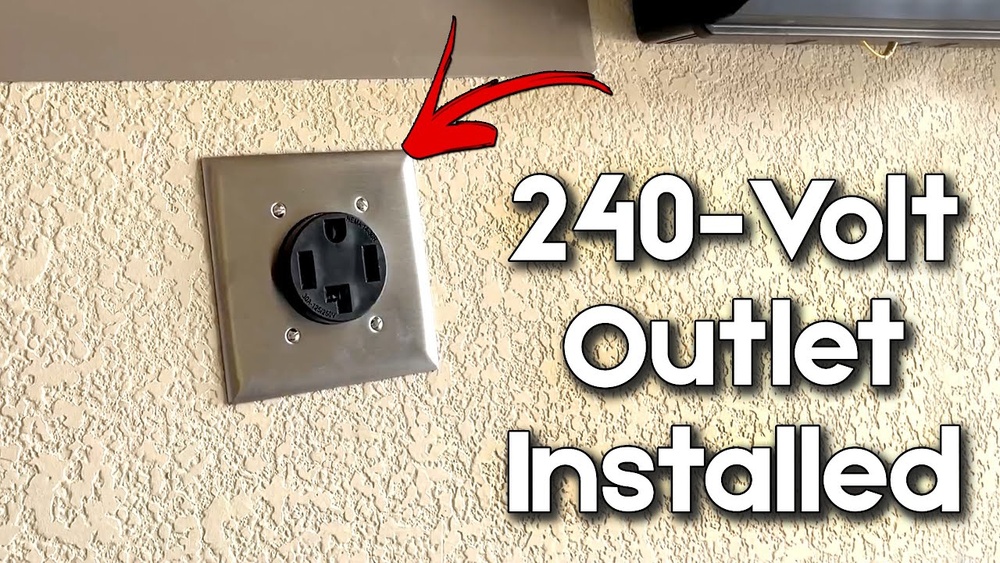
Installing a 240V outlet in your garage can open up many possibilities. Whether you want to power a heavy-duty tool, charge an electric vehicle, or run a large air compressor, having the right outlet makes all the difference. Many homeowners think this upgrade is only for professionals, but with the right guidance, even a beginner can understand the process. This article will walk you through everything you need to know, step by step, with clear explanations and practical examples.
Why Install A 240v Outlet In Your Garage?
A 240V outlet offers more power than a standard 120V outlet. This extra power is necessary for certain appliances and tools. Here are common reasons people add a 240V outlet in their garage:
- Electric vehicle (EV) charging: Most home EV chargers require 240V.
- Welders and air compressors: Many large garage tools only work on 240V.
- Faster charging or operation: Some devices run more efficiently and quickly with 240V.
Example: Charging an electric car with a 120V outlet can take over 24 hours for a full charge. With a 240V outlet, the same car can charge in 6-8 hours. That’s a huge difference!
Safety First: What You Must Know
Before you start, understand that working with electricity is dangerous. Mistakes can cause injury or fire. If you are unsure at any step, call a licensed electrician.
Important safety steps:
- Turn off power at the breaker box before starting any wiring.
- Use a voltage tester to confirm there is no electricity in the wires.
- Wear safety goggles and gloves.
- Follow all local electrical codes (these vary by city and state).
Non-obvious insight: Local codes may require a permit or inspection for new outlets. Skipping this step can cause problems if you sell your home or have insurance claims.
Tools And Materials Needed
Getting the right tools and materials before you start will save time and frustration.
Essential Tools
- Drill and bits
- Wire stripper and cutter
- Screwdriver set
- Voltage tester
- Tape measure
Materials
- 240V outlet (NEMA 6-50, 14-50, or as needed)
- Appropriate electrical wire (usually 10/3 or 6/3 Romex for most garage outlets)
- Double-pole circuit breaker (size depends on your needs—30A or 50A are common)
- Electrical box (metal or plastic)
- Wire connectors (wire nuts)
- Electrical tape
- Mounting screws
Data example: For a 30A breaker and outlet, use 10-gauge wire. For a 50A outlet, use 6-gauge wire. Using the wrong wire size is a common mistake and can be dangerous.
Planning The Installation
A well-thought-out plan makes installation safer and easier.
Steps To Plan
- Choose the right outlet type. Check your device’s plug or manual.
- Decide outlet location. Place it close to your device, but not in a wet area.
- Measure the distance from your breaker panel to the outlet spot. This affects wire length and cost.
- Check your electrical panel. Make sure you have space for a new double-pole breaker.
Example: If your garage is detached and far from the main panel, you may need a subpanel. This is a more advanced project.
Understanding Electrical Codes And Permits
Electrical codes exist for your safety. Always check with your local building department before starting.
- Permits: Most places require a permit for new 240V outlets.
- Inspections: An inspector checks your work to ensure safety.
- National Electrical Code (NEC): Sets rules for wiring, outlets, and breakers.
Non-obvious insight: Some garages need GFCI or AFCI protection by code. These special breakers protect against shocks and fires.
Wiring A 240v Outlet: Step-by-step Guide
Now let’s break down the process. These steps are for a typical 240V outlet using a double-pole breaker.
1. Turn Off Power
- Go to your breaker panel.
- Switch off the main breaker for the area you’ll be working in.
- Use a voltage tester to confirm the power is off.
2. Run The Wire
- Measure and cut the correct length of 10/3 or 6/3 wire.
- Run the wire from your breaker panel to the outlet location.
- Secure the wire with staples or clamps as required by code.
3. Install The Electrical Box
- Mount the electrical box at the chosen height (usually 18” to center above the floor).
- Pull the wire through the knockout hole in the box.
4. Wire The Outlet
- Strip back the outer insulation on the cable.
- Connect the two hot wires (usually black and red) to the brass screws on the outlet.
- Attach the ground wire (bare or green) to the green screw.
- If your outlet requires a neutral, connect the white wire to the neutral screw.
5. Install The Breaker
- Open your main electrical panel.
- Insert the double-pole breaker into an empty slot.
- Connect the hot wires to the breaker.
- Connect the ground and neutral (if used) to the bus bars.
6. Final Checks And Testing
- Double-check all connections are tight and correct.
- Secure the outlet in the box and attach the cover plate.
- Turn the breaker on and test the outlet with a voltage tester.
Common mistake: Mixing up hot, ground, and neutral wires. Always check the wiring diagram for your specific outlet and breaker.
Choosing The Right Outlet And Breaker
There are different types of 240V outlets and breakers. The choice depends on what you want to power.
| Outlet Type | Typical Use | Wire Gauge | Breaker Size |
|---|---|---|---|
| NEMA 6-50 | Welders, EVs | 6 AWG | 50A |
| NEMA 14-50 | EVs, RVs | 6 AWG | 50A |
| NEMA 6-30 | Dryers, Small Tools | 10 AWG | 30A |
Tip: Always match the wire size to the breaker and outlet. Never use a smaller wire than required.
Cost Breakdown: What To Expect
Installing a 240V outlet is not just about buying the outlet. Here’s a look at the main costs:
| Item | Average Cost (USD) |
|---|---|
| 240V Outlet | $10 – $30 |
| Double-pole Breaker | $15 – $40 |
| 10/3 or 6/3 Wire (per foot) | $2 – $5 |
| Electrical Box & Plate | $5 – $10 |
| Permit & Inspection (if needed) | $50 – $150 |
| Professional Electrician (optional) | $200 – $500 |
Example: If your garage is close to the panel and you do the work yourself, total material cost is often under $100.
Practical Examples For Common Garage Uses
Let’s look at two real-world examples.
Example 1: Powering An Electric Vehicle
- Outlet: NEMA 14-50
- Breaker: 50A
- Wire: 6/3 AWG
- Why: Most EV chargers recommend this setup for fast home charging.
Example 2: Running A Welder
- Outlet: NEMA 6-50
- Breaker: 50A
- Wire: 6/3 AWG
- Why: Many welders require this outlet for safe operation.
Non-obvious insight: Some older garages have only 60A main service. Adding a 50A breaker may not be safe. Always check your main service panel’s rating before starting.
Troubleshooting And Testing
After installing your 240V outlet, testing is very important.
How To Test
- Use a voltage tester or multimeter.
- Insert probes into both hot slots—should read around 240V.
- Test each hot slot to ground—should read 120V.
If readings are off, double-check your wiring and breaker connections.
Common issue: Outlet does not work after installation. Often, this is due to a loose wire or a breaker not fully seated.

Credit: www.youtube.com
Mistakes To Avoid
Many beginners make avoidable errors when installing a 240V outlet.
- Using the wrong wire size: This is a fire risk.
- Mixing up wires: Hot, neutral, and ground must be correct.
- Skipping permits or inspections: This can cause insurance and safety problems.
- Overloading the main panel: Know your home’s total electrical capacity.
Expert tip: Write down the new breaker’s purpose on your panel’s label for future reference.
When To Call A Professional
Even if you’re handy, some situations require a licensed electrician.
- If your main panel is full or outdated
- If you are unsure about wiring or breaker types
- If your garage is far from the panel (may need a subpanel)
- If local codes are complex
An electrician will ensure your installation is safe, legal, and reliable.
Credit: www.reddit.com
Maintenance And Safety Tips
After installation, keep your 240V outlet safe and working well.
- Check for heat or burning smell during use—shut off power if you notice anything unusual.
- Inspect wires and connections every year.
- Keep the area dry and free from dust and debris.
- Label the outlet so others know it is 240V.
Non-obvious tip: If you plan to use the outlet for multiple devices, consider installing a lockable cover to prevent accidental use.
Frequently Asked Questions
What Wire Size Do I Need For A 240v Outlet In My Garage?
The wire size depends on your breaker and outlet. For a 30A outlet, use 10-gauge wire. For a 50A outlet, use 6-gauge wire. Always check your device’s manual and local codes.
Can I Install A 240v Outlet Without A Permit?
Most cities require a permit for new 240V outlets. Skipping the permit can cause safety and insurance issues. Always check with your local building department.
How Much Does It Cost To Install A 240v Outlet?
DIY material costs are often $50 to $150, depending on wire length. Professional installation may cost $200 to $500 or more.
Can I Use A 240v Outlet For My Regular Power Tools?
No. Most regular power tools run on 120V. Plugging them into 240V can damage the tool and is unsafe.
Is It Safe To Install A 240v Outlet Myself?
It can be safe if you follow all steps, use the correct materials, and follow local codes. If unsure, hire a licensed electrician.
Installing a 240V outlet in your garage can make your space much more useful. With the right planning, materials, and safety steps, even a beginner can understand what’s involved. If you follow local codes and don’t rush, the project can be safe and rewarding. If you ever feel unsure, it’s best to call a professional. For more detailed code information, visit the National Electrical Code website.

Credit: diy.stackexchange.com