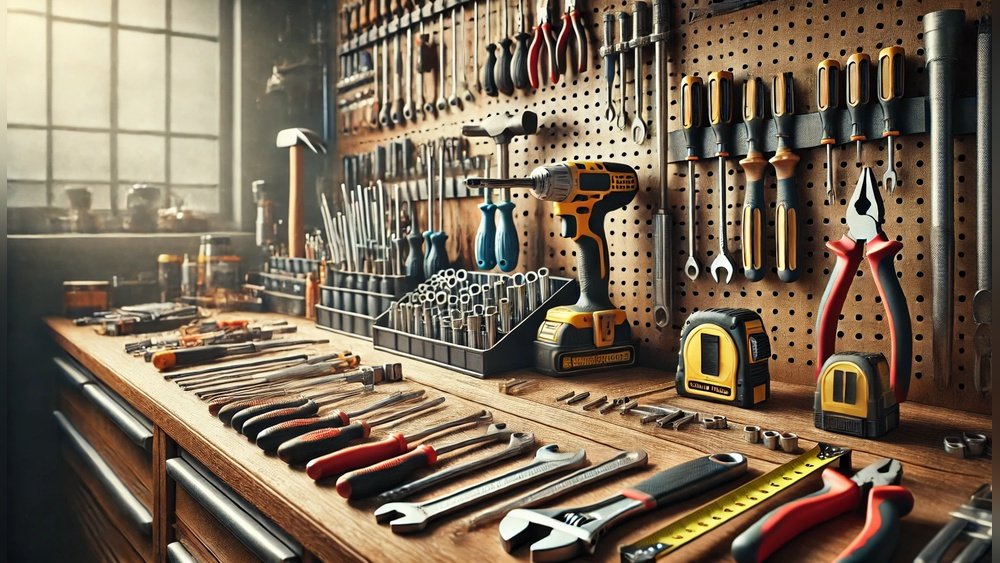
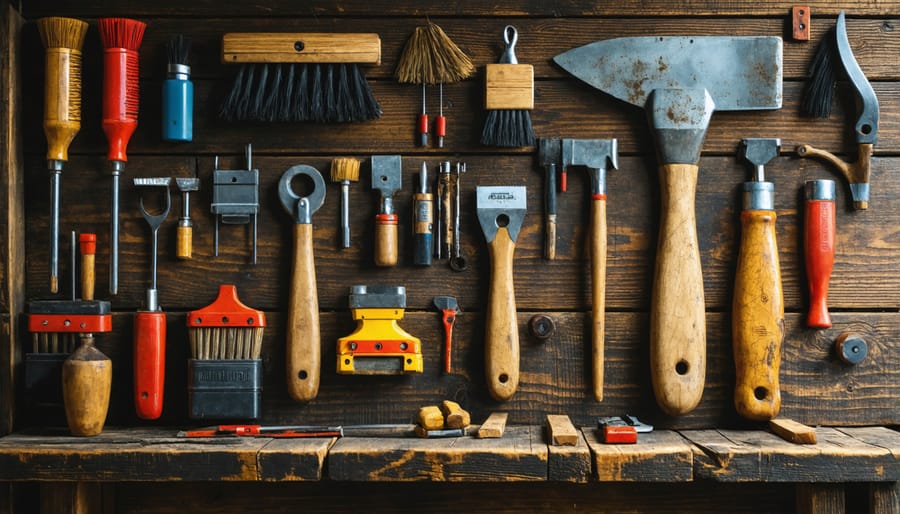
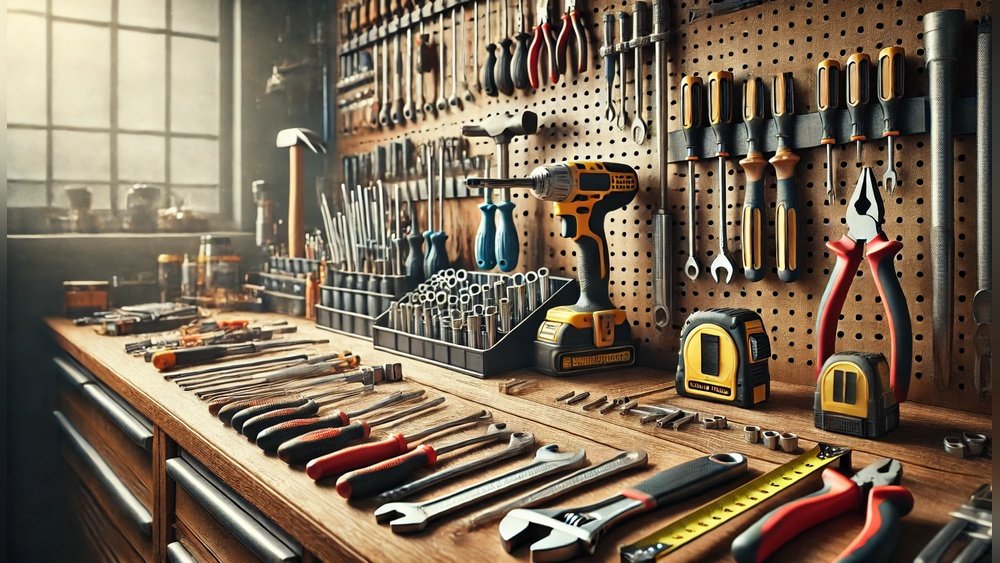
To keep hand tools working like new, clean them after use, dry them well, protect metal from rust, sharpen cutting edges, check for damage, and store each tool in a dry, safe place.
From home garages in Texas to woodworking shops in Oregon and construction sites across the United States, hand tools help people fix, build, and maintain the things they use every day. A good hammer, wrench, or pair of pliers can serve for years when cared for well. Yet dirt, moisture, poor storage, and rough use can wear out even a strong tool.
The good news is that most basic tool care takes little time. A quick wipe after a repair, a light coat of suitable oil, and a short safety check can help prevent many common problems. You do not need a large workshop or costly supplies to get started.
This guide explains how to clean common hand tools, stop rust before it spreads, care for wooden handles, sharpen blades, and choose better storage. It also covers warning signs that mean a tool needs repair or replacement. The goal is simple: keep your tools useful, safe, and ready for the next job.
Source: toolmateshire.com.au
Why Regular Hand Tool Care Matters
Regular maintenance helps hand tools work as intended and can delay the need for replacement. Dirt can affect moving joints, rust can weaken or roughen metal surfaces, and worn cutting edges can make simple jobs harder. Small problems are often easier to address before they spread.
Tool care also supports safety. A loose hammerhead, a worn wrench jaw, or a cracked screwdriver handle can cause a tool to slip or break during use. The Occupational Safety and Health Administration identifies proper tool condition, correct use, and inspection as important parts of hand and power tool safety.
Different tools need different care. A steel wrench may need cleaning and rust protection, while a wood chisel needs a sharp edge and a protective cover. A pair of pruning shears may need plant residue removed and its pivot lubricated. The best routine fits the tool rather than treating every item the same way.
Source: cdn11.bigcommerce.com
Better performance
Clean surfaces, sound handles, and sharp edges help tools grip, cut, turn, and strike as designed.
Longer useful life
Removing moisture and dirt reduces avoidable wear and corrosion.
Safer work
Routine checks help you find loose parts, damaged handles, and worn working surfaces before a job begins.
How Often Should You Maintain Hand Tools?
Give tools a quick clean and visual check after each use. Perform a closer inspection when a tool has been exposed to rain, wet soil, chemicals, heavy grime, or unusually hard work. A deeper maintenance session can be scheduled monthly or quarterly, depending on how often you use the tools and where you keep them.
A tool used every day on a jobsite may need more attention than one used a few times each year. There is no single schedule that fits every tool. Follow the manufacturer’s care instructions whenever they are available.
After each use
Remove dirt and residue, dry the tool, and return it to its storage place.
During routine checks
Inspect handles, joints, cutting edges, and moving parts for wear or damage.
Before seasonal storage
Clean the tool thoroughly, protect exposed metal, and confirm that its storage area is dry.
Clean Hand Tools After Every Job
Cleaning is the first step in keeping hand tools in good shape. Dust, soil, metal particles, grease, and moisture can collect on tool surfaces during normal use. If left in place, this residue may cause corrosion, interfere with moving parts, or transfer dirt to the next work surface.
Start with a dry cloth or soft brush to remove loose debris. Use a little mild soap and water only when the tool’s materials and manufacturer instructions allow it. Avoid soaking tools with wooden handles, delicate finishes, or enclosed joints, since trapped water can lead to swelling or rust.
After cleaning, dry the tool completely with a clean cloth. Pay attention to seams, pivots, adjustment screws, and other places where water can remain. If the tool has a moving joint, apply a small amount of suitable lubricant after it is dry, when the design calls for lubrication.
Source: i.ytimg.com
Use the right cleaning item
A soft brush, clean rag, and mild cleaner are enough for many tools. Choose a material-safe cleaner for sticky residue or stubborn grime.
Remove grease carefully
Use a suitable degreaser as directed. Keep solvents away from flames, sparks, skin, and incompatible finishes.
Dry every surface
Do not put damp tools into a closed toolbox. Moisture trapped inside can cause rust even when the outside looks clean.
How to Clean Different Types of Hand Tools
For wrenches, sockets, and pliers, remove dirt from the jaws, teeth, and moving joints. Wipe away any cleaner and dry the tool before storage. Add a small amount of suitable lubricant to the pivot of pliers or cutters if needed.
For screwdrivers, clean the handle and metal shaft. Check the tip for wear, rounding, or chips. For chisels and other cutting tools, remove residue without scraping or striking the cutting edge against hard surfaces.
For garden tools, remove soil and plant material from blades and metal parts. Dry them before storage. When pruning tools may carry plant disease, clean and disinfect them with a method suitable for the tool and plant involved.
Avoid harsh cleaning methods
Do not use strong acids, aggressive abrasives, or unknown chemicals that could damage a tool’s finish or protective coating.
Protect precision surfaces
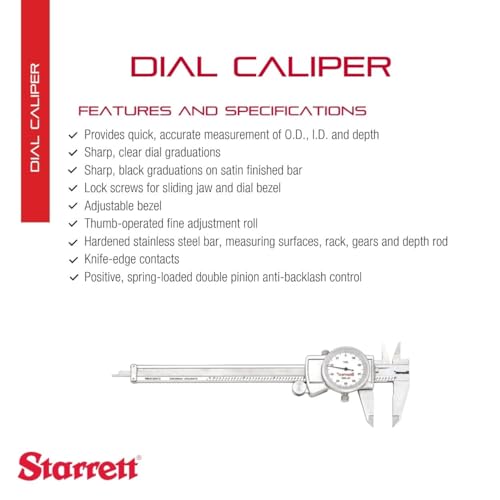
Keep measuring tools and fine cutting edges away from rough brushes, loose metal parts, and abrasive cleaners.
Prevent Rust and Protect Metal Surfaces
Rust forms when iron or steel reacts with oxygen and moisture. Damp garages, wet basements, humid sheds, and tools left outside can speed up corrosion. Even fingerprints may leave moisture and salts on bare metal, so a quick wipe is useful after handling tools for long periods.
The simplest way to prevent rust is to keep tools clean and dry. For exposed steel surfaces, a thin film of suitable rust-prevention oil can provide an added barrier. Use a product made for the tool and its intended use, and follow the label.
Not every metal part should receive oil. Some tools have special coatings, painted surfaces, friction areas, or measuring components that may be affected by the wrong product. Do not coat a handle or gripping surface if doing so could make the tool slippery. Keep cutting edges free of excess oil before use.
Source: toolsfilter.com
Wipe metal after use
Remove water, sweat, and grime before returning tools to a drawer or case.
Apply a thin protective film
Use suitable rust-prevention oil on exposed steel when the manufacturer allows it. A light film is usually more useful than a heavy, messy coating.
Keep storage dry
Use a dry cabinet, toolbox, or drawer. Consider a suitable moisture absorber in a closed storage space, following its instructions.
What Should You Do If a Tool Has Rust?
First, judge how serious the rust is. Light surface rust may be removable with a material-safe rust remover, a suitable fine abrasive, or a gentle cleaning pad. Follow the product instructions and avoid removing sound metal or damaging a protective finish.
After treatment, remove any residue, dry the tool, and apply a suitable protective film if appropriate. Check the working surface again before use. Rust on a measuring face, a precision tool, a heavily loaded component, or a critical cutting edge may need professional assessment.
Deep pitting, cracks, severe metal loss, or rust that affects the fit and function of a tool can make it unsafe. Cleaning cannot restore metal that has already been lost. Replace the tool when its condition makes safe use uncertain.
Light surface rust
Try a gentle, suitable cleaning method and inspect the surface afterward.
Deep corrosion
Do not rely on oil or paint to hide damage. Assess whether the tool remains fit for its intended load.
Keep Blades Sharp and Cutting Edges Protected
Sharp cutting tools usually require less force and give better control than dull ones. A dull blade can slip from the work, crush plant stems, or leave rough cuts. Keeping an edge sharp is useful, but the correct method depends on the tool’s design and intended use.
Before sharpening a chisel, plane iron, knife, or garden blade, check the manufacturer’s guidance. Some edges need a particular angle or sharpening system. Using the wrong angle or removing too much metal can shorten the tool’s useful life.
Secure the tool before sharpening and use suitable eye protection. Keep fingers away from the edge and move the sharpening tool in a controlled manner. If you use a powered sharpening system, follow its instructions and avoid overheating the metal, which may damage its hardness.
Source: toolmateshire.com.au
Inspect before sharpening
Check for chips, cracks, severe wear, or other damage that may need repair or replacement instead.
Use the correct method
Choose a suitable file, stone, sharpening guide, or other system for the tool’s edge and material.
Protect the finished edge
Use a blade cover, sheath, rack, or separate storage slot to prevent contact with other tools.
How to Tell When a Tool Needs Sharpening
A cutting tool may need attention if it requires more force than usual, tears material instead of cutting cleanly, or produces repeated rough cuts. For garden shears, stems that crush or fail to cut cleanly can be a sign that the blade needs care or adjustment.
Do not test sharpness by running a finger along the edge. Use the appropriate inspection and cutting test for the tool, with the work secured and your hands clear of the cutting path. If the blade is chipped or cracked, stop using it until the defect has been properly addressed.
Clean first
Remove residue so dirt does not interfere with sharpening or hide damage.
Check the result
Confirm that the edge cuts as intended and that the tool remains properly assembled.
Care for Wooden Handles, Grips, and Joints
A sound handle helps you control a tool and absorb some of the force created during work. Wooden handles can dry out, splinter, crack, or loosen. Rubber and plastic grips can also wear, split, or become slippery when contaminated with oil.
Inspect wooden handles for cracks, splinters, soft spots, and movement where the handle meets the metal head. Sanding may help with minor surface roughness when the handle is otherwise sound. Use a suitable wood finish only if the manufacturer permits it, and allow it to dry fully before use.
A loose hammerhead or other striking head is a serious warning sign. Do not rely on tape, glue, or an improvised fix to hold a damaged handle together. Repair the tool using an appropriate replacement part and method, or replace it if safe repair is not practical.
Source: cdn11.bigcommerce.com
Check for movement
Look for gaps or movement between a handle and its head. Stop using a striking tool if the head is loose.
Keep grips clean
Remove oil and grime that could make handles slippery. Use a cleaner compatible with the grip material.
Replace damaged parts
Use suitable replacement handles and approved repair methods instead of hiding cracks or loose joints.
Should You Oil Wooden Tool Handles?
Some unfinished wooden handles benefit from a suitable wood treatment, but the right choice depends on the wood, finish, and tool. A compatible drying oil may be suitable for some handles, while other products may leave a slick surface or interfere with a later finish.
Never apply a treatment that makes a handle hard to grip. Follow the manufacturer’s directions, wipe away excess product, and allow the handle to dry or cure as directed. Oily rags can heat up and ignite under certain conditions, so handle and dispose of them according to the product label and local fire-safety guidance.
Treat only when needed
A clean, sound, finished handle may need no extra coating.
Keep the grip secure
The handle must remain dry, firm, and easy to hold before the tool returns to service.
Lubricate Moving Parts Without Overdoing It
Moving parts need the right amount of lubrication to work smoothly and limit wear. Pliers, adjustable wrenches, pruning shears, and some clamps have joints or adjustment mechanisms that may benefit from periodic care. The type of lubricant and the amount depend on the design.
Clean the joint first so you do not trap grit under the lubricant. Apply a small amount to the area specified by the manufacturer, then move the joint through its normal range to spread the lubricant. Wipe away excess oil that could collect dirt or transfer to a workpiece.
Do not lubricate every part simply because it moves. Some locking mechanisms, coated surfaces, or specialized tools require a specific product or a dry surface. If a joint remains stiff after cleaning and correct lubrication, check for bent parts, corrosion, or other damage rather than forcing it.
Source: i.ytimg.com
Lubricate the right points
Use the product and application points recommended for the tool.
Avoid excess oil
A small, controlled application is easier to manage and less likely to attract dirt.
Test movement safely
Check that the joint moves as intended without binding, slipping, or unexpected looseness.
What If a Tool Still Feels Stiff?
Remove dirt and dried residue, then inspect the joint. If the manufacturer allows it, clean the mechanism with a compatible product and apply the recommended lubricant. Do not force a rusted or bent component through its full range.
If the joint remains stuck, the tool has excessive play, or the adjustment mechanism no longer holds securely, stop and assess whether repair or replacement is needed. Lubrication cannot correct a broken spring, stripped thread, or badly bent part.
Clean before adding oil
Dirt mixed with lubricant can form a gritty paste that increases wear.
Inspect for damage
Look for bent components, stripped threads, loose fasteners, and broken springs.
Store Hand Tools in a Dry, Organized Space
Good storage protects tools from moisture, accidental drops, damaged edges, and lost parts. A toolbox, drawer organizer, wall rack, or cabinet can work well when it fits the tools and keeps them away from damp floors and leaking roofs.
Avoid piling sharp tools loosely into a drawer. Metal edges can strike one another and become chipped or dull. Store knives, chisels, saws, and other sharp tools in suitable covers or separate slots, and keep heavy items from crushing smaller tools.
In humid areas or unheated garages, check for condensation and signs of corrosion more often. A moisture absorber or suitable desiccant may help in a closed cabinet, but it does not replace cleaning and drying. Inspect the storage area itself for leaks, damp walls, and poor ventilation.
Source: toolsfilter.com
Choose a dry location
Keep tools away from rain, standing water, damp concrete, and sources of condensation.
Give each tool a place
Use racks, trays, hooks, or labeled compartments to reduce clutter and prevent damage.
Protect delicate edges
Keep cutting tools covered and measuring tools away from impact or pressure.
Check stored tools
Inspect tools periodically, especially before returning them to service after a long period in storage.
Best Storage Options for Common Hand Tools
A portable toolbox suits household repair kits and tools carried between jobs. Drawer organizers work well for sockets, wrenches, screwdrivers, and small accessories. Wall racks can make frequently used tools easier to reach in a garage or workshop.
For fine woodworking tools, use racks, fitted cases, or protective sleeves that prevent edges from touching. Leather or fabric covers can protect surfaces, but they should be checked for trapped moisture and mold. A sealed container is useful only when the tools are dry before they go inside.
Toolbox
Useful for transport and compact storage. Keep it clean and avoid leaving wet tools inside.
Wall rack
Helpful for common tools that need quick access. Secure the rack and hang tools so they cannot fall.
Drawer organizer
Keeps small tools separated and reduces scratching, mixing, and accidental edge damage.
Inspect Tools for Damage Before Use
A tool can look clean and still be unsafe. Before each job, check the parts that carry force or touch the work. Look for cracks, bent metal, worn jaws, damaged tips, loose heads, and other defects that could cause the tool to slip or break.
A wrench with jaws that slip on a fastener should not be used for that task. A screwdriver with a badly worn tip may slip from the screw head. A hammer with a loose head or cracked handle can release the head during a strike. These problems call for repair or replacement, not just cleaning.
For workplace tools, follow the employer’s inspection procedures and applicable safety rules. U.S. construction safety regulations address the condition of hand tools, including loose or damaged handles, slipping wrench jaws, and mushroomed striking-tool heads. Home users should apply the same basic principle: do not use a damaged tool.
Source: i.ytimg.com
Handles and grips
Check for cracks, splits, loose heads, damaged insulation, and slippery surfaces.
Working ends
Inspect jaws, tips, cutting edges, striking faces, and teeth for wear or damage.
Moving parts
Check pivots, springs, adjustment screws, locks, and fasteners for correct operation.
Overall condition
Look for serious corrosion, bends, missing parts, or signs of an improvised repair.
When Should You Repair or Replace a Hand Tool?
Minor dirt, light surface rust, or a dull but otherwise sound edge may be manageable with routine care. Loose screws or worn replaceable parts may also be repairable when the manufacturer provides a suitable procedure and parts.
Cracked handles, damaged locking systems, severe corrosion, bent load-bearing parts, and slipping jaws deserve more caution. Do not straighten hardened components, weld a tool, grind away major defects, or improvise a repair unless an approved repair method specifically allows it.
If the tool’s strength or safe operation is uncertain, remove it from use until it has been assessed. In a workplace, mark the tool as defective and follow the site’s removal and repair process.
Clean or maintain
Suitable for dirt, ordinary residue, and minor maintenance needs when the tool remains structurally sound.
Repair correctly
Use appropriate replacement parts and a repair method designed for the tool.
Replace when unsafe
Choose replacement when damage affects strength, grip, locking, or reliable operation and cannot be corrected safely.
Build a Simple Hand Tool Maintenance Schedule
A basic schedule makes tool care easier to remember. You do not need to spend an entire afternoon maintaining every tool after a small repair. Instead, handle quick tasks when you finish a job and reserve more detailed checks for a set time.
The schedule below is a practical starting point, not a universal rule. Increase the frequency for tools used heavily, exposed to moisture, or stored in a humid location. Reduce unnecessary work when a tool’s instructions call for a different maintenance method.
Source: toolmateshire.com.au
After every use
Wipe tools clean, remove moisture, check for obvious damage, and return them to their proper storage place.
Monthly or after heavy work
Inspect moving joints, fasteners, handles, jaws, and cutting edges. Lubricate only where needed and permitted.
Every few months
Review storage conditions, check for early rust, organize loose accessories, and identify tools that need repair.
Before long-term storage
Clean and dry tools, apply suitable corrosion protection, cover cutting edges, and confirm that the storage area is dry.
A Five-Minute Routine for a Home Workshop
At the end of a small home repair, place used tools on a clear bench. Brush off dust, wipe away grime, dry any damp surfaces, and look for visible damage. Apply a small amount of suitable lubricant or rust protection only where the tool needs it.
Return each item to its proper place and leave sharp tools protected. If you find a defect, set that tool aside instead of putting it back with the ready-to-use items. This simple habit helps prevent small maintenance tasks from becoming larger repair problems.
Gather
Use a clean cloth, a soft brush, suitable lubricant, and any required protective gear.
Clean and inspect
Remove residue and check the parts that matter for safe operation.
Protect and store
Dry the tool, protect exposed metal when appropriate, and put it away safely.
Common Hand Tool Care Mistakes to Avoid
Many tool problems come from small habits rather than a lack of expensive supplies. Leaving tools wet, storing them in a cluttered drawer, or using the wrong tool for a task can cause avoidable wear. Better care begins with a few clear rules and a little attention after each job.
Avoid using one tool as a substitute for another when the design does not support it. A screwdriver is not a chisel, pliers are not a wrench, and a wrench should not be used as a hammer unless it is specifically designed for striking. Misuse can damage the tool and make the job less safe.
Do not assume that more oil, stronger chemicals, or more aggressive sharpening will improve results. Too much lubricant can collect dirt, harsh cleaners can damage finishes, and excessive grinding can ruin an edge. Follow the tool’s instructions and choose the least aggressive method that solves the problem.
Source: cdn11.bigcommerce.com
Putting away wet tools
Dry tools before storage, especially after outdoor work or cleaning with water.
Using damaged tools
Stop using tools with cracked handles, loose heads, badly worn tips, or unreliable jaws.
Mixing incompatible products
Never mix cleaning chemicals, and check product labels before applying solvents, oils, or rust removers.
Ignoring tool instructions
Use the manufacturer’s guidance for lubrication, sharpening, adjustment, repair, and storage.
Leaving sharp edges exposed
Use suitable covers or organizers to protect the edge and reduce accidental cuts.
Basic Safety During Tool Maintenance
Wear eye protection when brushing off debris, removing rust, or sharpening tools if particles could fly. Use gloves when appropriate for the task, but keep them away from rotating equipment and other moving parts where they could catch. Secure the tool before applying force.
Keep solvents and oils away from ignition sources and work in a suitably ventilated area when product instructions require it. Never use a cleaning method that could create an unsafe chemical reaction. Dispose of used products and oily rags according to their labels and local requirements.
When cleaning or servicing powered tools, disconnect the power source and follow the manufacturer’s instructions to prevent accidental startup. Do not direct compressed air at your skin or use it to blow debris into your eyes or other people’s faces. If the tool is damaged or you are unsure how to service it safely, seek qualified help.
Protect your eyes
Use suitable safety glasses or goggles for tasks that may produce flying particles.
Secure the work
Use an appropriate vise or clamp when needed, keeping hands away from the working edge.
Control fire and chemical risks
Read labels, provide suitable ventilation, and keep flammable products away from sparks and heat.
Frequently Asked Questions
Q
How can I keep hand tools working like new?
Clean tools after use, dry them fully, protect exposed metal from rust, and lubricate moving parts when needed. Keep cutting edges sharp, inspect handles and working ends, and store tools in a dry, organized place. Follow the manufacturer’s instructions for any special care.
Q
What is the best oil to prevent rust on hand tools?
A suitable tool-preservation oil or other manufacturer-approved rust inhibitor can help protect exposed steel. The best choice depends on the tool, its finish, and how it will be used. Apply only a thin film, keep gripping surfaces dry, and remove excess oil before use.
Q
Can I use WD-40 to clean and protect my tools?
Some WD-40 products can help loosen grime or displace moisture, but products in the range do not all serve the same purpose. Check the exact product label and the tool manufacturer’s guidance before use. For long-term corrosion protection, select a product suited to the storage conditions and the tool’s materials.
Q
How do I stop tools from rusting in a humid garage?
Dry tools before storage, wipe exposed steel with a suitable rust-prevention product, and keep the toolbox away from damp floors and leaks. Improve ventilation when practical and consider a moisture absorber in a suitable enclosed cabinet. Check stored tools regularly because trapped moisture can still cause corrosion.
Q
How often should hand tools be cleaned and lubricated?
Clean and dry tools after every use. Lubricate moving joints when they need it and when the manufacturer recommends it, rather than applying oil on a fixed schedule without checking the tool. Inspect tools more often after heavy work or exposure to rain, soil, chemicals, or damp conditions.
Q
Can rusty hand tools be restored?
Tools with light surface rust can often be cleaned with a suitable rust remover or gentle abrasive. Dry the tool and apply appropriate corrosion protection afterward. Deep pitting, cracks, serious metal loss, or damage to a critical working surface may make a tool unsafe, so cleaning alone is not always enough.
Q
When should I replace a hand tool instead of repairing it?
Replace a tool when its handle is cracked or cannot be secured, its jaws slip, its working end is severely damaged, or corrosion has affected its strength. Repair is reasonable when a suitable method and proper replacement parts are available. If you cannot confirm that the repaired tool is safe, do not return it to service.
✦ Wrapping Up
Conclusion
Keeping hand tools working like new does not require a costly workshop or a long maintenance routine. Most of the work comes down to a few habits: clean tools after use, dry them well, prevent rust, protect cutting edges, and check for damage before starting the next job.
The right care depends on the tool and its purpose. A wrench needs sound jaws, a chisel needs a suitable sharp edge, and a hammer needs a secure head and an intact handle. Good storage protects all of them from moisture, clutter, and accidental damage.
Make a short tool check part of every cleanup. Small steps can help your tools last longer, work as intended, and stay ready for home repairs, woodworking, gardening, and other projects. When a tool has serious damage, put safety first and repair it properly or replace it.
💡 Key Takeaway
After your next project, spend five minutes cleaning and drying each tool, checking its handle and working end, applying suitable protection where needed, and storing it in a dry place. Set aside any damaged tool until it can be repaired safely or replaced.
Sarah believes that a messy garage is a wasted room. After years of working in professional home staging and interior design, she shifted her focus to the most neglected part of the house: the garage. She focuses on vertical storage, aesthetic floor coatings, and converting dusty corners into functional workspaces. Sarah’s goal is to help you "unlock" every square inch of your garage.
Sarah believes that a messy garage is a wasted room. After years of working in professional home staging and interior design, she shifted her focus to the most neglected part of the house: the garage. She focuses on vertical storage, aesthetic floor coatings, and converting dusty corners into functional workspaces. Sarah’s goal is to help you "unlock" every square inch of your garage.