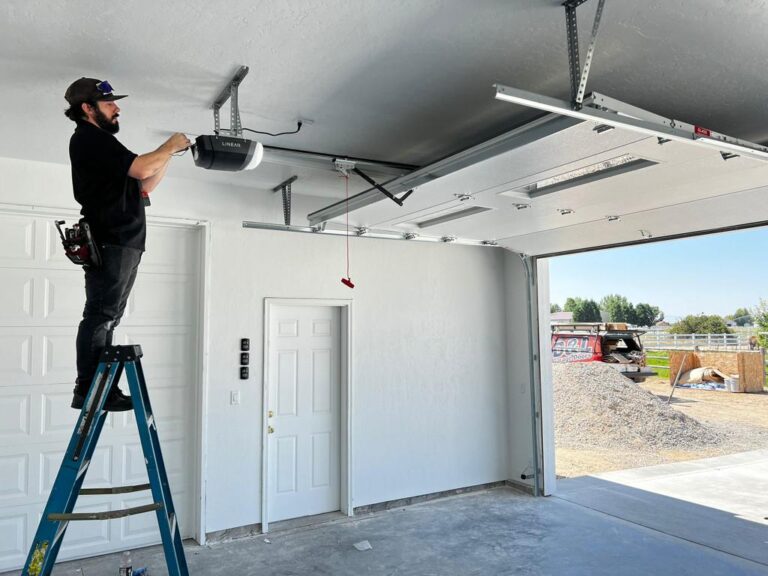
Wear your tool belt around your hips, keep your most-used tools within easy reach, place small parts in secure pockets, and balance the load on both sides.
From home renovation projects in Texas to framing jobs in California and repair work across the United States, a well-organized tool belt can make a workday easier. It keeps common tools close, cuts down on trips to the toolbox, and helps you stay focused on the task. But a belt packed with every tool you own can become heavy and hard to use.
The best setup starts with the work you plan to do. Choose the tools you need, place them where your hands can reach them with little effort, and make sure they stay secure when you bend, kneel, or move. Your layout should also suit your dominant hand, the clothes you wear on the job, and the type of work area. A simple setup that feels right is often more useful than a belt with dozens of pockets.
1. Start With the Tools You Need for the Job
The first step in organizing a tool belt is choosing the right tools. Do not fill every pocket just because it is empty. A loaded belt should support your task, not carry your entire workshop around your waist.
Before putting anything in the pouches, lay your tools out on a bench or clean floor. Think about the work you will do first, the tools you will use most, and the small parts you need to keep close. This gives you a clear plan before you start moving items from pocket to pocket.
For example, a person doing basic carpentry may need a tape measure, carpenter’s pencil, speed square, hammer, utility knife, and a small supply of fasteners. A person doing a short home repair may need only a tape, screwdriver, pliers, and a few screws. The right load changes with the job.
List the main tasks
Write down the steps you expect to complete. A framing task, trim job, cabinet installation, and basic repair may all need different tools.
Pick the tools you use often
Keep tools you reach for again and again in the belt. Put less-used tools in a nearby toolbox or work cart.
Group small supplies
Separate nails, screws, anchors, clips, and other small parts. Use pockets with closures when parts could fall out.
Check the tool size
Make sure each item fits its pocket or holder. Do not force a large tool into a pouch that can stretch, tear, or release it.
Make a Short Essential Tool List
A basic carpentry setup may include a tape measure, pencil, hammer, speed square, utility knife with a secure blade cover, and a small selection of nails or screws. You may also need a chalk line or pliers for certain tasks. Start with this short list, then add tools only when the work calls for them.
A good way to decide is to ask one question about every item: Will I need this often enough to carry it all day? If the answer is no, leave it in your toolbox until you need it. This keeps your belt lighter and makes each pocket easier to use.
Keep daily tools close
Place your tape, pencil, and other regular-use tools in easy-to-reach holders.
Carry spare tools separately
Store extra blades, large wrenches, spare batteries, and other bulky items in a tool bag unless your belt has a suitable holder.
2. Wear the Tool Belt at the Right Height
A tool belt should sit securely around your hips without digging into your body. It should not hang so low that the pouches hit your thighs, and it should not sit so high that the tools press into your ribs. The right position lets you reach your tools without making awkward movements.
Put on the clothes you normally wear at work before adjusting the belt. If you often wear a jacket, work shirt, or thicker pants, fit the belt over those layers. A belt that feels fine over a thin shirt may become too tight or shift when you add work clothes.
Fasten the buckle and adjust the belt until it feels snug. You should be able to bend and move without the belt sliding down or pressing too hard against your waist. The pockets should stay in place when you walk and reach.
If the belt keeps slipping after you adjust it, check its size and fit before adding more weight. Suspenders may help support a heavier setup, but they should be compatible with the belt and should not interfere with other safety equipment. Do not tighten a belt so much that it causes pain just to stop it from moving.
Keep the pouches near your hips
Set the pouches where your hands can reach them without sharp wrist bends or excessive twisting.
Check the buckle position
Keep the buckle clear of bulky tools and pouch edges so it does not press into your body when you bend.
Adjust for clothing layers
Recheck the fit when you change between light work clothes and thicker seasonal clothing.
Use suitable support
Consider compatible suspenders when a heavier load causes sagging. Follow the belt maker’s instructions for attachment and use.
Check the Fit Before Loading the Pouches
Try the belt on while it is empty. Walk a few steps, sit or kneel, and bend forward. The belt should stay in place without blocking your normal movement.
Next, add a few tools and repeat the check. This helps you spot problems before you load every pocket. If the belt shifts or presses against your body, adjust the fit or the pouch positions before adding more items.
Good fit
The belt stays in place, the pouches remain easy to reach, and the buckle does not dig into your body.
Poor fit
The belt slides down, swings when you walk, presses into your thighs, or makes you lean to one side.
3. Arrange the Pockets Around Your Dominant Hand
Your dominant hand should have quick access to the tools it uses most. If you are right-handed, you may prefer your main work pouch on the right side. If you are left-handed, you may prefer it on the left. These are starting points, not fixed rules. Your preferred working position and the shape of your belt matter too.
Place the tools you use for measuring, marking, cutting, or fastening where your hand can reach them without searching. Keep companion items in a nearby pocket that your other hand can reach. This creates a simple pattern: one hand gets the main tool, and the other hand gets the item needed to support the task.
For example, a right-handed carpenter might keep a hammer in a suitable loop near the right hip and put nails in a pouch that the left hand can reach. The tape measure may sit on a front clip or hip holder, depending on which position gives the clearest reach. A left-handed worker can reverse the layout.
Do not copy another worker’s layout without testing it. A setup that works well for one person may feel awkward for someone with a different hand preference, body shape, or work style. Try several positions until the tools feel natural to draw and replace.
Dominant-side pouch
Use this area for tools that your main hand handles often, such as a hammer, pliers, or marking tools.
Other-side pouch
Use this area for fasteners, small parts, a ruler, or tools that support the work done by your dominant hand.
Tape measure holder
Choose a position where the tape clips on securely and comes out without catching on nearby tools.
Front area
Keep the front of the belt clear enough that the buckle and nearby tools do not press into your body when you bend.
A Simple Right-Handed Tool Belt Example
A right-handed worker can start by placing the main hammer loop near the right hip, provided the loop does not block movement. A pencil and other marking tools can sit in narrow slots on the same side. Put nails or screws in a pouch that the left hand can reach while the right hand holds the tool.
Place the tape measure in a secure clip or holder near the front or preferred hip. Keep a speed square in a flat pocket where it will not catch on a pouch seam. This is only a sample arrangement. Move each item until it fits your own reach and work sequence.
Right side
Start with the hammer, marking tools, or other regular-use tools.
Left side
Start with nails, screws, small parts, and companion tools.
Front or hip
Place the tape measure where it is easy to draw and secure again.
A Simple Left-Handed Tool Belt Example
A left-handed worker can reverse the sample setup. Place the main working tools near the left hip and put the fasteners where the right hand can reach them. Keep the tape measure in the position that makes measuring smooth and avoids contact with other tools.
The goal is not to follow a strict left-side or right-side rule. The goal is to reduce extra reaching, avoid crossed hands, and keep tools from getting tangled in the pouches.
Reverse the main layout
Move the main work pouch to the left and put the supporting supplies on the right.
Test the tape position
Try several safe positions until the tape measure is easy to draw and return.
4. Give Every Tool a Clear Place
A good tool belt has a place for each item. You should not need to dig through a pouch to find a pencil or move three tools to reach a screwdriver. Arrange items by their size, shape, and purpose so you can recognize each pocket by feel.
Use narrow slots for long, slim items such as pencils and suitable marking tools. Use flat pockets for a square or ruler. Put small fasteners in a pouch that keeps them from spilling. A hammer should sit in a loop made for its handle, not in a loose pocket where it can slide out.
Keep sharp items separate from soft supplies and body-facing areas. A utility knife should have its blade retracted or covered before it goes into the belt. Do not carry loose blades in a pocket with pencils, fingers, or other tools. Chisels and similar sharp tools need a holder that protects the edge and keeps the point from facing your body.
Avoid filling a pocket until it becomes hard to open or close. An overstuffed pouch can hide small parts, make tools snag, and cause items to fall out when you crouch. Give each item enough room to go in and come out without force.
Measuring tools
Keep the tape measure in a secure clip or holder. Store squares and rulers flat where their edges will not press against your leg.
Marking tools
Use upright slots for pencils and markers. Keep them secure so they do not fall out when you bend.
Fasteners
Separate nails, screws, and anchors when mixing them would slow you down or lead to mistakes.
Cutting tools
Retract blades or use protective covers. Store sharp edges in suitable holders.
Striking tools
Use the hammer loop or holder designed for the tool. Check that the handle stays secure during normal movement.
Keep Small Parts Easy to Find
Small screws, nails, washers, and connectors can quickly turn a pouch into a mess. Give each type its own pocket or use small containers made for your belt. This helps you avoid wasting time sorting through mixed parts.
A pouch with a closure can be useful when you bend, kneel, or move around a jobsite. Make sure the closure is easy to operate with your work gloves and does not prevent you from reaching supplies when needed.
Separate different fasteners
Keep nails away from screws and other parts when their sizes or uses differ.
Use secure pockets
Choose closed or covered storage when loose parts could spill out.
5. Balance the Weight and Avoid Overloading
A tool belt should carry the tools you need without pulling your body to one side. Heavy items can make the belt sag, twist, or swing as you walk. Start by placing heavy tools close to your hips and keeping bulky items near the belt’s main support points.
Try not to place every heavy item on the same side. You do not need to make both pouches weigh exactly the same, but the belt should feel stable when you stand, walk, and reach. If one pouch pulls the belt forward, move some items to another suitable holder or remove tools you do not need.
There is no single safe load limit for every belt. The allowed load depends on the belt, pouch, attachment, tool holder, and maker’s instructions. Check the product markings and manual before adding heavy tools or accessories. Do not assume that a wider belt or a stronger-looking clip can carry more weight than its stated rating.
If the belt remains uncomfortable after you remove extra tools and adjust the layout, try a compatible support system or a different belt. Suspenders may help distribute some of the load, but they also add bulk. They should not interfere with harnesses, other protective gear, or your movement in tight work areas.
Keep heavy tools close to your hips
Avoid placing the heaviest items at the far outer edges of the belt where they can pull or swing.
Remove tools you do not need
Carry only the tools and supplies needed for the current work stage.
Check the load rating
Follow the stated weight limits for the belt, pouches, clips, and tool holders.
Watch for belt movement
If the belt rotates or slides when you reach, reduce the load and adjust its position.
When Should You Use Tool Belt Suspenders?
Suspenders may help when a belt carries a heavier set of tools and keeps slipping despite a proper fit. They can transfer some of the load from the hips to the shoulders. This may make a heavy setup feel more stable, but it does not make an overloaded belt safe.
Use suspenders that are designed to work with your belt. Check all attachment points before wearing them, and make sure they do not catch on nearby materials or conflict with required safety equipment. For a small repair kit, suspenders may add more bulk than value.
Consider suspenders
Use them when a suitable, properly adjusted belt still sags under a necessary tool load.
Skip extra support when it is not needed
A light belt may stay in place without suspenders or extra straps.
6. Adjust Your Setup for the Type of Work
The best tool belt arrangement depends on your trade and the work in front of you. A carpenter who frames walls needs a different set of tools from someone fitting trim or doing a small electrical repair. Start with a trade-specific pouch layout, then remove anything that does not support the current job.
For framing, a worker may need a hammer, tape measure, square, pencil, chalk line, and suitable fasteners. For finish carpentry, a smaller set of measuring and marking tools may be more useful. A repair worker may need only a few hand tools and a small supply of screws or anchors.
Electricians and plumbers should also use holders made for their tools. A regular carpentry pouch does not provide electrical protection, and carrying an insulated tool does not make every work area safe. Electrical work must follow the applicable safety procedures, equipment instructions, and requirements for isolating or verifying circuits.
Think about access to the work surface too. A large pouch may be useful for moving supplies across an open site, but it can get in the way in a narrow room, cabinet, crawl space, or other confined area. A removable pouch or smaller belt setup can make the work easier.
Framing work
Use a layout for the hammer, tape, square, pencil, chalk line, and fasteners. Keep the pouch clear enough to bend and move.
Finish carpentry
Carry a tape, pencil, small square, suitable knife, and only the small fasteners needed for the job.
Electrical work
Use suitable holders for pliers, approved hand tools, a tester, and connectors. Follow electrical safety rules; the belt is not protective insulation.
Plumbing or HVAC work
Choose holders that fit the actual hand tools you use. Keep heavy or bulky tools in rated storage rather than forcing them into small pockets.
Home repairs
Use a light setup with a tape measure, screwdriver, pliers, utility knife with a covered blade, and a few project supplies.
Use Removable Pouches for Changing Tasks
A modular belt can help when you switch between different types of work. You may use one pouch for framing and another for installation or repair work. Removable pouches let you carry only the set you need instead of taking every tool to every task.
Check that each pouch attaches firmly and cannot slide off during normal movement. The belt and its attachments should be made for the intended tools and load. A pouch that shifts when you bend or reach needs to be adjusted or replaced before you rely on it.
Use one setup per task
Keep common tools in a main layout and use removable pouches for work-specific supplies.
Check every attachment
Make sure clips, loops, and fasteners are fully secured before loading the belt.
7. Test the Loaded Belt Before Starting Work
A tool belt may feel fine while you stand still but become awkward once you move. Test it with the tools inside before starting a task. This is the best time to find pockets that are too deep, items that snag, and tools that fall out when you bend.
Start by walking across a clear, level area. Bend forward, squat, kneel, turn your body, and reach overhead. Pay attention to the way the pouches move. Check that the hammer stays in its holder, the tape measure remains clipped, and small parts do not spill.
Try drawing and replacing each tool with the hand you plan to use. You should be able to reach common tools without searching or making a sharp twist. If a tool catches on another item, move it to a different pocket or use a holder that fits its shape.
Do not test an unstable setup on a roof, scaffold, or ladder. Make adjustments in a safe area first. When you move to elevated work, follow the site’s access, fall-protection, and dropped-object procedures.
Walk
Check whether the belt swings, rotates, or slides down.
Bend and squat
Make sure tools do not fall out or press painfully against your thighs or ribs.
Kneel and turn
Check that pouch edges and tool handles do not block your movement.
Reach overhead
Confirm that the belt stays in place and tools remain secure during normal reaching.
Draw and replace tools
Check that each tool comes out and returns smoothly without catching on other items.
Fix Common Tool Belt Problems
If the belt keeps rotating, check whether too much weight is sitting in one pouch. Move suitable items closer to the hips, reduce the load, and adjust the fit. Suspenders may help with sagging, but they will not correct a pouch that is poorly attached.
If tools fall out, check the pocket size and closure. A pocket that is too wide for a pencil or too shallow for a tool may need a different holder. If the tape measure catches on a square, give each item its own space rather than forcing both into the same area.
If you feel pressure or discomfort, remove tools and reassess the setup. Do not keep tightening the belt or add more straps to hide the problem. Persistent discomfort is a reason to stop using that arrangement and seek help from a supervisor or a qualified safety or ergonomics professional.
Problem: The belt twists
Possible cause: uneven loading or a loose fit. Try reducing the load and moving heavy tools closer to the hips.
Problem: Small items fall out
Possible cause: open or unsuitable pockets. Try a secure pouch with the right depth and closure.
Problem: Tools catch on one another
Possible cause: crowded slots. Separate the tools and give each item a clear place.
Problem: The belt presses into your body
Possible cause: poor fit, excess weight, or badly placed tools. Remove unnecessary items and adjust the layout.
8. Follow Tool Belt Safety Rules on the Jobsite
Good organization is also a safety issue. A loose hammer, open knife, or handful of screws can cause trouble if it falls, catches on material, or shifts while you work. Check every tool before moving into an area where other people may be below you.
When working above ground level, follow your employer’s procedures for preventing dropped objects. The National Institute for Occupational Safety and Health and the Center for Construction Research and Training have highlighted the risk from dropped tools and the use of proper tool lanyards for overhead work. Use only suitable, approved tool attachment points and compatible lanyards. Do not assume that any belt loop, harness ring, or clip is designed to hold a tethered tool.
OSHA’s construction scaffolding guidance addresses protection from falling hand tools and other small objects. Depending on the work, this can include toeboards, screens, debris nets, catch platforms, canopies, or barricades, along with required head protection. A tool belt alone does not replace these controls or the site’s safety plan.
Be careful when using ladders or moving through tight areas. Do not carry a load that blocks your view, catches on the ladder, or makes you lose balance. Keep your hands available for safe access, and use an approved method to raise or lower tools when needed. Follow the ladder maker’s instructions and your worksite rules.
Before each shift, check the belt, stitching, clips, hammer loop, and pouch openings. Look for worn seams, cracked attachments, loose rivets, or damaged closures. Replace worn parts before loading the belt again. A damaged pouch may release a tool when you least expect it.
Secure sharp tools
Retract blades, use guards, and store pointed tools in holders that keep sharp edges away from your body.
Prevent falling tools
Follow site procedures for tool tethers, approved attachment points, overhead protection, and work-area controls.
Avoid overloading
Stay within the load ratings given for the belt and every attached pouch or holder.
Protect nearby workers
Do not leave loose tools near platform edges or places where they could fall onto people below.
Inspect the belt
Check straps, stitching, clips, loops, and closures before use. Remove damaged equipment from service.
Keep Your Tools Safe When Using Ladders
A tool belt should not make climbing or standing on a ladder harder. If the pouches catch on ladder parts, shift your balance, or prevent safe movement, stop and change the way you carry the tools. Do not climb while holding loose tools in your hands if doing so prevents safe contact with the ladder.
For a larger tool load, an approved tool bucket or lifting method may be more suitable than wearing every item. Follow your employer’s procedure and keep the area below clear when tools are raised or lowered. Never throw tools to another worker.
Check the belt before climbing
Make sure it does not catch, swing, or block your movement.
Use a suitable tool-carrying method
Choose an approved bucket, hoist, or other method when a belt is not practical.
Keep the area below clear
Prevent people from standing below tools or supplies that are being moved.
9. Clean and Reset Your Tool Belt Each Day
A quick end-of-day reset helps keep your tool belt ready for the next task. Remove unused fasteners, empty pockets that collected dust, and return each tool to its proper storage place. This also gives you a chance to find tools that may have been left in another work area.
Wipe dust and dirt from the pouches and inspect the areas that hold the most weight. Fine debris can build up around closures and inside tool slots. Clean tape measures and other tools according to their care instructions, especially before storing them for a long period.
Check the belt for damage before putting it away. Look closely at the seams, clips, loops, straps, and buckle. If a pouch is starting to tear or a clip no longer locks securely, repair or replace it using suitable parts rather than trusting a damaged holder.
Reset the layout when the next job requires different tools. A belt used for framing may need fewer items for a small installation job. Take a moment to remove the old load and build the new one. This simple habit prevents a belt from becoming a heavy storage bag.
Empty loose supplies
Remove unused nails, screws, scraps, and other items that do not belong in the next setup.
Clean the pouches
Remove dirt and debris that may block closures or wear down tool holders.
Inspect for damage
Check stitching, loops, straps, rivets, clips, and buckles.
Prepare for the next task
Choose the next tool set and remove anything that is not needed.
Create a Simple Daily Tool Belt Checklist
A short check before and after work can prevent many common problems. Keep the routine simple enough that you can follow it every day. A clean, complete, and properly loaded belt is easier to use than one that changes without a plan.
Before work
Check the belt fit, tool load, pocket closures, sharp-tool covers, and attachment points.
During work
Return tools to their assigned holders and remove supplies that are no longer needed.
After work
Empty loose parts, clean the pouches, inspect for wear, and prepare the next setup.
Frequently Asked Questions
Q
How tight should I wear a tool belt?
Wear your tool belt snugly around your hips so it stays in place when you walk, bend, and reach. It should not press painfully into your waist or restrict normal movement. Adjust it over the work clothes you normally wear, and use suitable suspenders if a necessary load still causes the belt to sag. Always follow the belt maker’s fit instructions.
Q
Where should a hammer go on a tool belt?
Place the hammer in a loop or holder designed for its handle. Many right-handed workers prefer a holder near the right hip, while left-handed workers may prefer the left. Your best position depends on your reach, the belt design, and the work you do. Check that the hammer stays secure when you walk, bend, and turn.
Q
How should a left-handed person organize a tool belt?
A left-handed worker can start by reversing a common right-handed layout. Put the main tools near the left hip and place fasteners or supporting supplies where the right hand can reach them. Test the tape measure and hammer positions instead of assuming they must go in one spot. The best arrangement is the one that allows smooth, natural movement.
Q
What tools should I carry in a basic carpenter tool belt?
A basic setup may include a tape measure, carpenter’s pencil, hammer, speed square, utility knife with a secure blade cover, and a small supply of fasteners. Some jobs may also call for pliers or a chalk line. Start with the tools needed for your current task and leave bulky or rarely used items in a nearby toolbox.
Q
Can I wear a tool belt while climbing a ladder?
Only use a belt when it does not interfere with safe ladder access, balance, or movement and when workplace rules allow it. The belt must not catch on ladder parts or carry a load that shifts your balance. Do not carry loose tools in your hands when that prevents safe ladder contact. For larger loads, use a suitable approved method to raise or lower tools, and follow your employer’s procedures.
Q
How do I stop tools from falling out of my tool belt?
Use pockets and holders that match each tool’s size and shape. Keep small parts in secure pouches, fit the hammer into its proper loop, and use a clip made for your tape measure. Retract or cover sharp blades. If tools still fall out when you bend, change the pouch or reduce its load rather than relying on a tighter belt.
Q
Should I carry power tools in my tool belt?
Carry a power tool only when the belt or attached holster is designed and rated for that tool and its weight. A regular hand-tool pouch may not support a drill or driver securely. Check the maker’s load limits and attachment instructions. For larger tools, a separate tool bag or approved carrier may be a better option.
✦ Wrapping Up
Conclusion
Learning how to organize wear tool belt starts with a simple plan. Choose the tools you need, set the belt at a comfortable height, place regular-use items near your dominant hand, and give every tool a secure place. Keep heavy items close to your hips and remove anything that does not support the current job.
Before work, test the loaded belt by walking, bending, kneeling, and reaching. Fix loose tools, crowded pockets, and uneven weight before moving to an elevated work area. Check your belt and follow the safety rules for your jobsite. A good setup should make tools easier to reach without getting in the way.
💡 Key Takeaway
Lay out your tools, load only what you need, adjust the belt around your hips, and test every pocket before starting your next job.
Sarah believes that a messy garage is a wasted room. After years of working in professional home staging and interior design, she shifted her focus to the most neglected part of the house: the garage. She focuses on vertical storage, aesthetic floor coatings, and converting dusty corners into functional workspaces. Sarah’s goal is to help you "unlock" every square inch of your garage.
Sarah believes that a messy garage is a wasted room. After years of working in professional home staging and interior design, she shifted her focus to the most neglected part of the house: the garage. She focuses on vertical storage, aesthetic floor coatings, and converting dusty corners into functional workspaces. Sarah’s goal is to help you "unlock" every square inch of your garage.