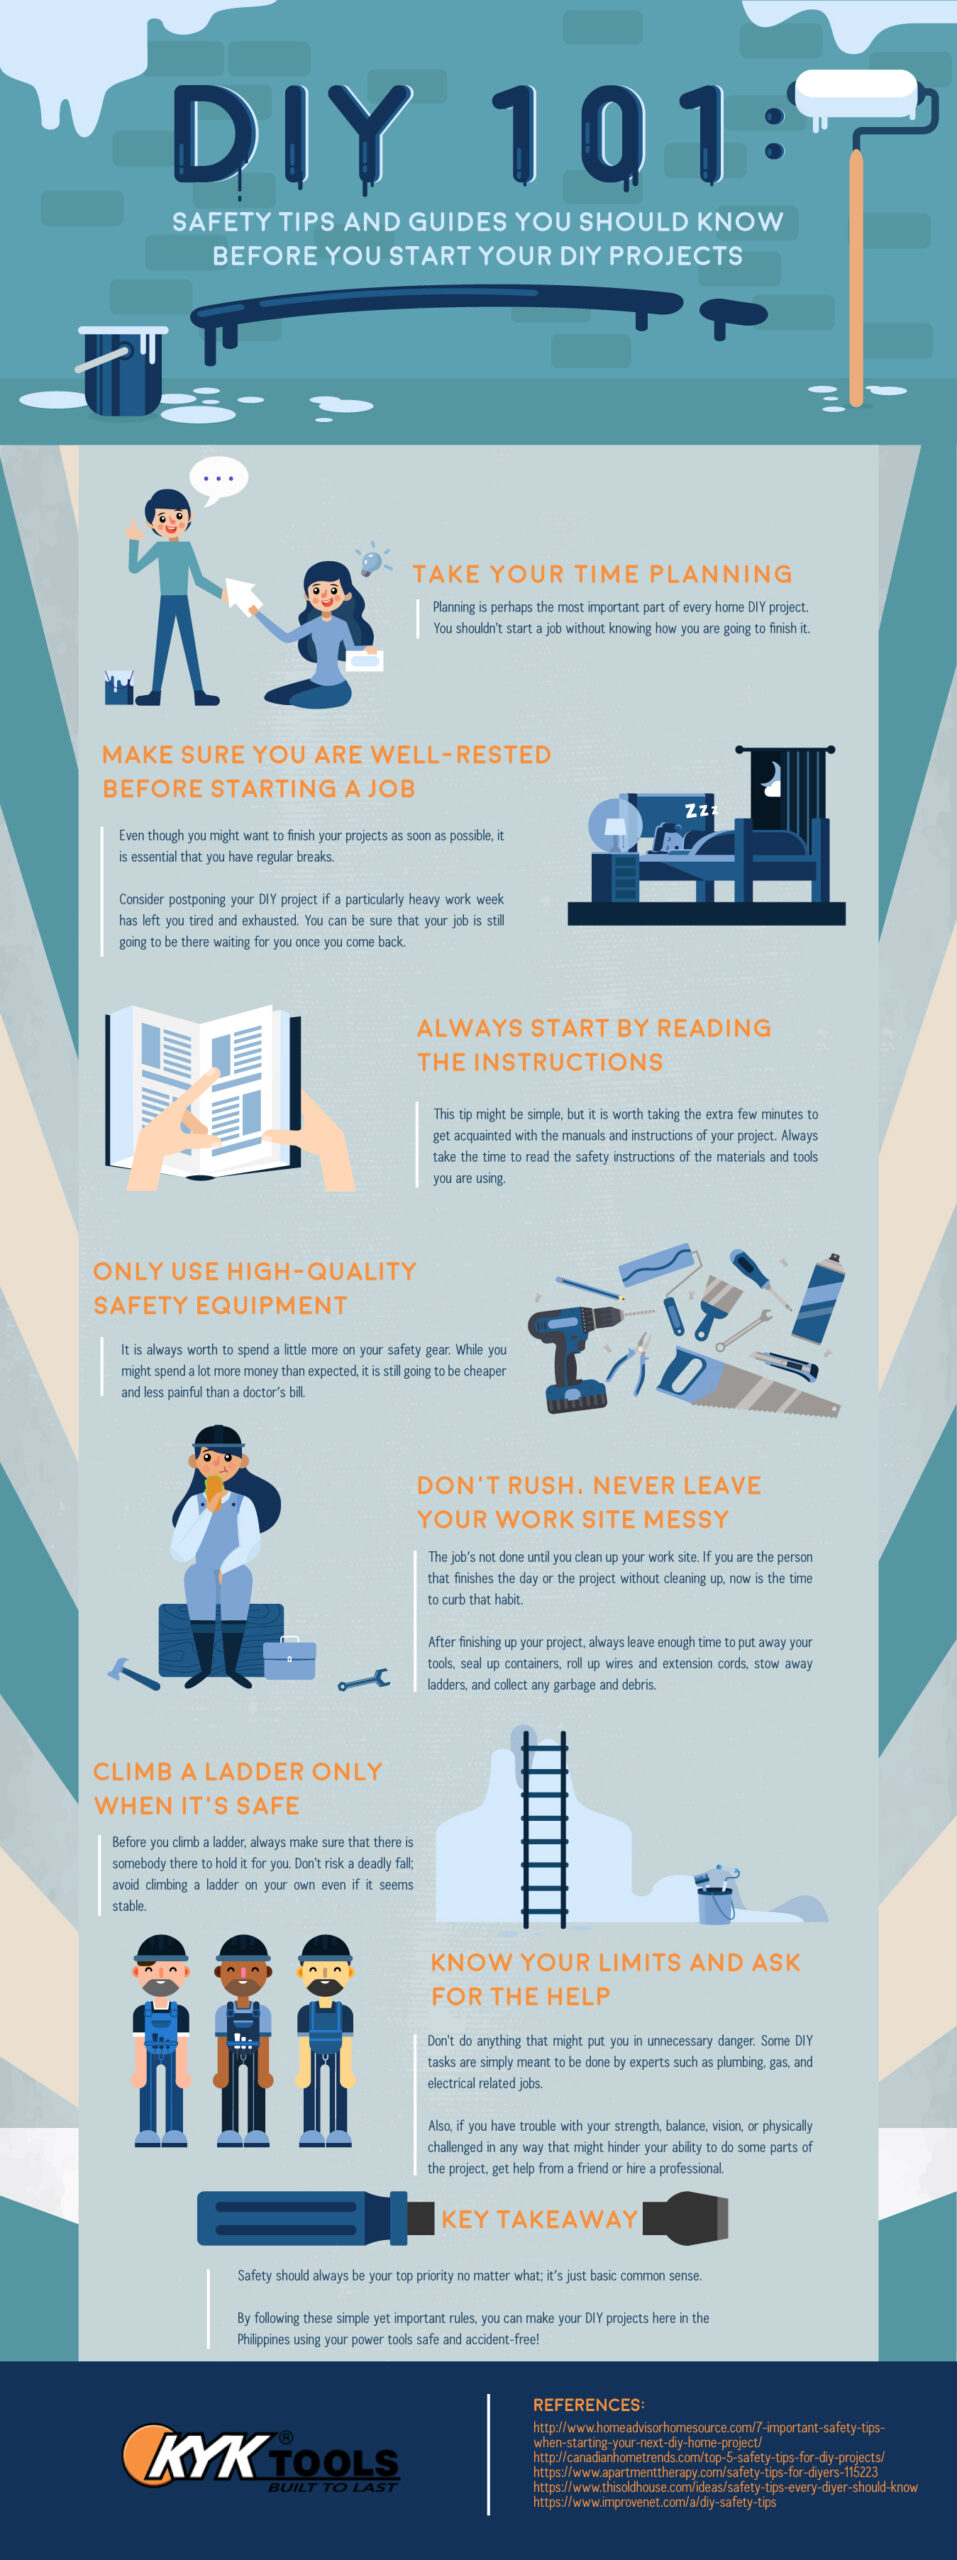
The best safety tips for every DIYer are simple: wear the right protective gear, read tool manuals, prepare a clean work area, control dust, and stop whenever a job exceeds your skills.
From fixing a loose deck board to painting a bedroom or building garage shelves, DIY projects are part of life for many American homeowners. A trip to a home improvement store can turn a weekend idea into a new shelf, a fresh coat of paint, or a repaired fence. Yet even a small job can cause an injury when tools, dust, electricity, or ladders are not handled with care.
Good DIY safety starts before the first screw goes in. Check the work area, choose the right tool, wear gear that fits the task, and know how to stop the work safely. These habits help protect your eyes, ears, lungs, hands, and the people who share your home.
This guidecovers practical safety tips for beginners and experienced DIYers across the United States. It also explains when a project needs a licensed professional, how to handle older building materials, and what to do when a job does not go as planned. The goal is not to make every task risk-free, but to help you spot hazards and make sound choices.
Source: pybhealth.com
1. Plan the Project Before You Pick Up a Tool
A safe DIY project begins with a clear plan. Know what you want to build or repair, which tools the task requires, and what could go wrong. A few minutes of preparation can prevent rushed decisions once work is underway.
Read the instructions for every unfamiliar tool, product, or building material. Check the recommended uses, required protective equipment, operating limits, and warnings. If a task depends on skills you do not have, arrange qualified help instead of learning through a dangerous trial and error process.
Source: rxtooler.com
Inspect the work area
Look for exposed wires, water leaks, unstable surfaces, poor lighting, loose flooring, and nearby flammable items. Correct hazards before starting.
Gather the right equipment
Collect the correct tools, accessories, measuring devices, protective gear, and cleanup supplies. Do not substitute an unsuitable tool just because it is close at hand.
Set a realistic schedule
Allow enough time for setup, careful work, drying, cleanup, and unexpected problems. Avoid starting a risky task when you must finish in a hurry.
Know your stopping point
Decide which steps you can safely complete and which may need an electrician, plumber, roofer, or other qualified professional.
Check for hidden hazards in older homes
Homes built decades ago may contain lead-based paint, asbestos-containing materials, outdated wiring, or other hazards that are not visible at first glance. Sanding, drilling, cutting, or demolition can release harmful dust or fibers.
In the United States, federal lead-safe requirements may apply to paid renovation work that disturbs paint in many pre-1978 homes. DIY homeowners should also take lead exposure seriously. Before disturbing old paint or suspect insulation, flooring, pipe coverings, or other materials, seek appropriate testing and guidance. Do not assume that a material is safe because it looks ordinary.
Avoid blind demolition
Do not cut into walls or ceilings without considering hidden wiring, pipes, ducts, and potentially hazardous materials.
Pause when materials are uncertain
Do not sand, drill, or break suspected asbestos-containing materials. Contact a qualified asbestos professional for assessment and advice.
2. Wear the Right Personal Protective Equipment
Personal protective equipment, often called PPE, helps reduce exposure to specific hazards. The right gear depends on the job. Safety glasses that protect against flying chips, for example, serve a different purpose from goggles designed to resist chemical splashes.
PPE works best alongside safe work methods, tool guards, ventilation, and other controls. It cannot make an unsafe setup safe. Choose equipment that fits, is suitable for the hazard, and is used according to its instructions.
Source: handymanlarry.com
Protect your eyes
Wear impact-rated safety glasses with side protection for tasks that can throw chips or debris. Use suitable chemical splash goggles when handling products that may splash. A face shield may provide added protection but does not replace safety glasses or goggles when eye protection is required.
Protect your hearing
Use suitable earplugs or earmuffs around loud saws, grinders, impact tools, and other noisy equipment. Follow the tool manual and hearing protection guidance, especially when several loud tools run nearby.
Protect your lungs
Use source capture, ventilation, and suitable respiratory protection when dust or fumes cannot be adequately controlled. Select a respirator for the specific hazard and make sure it fits correctly.
Protect your hands and feet
Wear sturdy, closed-toe footwear with good traction. Choose gloves for suitable handling tasks, but keep hands and gloves away from rotating machinery where they could become caught.
Dress for the work
Tie back long hair and remove dangling jewelry. Avoid loose sleeves around drills, saws, lathes, and other moving parts. Use task-appropriate clothing for sparks, hot materials, or chemical exposure.
Choose a respirator for the actual hazard
A loose disposable dust mask is not suitable for every job. Fine wood dust, silica-containing dust from concrete or masonry, paint vapors, and solvent fumes pose different hazards. A particulate filter does not automatically protect against gases or vapors.
When a respirator is needed, identify the substance first and follow its safety data sheet and applicable guidance. Tight-fitting respirators require a proper seal, and facial hair can interfere with that seal. For asbestos, lead, silica, or unknown hazardous materials, obtain competent guidance rather than relying on a basic mask.
Keep protective gear in good shape
Replace cracked eyewear, damaged earplugs, worn straps, and filters that have reached their service limits.
Do not reuse contaminated gear carelessly
Follow the manufacturer’s cleaning, storage, and replacement instructions for each item.
3. Use Power Tools With Care
Power tools can make home repairs faster, but their speed and force leave little room for careless movements. Drills, circular saws, table saws, angle grinders, and reciprocating saws can cause serious injuries when they are used incorrectly. Learn the controls and safe operating steps for each tool before switching it on.
Inspect the tool and workpiece before use. Check the cord, plug, battery, trigger, guards, blade, bit, and other accessories. Never use equipment with a damaged cord, missing guard, loose component, or faulty switch. Remove damaged equipment from service until it has been properly repaired.
Source: diyhuntress.com
Secure the workpiece
Use clamps or a suitable vise to hold material steady. Keep your hands away from the cutting path and do not try to hold a small piece close to a moving blade.
Use the correct accessory
Choose a blade, bit, disc, or attachment rated for the exact tool and task. Check its size, speed rating, condition, and mounting requirements.
Keep guards in place
Never remove or bypass a safety guard to make a cut easier. If a guard sticks or fails to work, stop and correct the problem before continuing.
Maintain a stable stance
Stand on a firm, dry surface, keep both hands on the tool where the design calls for it, and avoid awkward reaches.
Wait for a complete stop
Do not touch a blade or attachment while it is coasting. Disconnect the power source before changing accessories or clearing jams, following the manufacturer’s procedure.
Prevent kickback and loss of control
Kickback happens when a tool or workpiece suddenly moves in an unexpected direction. A saw blade can bind in the cut, a drill bit can catch, or a grinder can snag on an edge. The resulting movement can cause the tool or material to strike the user.
Use the correct cutting technique, secure the material, and keep the tool aligned as its manual directs. Do not force a blade through material or twist a running saw in the cut. If a tool binds, release the control, wait for all motion to stop, disconnect power when safe, and identify the cause before restarting.
Avoid freehand cuts when support is required
Use the correct fence, guide, jig, or cutting support for the tool and task. Follow the manufacturer’s instructions for the material being cut.
Keep bystanders clear
Stand clear of likely kickback paths and keep children, pets, and other people outside the work zone.
Treat table saws and grinders as high-risk tools
Table saws require particular care because the blade can cause severe injury and the workpiece may kick back. Use the supplied guard, riving knife, and anti-kickback features as applicable to the operation. Use a push stick or other suitable aid when the cut calls for it, and never reach over a moving blade to retrieve offcuts.
Angle grinders can throw fragments, create sparks, and damage discs that are unsuitable or defective. Check the disc rating, install the correct guard, control sparks, and use eye and face protection suited to the task. Do not use a damaged disc or exceed its rated speed.
Do not improvise tool repairs
Use the approved parts and repair procedures for the exact model. If a guard, brake, switch, or other safety feature fails, stop using the tool.
4. Keep Your DIY Work Area Clean and Organized
A cluttered workspace can turn a routine repair into a fall, cut, or tool accident. Cords, offcuts, loose fasteners, wet patches, and discarded packaging create hazards when you need to move quickly or carry a large item.
Set up a clear work zone before beginning. Keep frequently used tools within easy reach, store unused items away from walkways, and make sure you have enough space to move the material without twisting or losing balance.
Source: bushrealtysystems.com
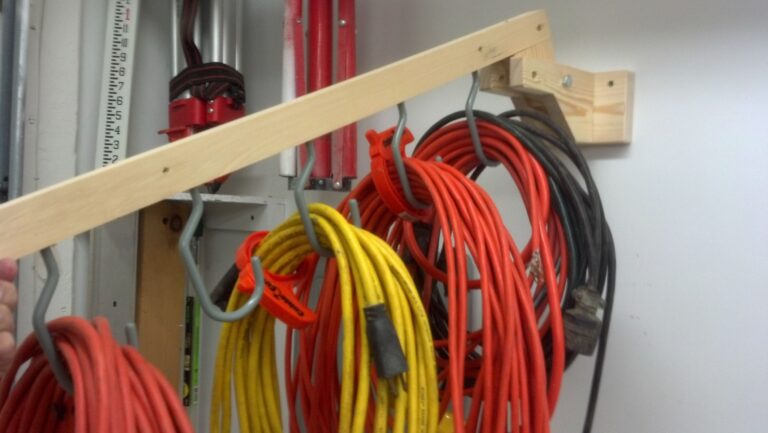
Manage cords and hoses
Route them away from walkways, sharp edges, water, and hot surfaces. Use equipment approved for the conditions and replace damaged cords rather than patching them with improvised fixes.
Improve lighting
Use adequate lighting to see measurements, hazards, cut lines, and tool controls. Keep lights positioned so they do not create glare or deep shadows.
Control dust at the source
Use a suitable dust extractor, local exhaust system, or other effective collection method. Avoid blowing dust around with compressed air or dry sweeping hazardous dust.
Store materials securely
Stack lumber flat, secure tall items against tipping, and place heavy objects where they will not fall when removed.
Clean as you go
Switch tools off before cleaning nearby surfaces, and wait until all moving parts stop. Remove scraps with an appropriate brush or tool, not your bare hands near a blade.
Make the workshop safe for children and pets
A workshop is not a safe play area, even when no tool is running. Sharp blades, small fasteners, chemicals, batteries, and heavy materials can injure curious children or pets.
Keep them outside the work zone while you work. Store tools unplugged or otherwise secured, place chemicals in their original labeled containers, and lock away hazardous materials when the project is finished. Never leave a running tool unattended.
Create a clear boundary
Close the garage door or use a suitable barrier where needed, and tell household members when dangerous work is underway.
Secure hazardous supplies
Keep sharp tools, solvents, fuels, and other hazardous products in appropriate storage away from children and pets.
5. Follow Electrical Safety Rules
Electricity can cause burns, fires, and fatal shocks. A tool does not need to look damaged to be dangerous, and a wall switch being off does not prove that wires are de-energized.
For portable tools, inspect plugs and cords before use, keep electrical connections away from water, and use equipment suitable for the location. A ground-fault circuit interrupter, or GFCI, helps reduce shock risk in situations where electricity and moisture may come into contact, but it does not make every electrical setup safe.
Source: tipshandyman.com
Keep water away
Do not operate electrical tools with wet hands or while standing in water. Stop work if a leak or damp condition creates an electrical hazard.
Use the right power source
Follow the tool’s voltage, grounding, extension-cord, and circuit requirements. Do not overload outlets or daisy-chain power strips.
Inspect cords and plugs
Remove equipment with exposed wires, damaged insulation, bent prongs, or loose connections from service.
Disconnect before maintenance
Unplug the tool or remove its battery before changing accessories or cleaning it, when the manufacturer’s procedure calls for this. Keep controls from being activated accidentally.
Know when electrical work needs a professional
Replacing a battery in a cordless drill is very different from opening a service panel or changing house wiring. Electrical systems can contain live conductors even when one breaker is off, and incorrect work can create a fire or shock hazard.
If you are unsure how to identify and verify a circuit, do not touch exposed conductors. Do not work inside an energized electrical panel. For new circuits, panel work, damaged wiring, or jobs that exceed your training, use a qualified electrician and follow local permit and code requirements.
Stop if you find damaged wiring
Do not cover or ignore frayed insulation, scorch marks, buzzing, burning smells, or unexplained shocks. Keep people away and arrange qualified assessment.
Never defeat a safety device
Do not bypass grounding, remove protective prongs, or use a fuse or breaker with an unsuitable rating.
6. Use Ladders and Work at Height With Care
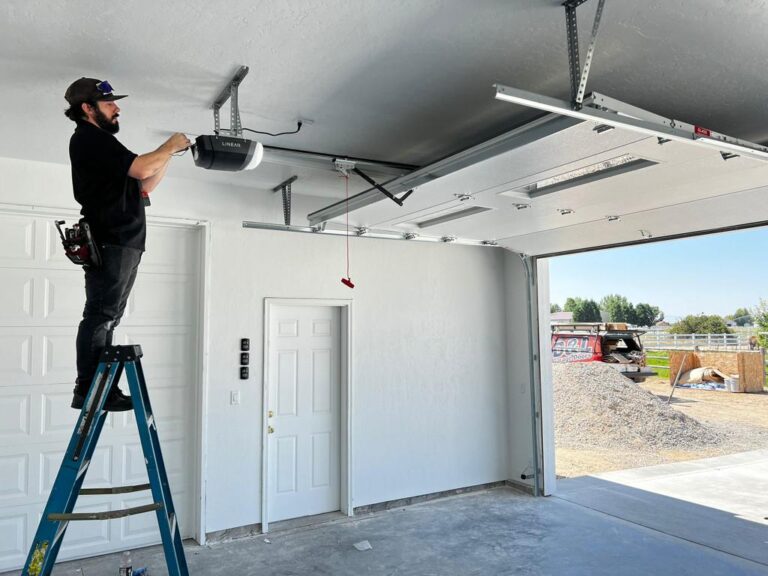
Falls can happen during simple jobs such as cleaning gutters, painting a ceiling, changing a light fixture, or trimming branches. A ladder that is too short, poorly placed, or used on an uneven surface can quickly become unstable.
Choose a ladder designed for the task and the load. Check its condition, including the feet, rails, steps, locks, and labels. Follow the ladder manufacturer’s instructions and applicable safety guidance before climbing.
Source: www.pinterest.com
Set up on firm, level ground
Do not place a ladder on boxes, loose bricks, wet flooring, or other makeshift supports. Secure the setup as directed by the manufacturer.
Maintain three points of contact
Keep two hands and one foot, or two feet and one hand, in contact when climbing whenever possible. Use a proper method to raise and lower tools rather than carrying bulky items that affect balance.
Do not overreach
Keep your body centered between the side rails. Climb down and reposition the ladder instead of leaning sideways.
Respect load limits
Include your body weight, clothing, tools, and materials when checking the ladder’s rated capacity.
Avoid unsafe weather
Do not climb when strong wind, lightning, rain, ice, or slippery surfaces make the work unsafe.
Know when not to use a ladder
Some jobs are too risky for a typical homeowner ladder setup. Roof work, work near overhead power lines, and jobs requiring heavy tools or awkward materials can demand specialized equipment, fall protection, or trained workers.
Never use a metal ladder near electrical hazards. Do not stand on a step or rung that the manufacturer prohibits using. If a task requires you to lean far outside the ladder, climb onto a roof without a suitable plan, or handle a heavy load at height, stop and arrange a safer method.
Inspect before every climb
Remove a damaged ladder from service rather than attempting an improvised repair.
Keep the area below clear
Prevent other people from walking beneath your work and secure tools or materials that could fall.
7. Handle Paint, Solvents, Adhesives, and Dust Safely
Paints, stains, adhesives, cleaners, and solvents can expose DIYers to irritating fumes, skin contact, fire hazards, or harmful vapors. Dust from sanding wood, cutting masonry, or removing old finishes can also affect health.
Read the product label and safety data sheet before use. Check the ventilation instructions, protective equipment, storage rules, first-aid steps, and incompatibilities. A pleasant smell does not prove that a product is safe to breathe.
Source: rxtooler.com
Ventilate the space
Use the ventilation method recommended for the product. Where safe and suitable, increase fresh-air flow and avoid working in enclosed areas with accumulating fumes.
Keep flammable products away from ignition sources
Follow label directions and keep solvents, fuels, and flammable vapors away from flames, sparks, smoking, and hot equipment.
Never mix cleaners casually
Mixing products can release dangerous gases or cause violent reactions. Use products only as directed and never combine bleach with ammonia or acids.
Store chemicals in original containers
Keep labels readable and lids secure. Never place hazardous chemicals in drink bottles or food containers.
Dispose of waste properly
Follow local rules for paint, solvents, oily rags, batteries, and other hazardous waste. Do not pour leftover chemicals down a drain unless the product and local rules explicitly allow it.
Prevent dust exposure during sanding and cutting
Fine dust can stay in the air after a job looks finished. Wood dust may irritate the skin and breathing passages, while dust from cutting concrete, brick, or stone can contain respirable crystalline silica, which can cause serious lung disease.
Choose methods that create less dust, use suitable extraction at the tool, and avoid dry sweeping or blowing hazardous dust around. For concrete and masonry work, use appropriate wet methods or effective dust-control equipment compatible with the tool and task. Wear respiratory protection when needed, but do not treat a respirator as a substitute for source control.
Check the material first
Older paint, insulation, flooring, and other building materials may contain hazardous substances. Assess the risk before sanding, grinding, or demolition.
Keep contaminated dust out of living areas
Isolate the work zone when needed, protect nearby surfaces, and use suitable cleanup methods. Avoid carrying dust on clothing into other parts of the home.
Store and dispose of oily rags carefully
Some finishing oils and products can generate heat as they react with air. A pile of oily rags may ignite without an open flame, depending on the product and conditions.
Follow the product label and local fire department guidance for storage and disposal. Do not leave oily rags bunched together or place them in an ordinary pile near combustible materials. Use only the approved handling method for the specific product.
Keep labels and instructions available
Retain product information so you can check the correct cleanup and disposal procedure.
8. Protect Yourself During Painting, Welding, and Hot Work
Painting and finishing may seem less risky than cutting wood, but these jobs can expose you to chemical hazards. Welding, soldering, and metal grinding add intense heat, sparks, burns, and fire risks.
Match your precautions to the material and process. Read product instructions, keep combustible items away, and use the correct eye, face, skin, and respiratory protection. Do not assume that an open garage door alone provides enough ventilation for every chemical or hot-work task.
Source: tipshandyman.com
Prepare for sparks
Move combustible materials away from the work area, protect nearby surfaces, and have appropriate fire-extinguishing equipment available. Follow safe hot-work procedures for the specific task.
Use the right eye protection
Ordinary clear safety glasses are not sufficient protection against the intense optical radiation from welding arcs. Use a suitable welding helmet or shield with the correct filter and additional eye protection as required.
Keep products away from heat
Follow labels when using flammable paints, aerosols, solvents, and adhesives. Do not spray or apply products near flames, sparks, or hot surfaces.
Check the work area after hot work
Inspect for smoldering debris and hidden ignition risks. Follow the appropriate fire-watch requirements for the work being done.
Do not improvise welding protection
Welding can cause eye injuries, skin burns, fire, and exposure to hazardous fumes. The required helmet filter, protective clothing, ventilation, and other controls depend on the process, material, and work environment.
If you have not been trained to set up and perform the operation safely, do not use welding equipment based on a short video alone. Seek suitable training and follow the equipment manual and applicable safety requirements.
Protect nearby people
Use appropriate screens and keep others away from welding arcs, sparks, and hot workpieces.
9. Lift, Move, and Secure Heavy Materials Correctly
DIY projects often involve lumber, drywall, tile, concrete bags, cabinets, and bulky furniture. Poor lifting or an unstable load can lead to back strain, crushed fingers, dropped materials, or falls.
Think about the load before moving it. Check its weight and balance, clear the route, and decide where it will be set down. If it is too heavy, long, or awkward to control, use suitable lifting equipment or ask for trained help rather than trying to prove you can manage it alone.
Source: diyhuntress.com
Keep the route clear
Move cords, scraps, tools, and other trip hazards before carrying materials.
Use stable handholds
Keep the load close to your body where possible, avoid twisting under load, and move your feet to turn.
Secure materials before cutting
Support long boards and large sheets so they cannot tip, sag, or pinch the blade during a cut.
Prevent crushing injuries
Keep fingers clear when setting down heavy items, and never rely on a person or an unstable stack to support a suspended load.
Check wall and ceiling loads before mounting heavy items
Installing shelves, cabinets, televisions, or overhead storage requires suitable anchors and a reliable understanding of the supporting structure. A fastener that works in solid wood may not be suitable for drywall, masonry, or a hollow wall.
Locate framing and hidden utilities before drilling. Follow the mounting hardware instructions and confirm the wall or ceiling can support the intended load. For large overhead storage, structural changes, or uncertain support, consult a qualified professional.
Do not guess about load capacity
Use documented ratings and the correct installation method for the actual material and mounting conditions.
10. Know When to Stop and Call a Professional
A good DIYer knows the limits of a project. Some jobs require specialized tools, technical training, permits, inspections, or a legal license. Choosing professional help can prevent injury, property damage, and costly repairs.
The exact rules vary by state, county, and city. Before starting work that affects electrical systems, gas lines, major plumbing, structural supports, roofing, or hazardous materials, check local requirements and the risks involved. Do not use a general online guide as a substitute for job-specific instructions or required professional assessment.
Source: bushrealtysystems.com
Electrical panels and complex wiring
Use a qualified electrician for energized systems, service panels, new circuits, damaged wiring, and work outside your training.
Gas lines and fuel-burning equipment
Do not improvise gas repairs or alter combustion equipment without the proper qualifications. Leave suspected leaks and unsafe equipment to qualified responders or technicians.
Structural changes
Get qualified advice before removing load-bearing walls, altering beams, cutting major structural members, or changing foundations.
Suspected lead or asbestos
Obtain appropriate testing and qualified guidance before disturbing suspect materials, especially during demolition, sanding, or drilling.
Roofing and dangerous tree work
Seek trained help when a task involves significant fall exposure, overhead power lines, unstable trees, or heavy equipment.
Use a simple stop-work test
Before starting a risky step, ask whether you understand the hazard, have the right equipment, can control the material, and know how to respond if something fails. If the answer to any of these questions is no, pause and get the information or help you need.
Also stop if a tool begins to vibrate unusually, a guard fails, a chemical produces unexpected fumes, a ladder shifts, or a circuit behaves strangely. Do not keep working just because most of the job is already complete.
Pause
Release the tool control, step away from the immediate hazard if safe, and prevent others from entering the area.
Make the situation safe
Disconnect power or isolate the hazard only when you can do so safely. Do not approach exposed live wires, leaking gas, or unstable structures.
Get qualified advice
Consult the manufacturer’s instructions or an appropriate professional before resuming the task.
11. Build a Simple DIY Safety Checklist
A short checklist helps turn safety into a habit. Use it before each project and repeat the relevant checks whenever the work changes. A task that begins with simple measuring may become much riskier once cutting, sanding, drilling, or working at height begins.
The checklist below is a starting point, not a substitute for the tool manual, chemical label, or professional instructions. Add any job-specific precautions before you begin.
Source: storage.googleapis.com
Before starting
Read the instructions, inspect the tools, identify hidden hazards, prepare the work area, choose suitable PPE, and keep children and pets away.
During the job
Keep guards in place, secure the workpiece, control dust and fumes, maintain stable footing, and pay attention to changes in sound, vibration, smell, or tool behavior.
When changing tools or clearing jams
Stop the tool, wait for moving parts to stop, and disconnect the power source according to the manufacturer’s instructions.
After finishing
Switch off and secure equipment, store materials and chemicals correctly, clean using suitable methods, and inspect the area for fire, trip, and exposure hazards.
When something goes wrong
Stop work, avoid exposing others, and get appropriate help. Do not restart until the cause is understood and corrected.
What should you do after an injury or exposure?
Respond to the actual hazard rather than trying to finish the job. For a severe injury, uncontrolled bleeding, major burn, suspected electrical injury, breathing difficulty, or other emergency, call 911 in the United States. Do not touch a person who may still be in contact with an electrical source until the power hazard has been made safe.
For a chemical splash or suspected poisoning, follow the product’s first-aid instructions and contact Poison Control in the United States at 1-800-222-1222 for appropriate guidance. Call 911 for severe symptoms. If dust or a foreign object enters an eye, avoid rubbing it; follow appropriate first-aid guidance and seek urgent medical care for pain, vision changes, embedded objects, or a suspected penetrating injury.
Do not minimize serious symptoms
Electrical injuries, deep cuts, serious burns, and certain chemical exposures may need prompt medical assessment even when the initial symptoms seem mild.
Frequently Asked Questions
Q
What safety gear should every DIYer have?
A useful starting kit includes impact-rated safety glasses, suitable hearing protection, sturdy closed-toe footwear, a basic first-aid kit, and work clothing suited to the task. Add gloves, chemical splash goggles, a properly selected respirator, a face shield, or other equipment when the hazard requires it.
There is no single set of gear that protects against every hazard. Choose equipment for the specific material and tool, and follow the manufacturer’s instructions.
Q
Can beginners use power tools safely?
Yes, beginners can learn to use many power tools safely when they start with suitable tasks, read the manual, understand the controls, and follow the required precautions. Practice on appropriate scrap material when the instructions permit it, and secure the workpiece before operating the tool.
Start with lower-risk tasks and seek hands-on training for tools or techniques you do not understand. Do not attempt unfamiliar high-risk operations simply because a video makes them look easy.
Q
Should I wear gloves when using power tools?
It depends on the tool and task. Gloves can help protect against cuts, rough surfaces, chemicals, and heat during suitable handling work, but loose or unsuitable gloves can become caught in rotating parts.
Follow the tool manufacturer’s guidance. Keep gloves, clothing, hair, and jewelry away from drills, lathes, and other rotating equipment when entanglement is a risk.
Q
How can I reduce dust during a DIY renovation?
Use effective dust collection at the tool, suitable ventilation, and appropriate wet methods when the material and tool allow them. Isolate the work area when needed, avoid dry sweeping or blowing hazardous dust into the air, and clean with methods suitable for the material.
If the work may disturb lead paint, asbestos, or silica-containing materials, identify the hazard before starting and follow appropriate specialist guidance. A basic disposable mask is not a universal solution.
Q
What should I do if a power tool jams?
Release the control and wait for all moving parts to stop. Disconnect the power source using the manufacturer’s procedure before inspecting the jam, and never reach toward a blade or attachment that may still move.
Find out why the tool jammed, check the accessory and workpiece, and correct the cause before restarting. If the tool is damaged or the cause is unclear, stop using it until it can be checked safely.
Q
When should I hire a professional instead of doing the job myself?
Seek qualified help when the work involves hazards you cannot assess or control, such as complex electrical systems, gas lines, structural changes, significant roof work, or suspected asbestos. Professional help may also be required by local codes, permits, or licensing rules.
If you lack the correct equipment, cannot follow the instructions confidently, or cannot make the work area safe, stopping is the responsible choice.
✦ Wrapping Up
Conclusion
The best safety tips for every DIYer come down to preparation, the right equipment, and sound judgment. Plan each project, inspect your tools, wear suitable protective gear, keep your workspace tidy, and control dust, fumes, and electrical hazards. These habits can help make home repairs and weekend projects safer for you and your family.
Remember that safety is part of the job, not an extra step to squeeze in at the end. Follow tool manuals and product labels, respect ladders and moving machinery, and stop when a hazard exceeds your training. For work involving serious electrical, structural, chemical, or fall risks, choose qualified professional help rather than taking a chance.
💡 Key Takeaway
Before your next DIY project, spend five minutes checking the work area, inspecting your tools, selecting the right protective gear, and identifying the point at which you would stop and ask for professional help.
Sarah believes that a messy garage is a wasted room. After years of working in professional home staging and interior design, she shifted her focus to the most neglected part of the house: the garage. She focuses on vertical storage, aesthetic floor coatings, and converting dusty corners into functional workspaces. Sarah’s goal is to help you "unlock" every square inch of your garage.
Sarah believes that a messy garage is a wasted room. After years of working in professional home staging and interior design, she shifted her focus to the most neglected part of the house: the garage. She focuses on vertical storage, aesthetic floor coatings, and converting dusty corners into functional workspaces. Sarah’s goal is to help you "unlock" every square inch of your garage.