Installing a new garage door opener involves checking the door, assembling the opener rail, mounting the motor, connecting the door arm, installing the controls and safety sensors, and testing the system. Follow the instructions for your exact model, and hire a qualified garage door technician if the door has damaged springs, loose cables, or other mechanical problems.
For homeowners across the United States, a garage door opener can make daily life easier, whether you park in an attached garage in the suburbs or use a detached garage at the end of a driveway. A new opener can also replace a noisy, unreliable unit or add features such as remote access, battery backup, and smartphone control. Before starting, check that the new unit fits your door, ceiling, outlet, and available mounting space.
Installing a garage door opener is a project that some homeowners can complete with basic tools and careful planning. However, the opener is only one part of a larger system that includes heavy door panels, springs, lift cables, tracks, and safety devices. The steps below explain the usual installation process while identifying work that should be left to a professional.
This guide covers common residential sectional garage doors in the United States. Exact mounting points, wire connections, sensor heights, and adjustment procedures vary by model. Your manufacturer’s installation manual takes priority over general instructions, especially for electrical work and safety testing.
Source: storables.com
What You Need Before Installing a New Garage Door Opener
Prepare the work area and confirm that the new opener is compatible with your garage door before opening the installation kit. A little planning can prevent problems with ceiling clearance, rail length, electrical access, and mounting support.
Read the complete installation manual, including the sections on warnings, assembly, wiring, travel limits, force settings, and safety testing. Some models use different mounting systems and adjustment methods, so do not assume that instructions for an older opener apply to a new one.
Source: titangaragedoorsne.com
Tools
Gather a tape measure, pencil, level, suitable screwdrivers, wrench or socket set, pliers, and a drill with appropriate bits. A ladder rated for the user and task may also be needed. Use safety glasses and gloves where appropriate.
Installation hardware
Check the kit for the motor unit, rail, trolley, door arm, header bracket, ceiling mounting brackets, fasteners, wall control, remote controls, and photoelectric safety sensors. Parts vary by model, so use the included inventory list.
Safe access
Clear vehicles, bicycles, storage bins, and other items from the garage door’s travel path. Keep children and pets away while the door and opener are being installed or tested.
Electrical supply
Confirm that the opener has a suitable power supply and that the outlet or hardwired connection meets the manufacturer’s requirements and applicable local electrical rules. Do not use an extension cord as a permanent substitute for a proper supply.
Check the Existing Garage Door First
Disconnect the existing opener using its manufacturer-approved procedure, with the door closed whenever possible. If the door can be safely operated manually, follow the manual’s instructions for releasing the trolley and moving the door. A sectional door should travel smoothly without binding, sudden drops, or unusual resistance.
A door that feels unusually heavy, moves unevenly, or will not remain in the position expected by the manufacturer may have a spring, cable, track, or balance problem. Stop if you notice these signs. Garage door springs and cables can store dangerous amounts of energy, and repairs should be handled by a qualified technician.
Look for visible damage
Check for bent tracks, damaged panels, loose hinges, frayed lift cables, and loose mounting hardware without touching spring assemblies or cable drums.
Confirm the door type
Most standard residential openers are designed for compatible sectional doors. One-piece tilt-up doors and unusual door designs may need a specific opener and installation arrangement.
Measure the Garage Ceiling and Door Opening
Measure the door height, available headroom above the opening, distance from the header to the motor mounting area, and the ceiling space needed for the rail. Check the manual for the required clearance and any special instructions for low ceilings, high-lift doors, or unusually tall doors.
Locate a suitable structural mounting point for the header bracket and ceiling supports. A ceiling joist or other approved structural member must carry the opener’s mounting loads. If the support location is unclear or the garage has engineered trusses, unusual framing, or a finished ceiling that hides the structure, ask a qualified professional to assess it.
Check the header
Verify that the area above the opening can accept the specified bracket and fasteners. Do not rely on trim, thin paneling, or drywall as structural support.
Check the power location
Make sure the approved power supply is within reach of the opener without straining the cord or creating a trip hazard.
Choose the Right Garage Door Opener
Select an opener based on the door’s specifications, available space, noise concerns, and desired features. Horsepower ratings alone do not establish compatibility. Follow the manufacturer’s door-size and door-weight limits, and check whether the product supports the particular door configuration in your garage.
Residential openers commonly use chain-drive, belt-drive, screw-drive, or direct-drive mechanisms. Each design has different maintenance needs, noise characteristics, and installation requirements. No single type is best for every garage.
Source: Lowe’s
Chain-drive opener
A chain moves the trolley along the rail. This type may suit homeowners who prioritize a familiar design and practical cost, but the moving chain can be more noticeable in an attached garage.
Belt-drive opener
A reinforced belt moves the trolley. Belt-drive models are often chosen for their quieter operation, which can be helpful when a bedroom or living space is near or above the garage.
Screw-drive opener
A threaded rod moves the trolley. Noise, lubrication needs, climate considerations, and maintenance requirements depend on the specific design and manufacturer.
Direct-drive opener
Some designs move the motor along a fixed rail or use another simplified drive arrangement. Follow the model-specific mounting and service instructions rather than assuming a conventional chain-rail layout.
Features Worth Comparing
A built-in light, remote controls, a wall control, rolling-code security, and automatic closing features may be available depending on the model. Smartphone control can be useful when you want to check the door’s status remotely, but some products require a compatible hub, wireless network, account, or subscription.
Battery backup can help some openers operate during a power outage, provided the model supports it and the battery is maintained. It does not make every garage door safe to operate during every emergency, and it does not remove the need to follow the manufacturer’s warnings.
Attached garage
Consider operating noise, light output, and whether the opener’s vibration could be transmitted into nearby rooms.
Frequent power outages
Check whether the model has battery backup, what functions remain available during an outage, and how the battery is tested or replaced.
Smart-home access
Confirm compatibility with your existing network, phone, and preferred smart-home platform before buying.
Multiple doors
Verify whether the opener and its controls support the number of doors and remotes you intend to use.
Step 1: Remove the Old Garage Door Opener Safely
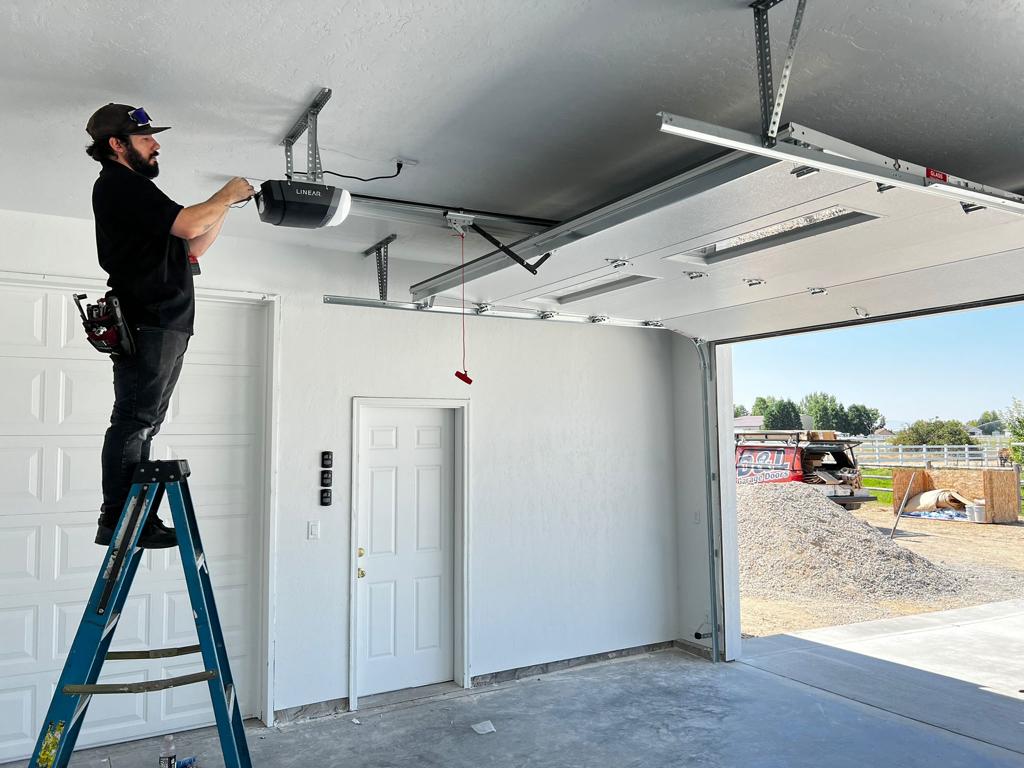
If you are replacing an existing opener, close the garage door and disconnect electrical power before removing the old unit. Follow the old opener’s instructions for releasing the trolley, disconnecting the door arm, and removing the mounting hardware.
Keep the door closed and supported in its normal position while the opener is detached. Do not remove door springs, lift cables, cable drums, or spring brackets as part of an ordinary opener replacement. These parts belong to the door’s counterbalance system and can cause serious injuries if released improperly.
Have another adult assist with handling bulky components where needed. Support the old motor and rail before removing their last mounting fasteners, and use a suitable ladder and stable working position. If the existing support structure is loose, damaged, or unclear, stop and obtain professional help.
Source: upstatedoors.com
What to Do With Old Hardware
Separate reusable mounting points from hardware that belongs only to the old model. The old header bracket, rail supports, wiring, and door arm may not match the replacement opener. Reuse parts only when the new manufacturer’s instructions explicitly permit it and the parts are in sound condition.
Remove old controls and wiring only when it is safe to do so. If the installation involves exposed line-voltage wiring, damaged insulation, an unknown circuit, or a hardwired opener, have a qualified electrician handle the electrical work as required by local rules.
Keep compatible parts organized
Set aside fasteners and components only after confirming that the replacement manual allows their reuse.
Inspect the mounting area
Look for cracked wood, loose anchors, damaged brackets, and signs of movement before attaching the new opener.
Step 2: Assemble the Rail and Trolley
Assemble the rail on a clean, level surface before lifting the motor into place. Depending on the model, the rail may arrive in several sections that connect with bolts, sleeves, clips, or other supplied hardware. Lay out the parts in the order shown in the manual so that the trolley, belt, chain, or screw mechanism is installed correctly.
Attach the trolley and drive components as directed. The trolley is the moving carriage that connects the rail to the garage door through the door arm. Its orientation and engagement method matter because an incorrectly assembled trolley may prevent normal travel or cause the opener to operate improperly.
Tighten the specified fasteners and adjust chain or belt tension only as directed. Over-tightening can damage parts, while excessive slack can affect operation. Do not substitute generic hardware or modify the rail to make incompatible parts fit.
Source: i.ytimg.com
Confirm the Rail Assembly Before Lifting
Check that the rail sections are fully joined, the drive mechanism is seated correctly, and the trolley moves as the manual describes. Confirm that any required stops, retainers, and covers are in place before mounting the assembly.
Some opener kits allow the motor to be attached before the rail is raised, while others use a different sequence. Follow the model-specific order rather than choosing a method based on appearance or convenience.
Check alignment
The assembled rail should be straight and secure, with no loose joints or visibly damaged components.
Check moving parts
Verify the trolley and drive components are installed in the correct orientation before attaching the opener to the door.
Step 3: Install the Header Bracket and Mount the Opener
The header bracket connects the rail to the structure above the garage door opening. Position it using the exact measurements and reference points shown in the new opener’s manual. The correct location depends on the door height, rail design, header geometry, and manufacturer requirements.
Fasten the bracket to approved structural material using the specified hardware. Do not mount it to decorative trim or unsupported drywall. If the header material is masonry, steel, or another nonstandard material, use only a mounting method approved for that structure and product.
Attach the rail to the header bracket using the supplied pin or connection hardware. Keep the assembly supported while positioning the motor. An assistant can help steady the rail, but the unit must be secured with proper temporary support rather than relying on a person to hold its weight.
Source: mygarageandgates.com
Secure the Ceiling Supports
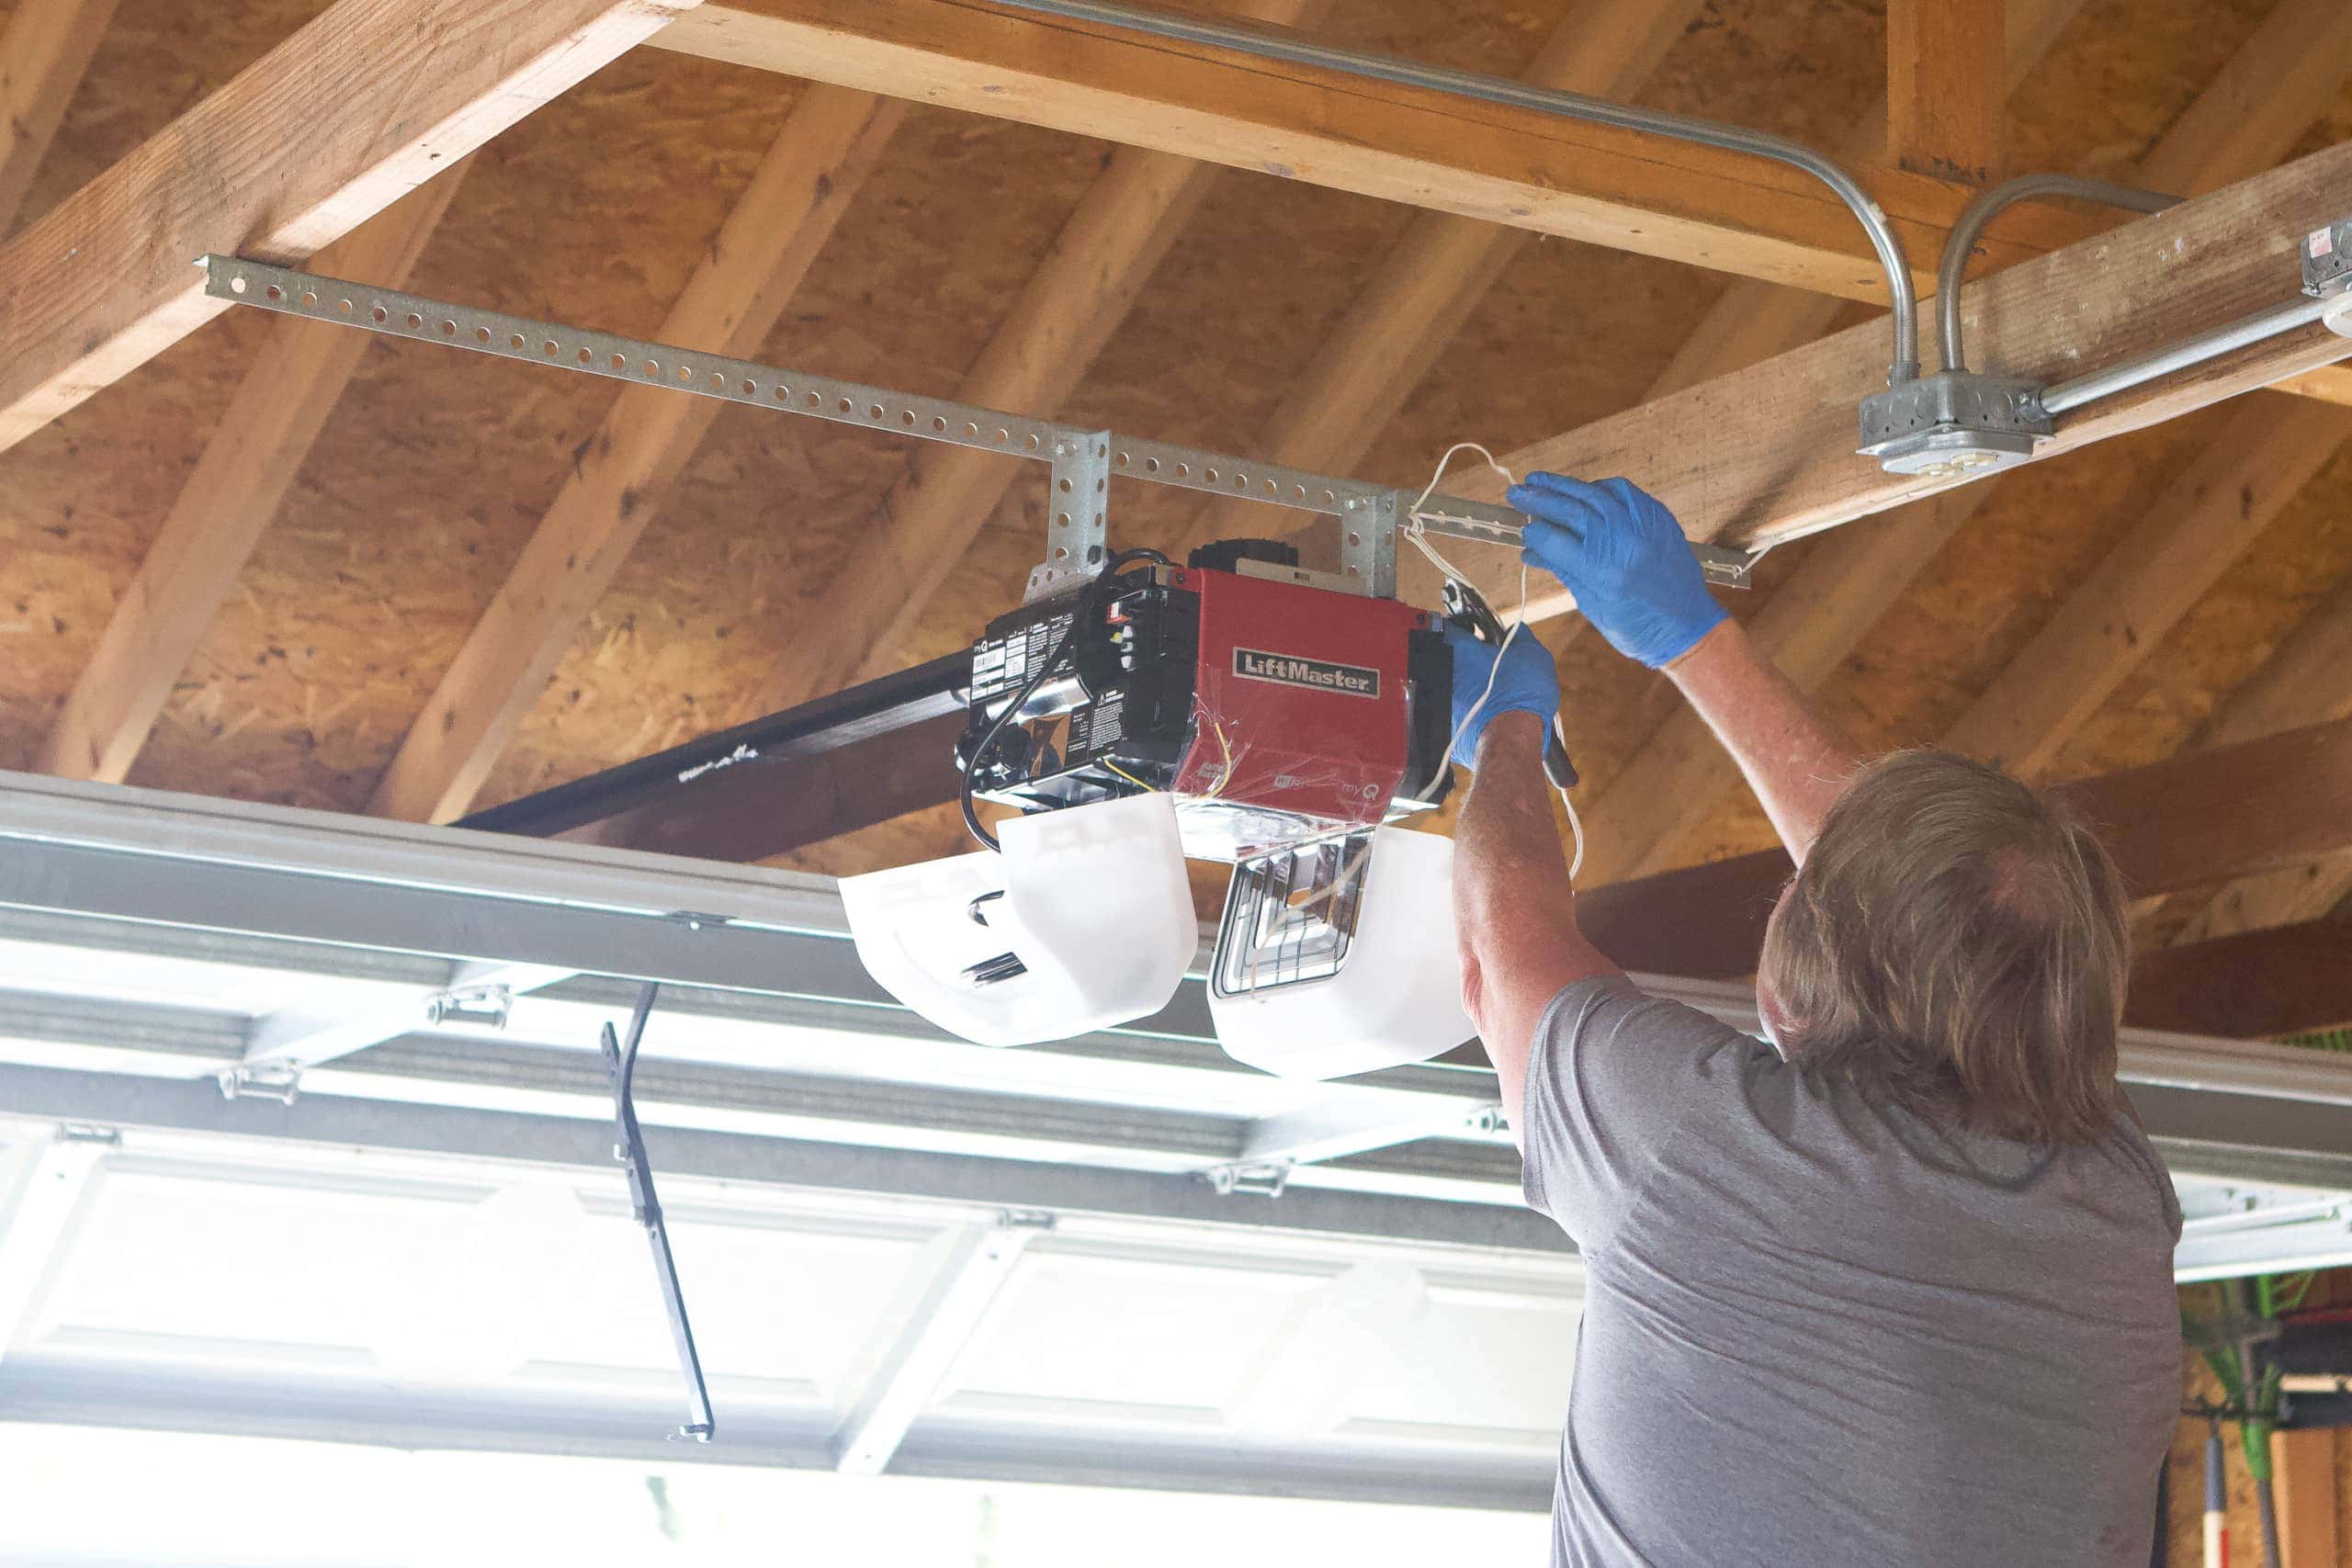
Raise the motor end to the height and angle specified in the installation manual. Attach the ceiling brackets to suitable structural members and connect them to the opener using the supplied mounting hardware. Many installations use perforated metal angle, but the exact support arrangement depends on the model and garage framing.
The opener must remain firmly supported during operation. Do not assume that a visually sturdy bracket is adequate if it is attached to the wrong material or uses unsuitable fasteners. When the structure cannot be identified or the required support is uncertain, stop and consult a qualified installer.
Use approved structural supports
Fasten the supports to framing or other structural members that meet the manufacturer’s requirements.
Check rail position
Keep the rail and motor aligned according to the manual. Incorrect height or angle can affect travel, clearance, and door-arm movement.
Check every fastener
Confirm that the specified bolts, nuts, brackets, and retainers are fully secured before releasing temporary support.
Step 4: Connect the Door Arm and Trolley
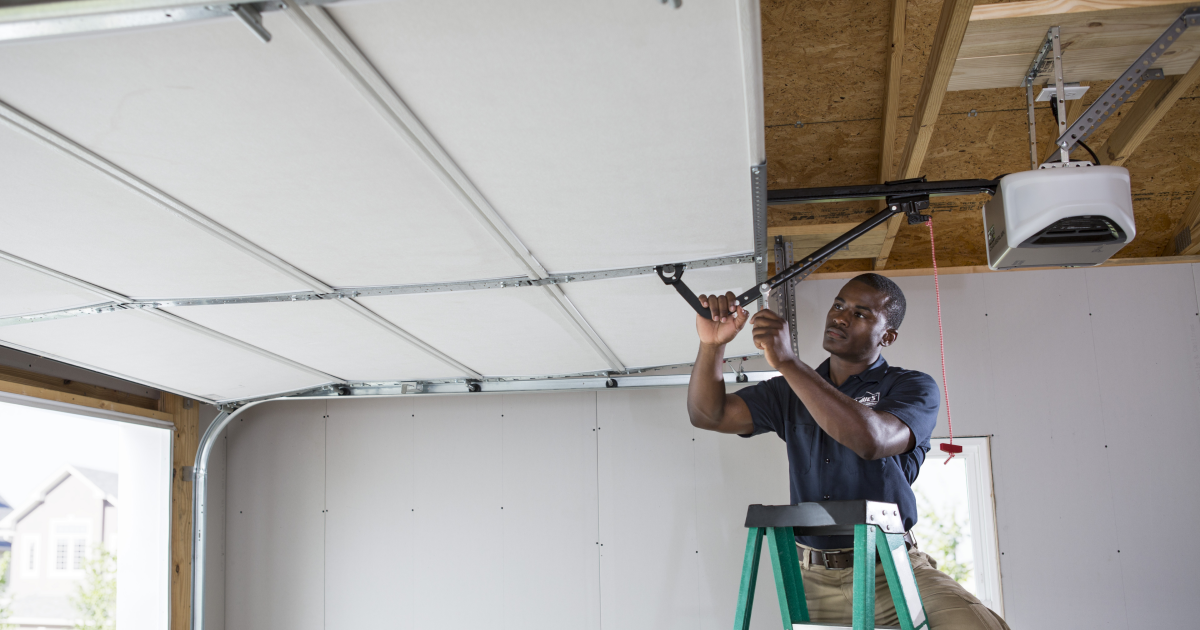
The door arm links the opener trolley to the garage door. Attach the door bracket at the location specified in the manual, then connect the arm to the bracket and trolley using the supplied pins and retainers. The exact position varies with the door design and opener model.
Do not attach the door arm to a random panel, hinge, or thin section of the door. Use the approved attachment point and hardware. If the door has a damaged panel or lacks a suitable reinforced attachment area, obtain professional advice before continuing.
With the opener disconnected from power, follow the manual to confirm that the trolley and arm can move through the required range without binding. Do not force the door or use the motor to pull a misaligned door into position. If anything bends, catches, or moves unexpectedly, stop and inspect the installation.
Source: images.ctfassets.net
Avoid Common Door-Arm Errors
An incorrectly positioned door arm can place unwanted stress on the opener or door. Using the wrong hole, omitting a retaining clip, or attaching the arm to a weak panel can lead to loose hardware or unreliable movement.
Use only the adjustment range and arm configuration described in the model’s manual. Different opener designs have different arm geometry, so measurements from another model may not apply.
Use the supplied retainers
Install all specified pins, clips, and fasteners so the arm cannot work loose during movement.
Keep the door aligned
The door should follow its tracks without rubbing, twisting, or binding before powered testing begins.
Step 5: Install the Wall Control and Safety Sensors
Install the wall control and photoelectric safety sensors before regular operation. These devices help the opener respond to user commands and detect certain obstructions in the door opening. Their exact wiring, mounting points, and connection terminals depend on the product.
Mount the wall control in the location specified by the manufacturer. Residential installations commonly place it where the person using the control can see the garage door, but the manual and applicable safety requirements determine the correct location. Keep controls away from children where required and never allow a user to operate the door without a clear view when the system requires visual supervision.
Install the photoelectric sensors on opposite sides of the door opening at the height specified by the manual. The sensors must face one another and maintain a clear beam across the opening. Secure their brackets so vibration or accidental contact does not easily change their alignment.
Source: garage.com
Wire the Opener Correctly
Disconnect power before connecting or changing wiring. Use the terminals, wire type, routing, and connections specified by the manufacturer. Keep low-voltage control wires away from moving door parts and protect them from sharp edges, crushing, and accidental damage.
Never assume that wire colors or terminal labels are identical across opener brands. If the product requires hardwiring, if you encounter exposed line-voltage conductors, or if the existing circuit is damaged or unclear, use a qualified electrician in accordance with local electrical requirements.
After wiring, inspect every connection and secure loose wire runs. Restore power only after the motor, rail, door arm, controls, sensors, and mounting hardware are correctly installed and the manual permits powered testing.
Align the photoelectric sensors
Adjust the sensors until their indicator lights show the alignment state specified by the manual. An indicator light alone does not prove that all safety functions work.
Keep the beam clear
Remove tools, storage items, and other objects from the space between the sensors and the door’s travel path.
Protect the wiring
Route cables neatly and keep them clear of the rail, trolley, hinges, tracks, and door panels.
Step 6: Set the Travel Limits and Test the Opener
Once the opener is fully assembled and the manual permits power to be restored, set the opening and closing travel limits according to the model’s instructions. Travel limits tell the opener where the door should stop. Incorrect settings can leave the door partly open, press it too hard against the floor, or cause unreliable movement.
Some models use physical adjustment controls, while others use electronic programming. Follow the exact procedure for your opener and make only the adjustments allowed by the manufacturer. Do not increase force settings to overcome a door that binds, is unbalanced, or has an installation problem.
Operate the door through complete cycles while watching and listening from a safe position. The door should move smoothly, remain aligned, and stop at the intended endpoints without unusual noise, shaking, or visible strain. Stop immediately if the rail moves, the brackets shift, the door reverses unexpectedly, or any part appears loose.
Source: i.ytimg.com
Test the Photoelectric Safety System
Test the photoelectric sensors using the method specified in the opener’s manual. On common residential systems, interrupting the sensor beam during closing should trigger the response described by the manufacturer, often stopping or reversing the door. Never place a hand, foot, pet, or person under a moving door to test the sensors.
If the door does not respond as required, stop using the opener until the fault is corrected. Check sensor alignment, wiring, obstructions, and the model’s troubleshooting instructions. Do not bypass, disconnect, or permanently disable the safety sensors to make the door operate.
Check sensor response
Confirm that the opener responds correctly when the beam is interrupted using the prescribed test method.
Check closing behavior
Verify that the door closes and stops according to the programmed travel limits without slamming or excessive pressure.
Check the manual’s reversal test
Complete the required contact-reversal test, if specified, using only the approved test object and procedure. Never use a body part as an obstacle.
Confirm Remote and Wall-Control Operation
Program the supplied remote controls and test the wall control from a safe position. If the opener includes smartphone access, follow the manufacturer’s pairing and account setup instructions after the basic safety tests pass.
Check that remote commands operate the intended door and that any additional controls are configured correctly. If the remote fails, check its battery, programming steps, and compatibility before assuming the opener motor is defective.
Test each remote
Program and test each supplied transmitter separately, following the manual.
Confirm lighting
Check that the opener light operates as described and that its cover or lens is secured.
Verify emergency release
Understand how to use the emergency release according to the manual. Use it only when the door is safely positioned and its operation is appropriate.
How Much Does It Cost to Install a Garage Door Opener?
The total cost depends on the opener model, installation complexity, electrical requirements, and whether old hardware or damaged door components need attention. A straightforward replacement may cost less than a new installation that needs structural supports, wiring, special brackets, or professional repairs.
Prices change by region, retailer, product availability, and labor rates. The figures below are planning categories rather than current quotes or verified national averages. Obtain local estimates and confirm exactly what each quote includes before deciding whether to do the work yourself.
DIY installation
Budget for the opener kit, any approved additional mounting hardware, basic tools you do not already own, and any required electrical work. Do not assume that every kit includes all items needed for an unusual garage.
Professional installation
A contractor’s quote may include labor, removal of the old opener, installation, programming, and safety testing. Ask whether disposal, additional wiring, structural modifications, and repairs are included.
Unexpected repairs
Damaged springs, cables, tracks, panels, or mounting structures can increase the total cost. Have those issues assessed before authorizing the opener installation.
DIY or Professional Installation: Which Makes Sense?
DIY installation may suit a homeowner who has the right tools, can identify safe structural mounting points, understands the manual, and is comfortable assembling the product and completing permitted low-voltage wiring. It is less suitable when the work involves uncertain framing, hardwired electrical connections, unusual doors, or a difficult overhead installation.
Professional installation is worth considering when safety, access, or compatibility is uncertain. A qualified technician can assess the door system and mount the opener correctly. Verify the installer’s qualifications, insurance where applicable, warranty terms, and the scope of the work before hiring.
Consider DIY when
The door is in good condition, the opener is compatible, the mounting structure is suitable, and the installation falls within your skills and the manufacturer’s instructions.
Hire a professional when
The door is unbalanced, springs or cables are damaged, structural support is uncertain, electrical work is beyond your qualifications, or the manufacturer requires specialist installation.
Common Garage Door Opener Installation Problems
When a new opener does not work as expected, start with the simplest safe checks. Disconnect power before inspecting wiring or moving components, and follow the troubleshooting section of the model’s manual. Do not repeatedly operate a malfunctioning door in an attempt to force it to work.
The opener has no power
Check the power supply and circuit breaker if it is safe to do so. Follow the manual for indicator lights and reset procedures. If a breaker trips repeatedly, wiring appears damaged, or a burning smell is present, disconnect power if safe and contact a qualified electrician or service technician.
The motor runs but the door does not move
The trolley may be disengaged, the door arm may be incorrectly attached, or the drive mechanism may not be assembled correctly. Disconnect power before checking the trolley and connections. Do not open the motor housing unless the manual specifically authorizes the procedure.
The door reverses before closing
Check for obstructions, sensor misalignment, damaged wiring, and incorrect travel settings. A door that binds or encounters excessive resistance needs mechanical inspection rather than a higher force setting.
The opener is unusually noisy
Possible causes include loose mounting hardware, an incorrectly assembled rail, excessive drive tension, or a door that moves poorly. Stop if the motor support or rail shifts, and inspect only the components identified in the manual.
The remote does not work
Check the battery, programming procedure, compatible frequency or system requirements, and the opener’s status indicators. Reprogram the remote only as directed by the manufacturer.
The safety sensor lights are off or flashing
Check for blocked lenses, poor alignment, loose low-voltage connections, or damaged wire insulation. Indicator patterns vary by model, so consult the manual rather than guessing from the light color alone.
When to Stop Troubleshooting
Stop using the opener if the door drops, moves unevenly, comes off its track, makes a sudden loud noise, or appears to have a damaged spring or lift cable. These symptoms may indicate a mechanical problem that cannot be corrected through opener adjustments.
Do not defeat safety sensors, bypass required controls, increase force to mask resistance, or continue testing a loose motor mount. If the fault remains after the approved basic checks, contact the manufacturer or a qualified garage door technician.
Mechanical warning signs
Damaged springs, frayed cables, bent tracks, displaced rollers, or a heavy door require professional assessment.
Electrical warning signs
Repeated breaker trips, exposed live conductors, melted insulation, or a burning smell require appropriate electrical service.
Garage Door Opener Safety and Maintenance
Regular checks help you spot loose hardware, worn parts, and sensor problems before they lead to a failure. Follow the opener and garage door manufacturers’ maintenance schedules because lubrication points, inspection intervals, and adjustment procedures vary by design.
Keep the door’s path clear and inspect visible mounting hardware, wiring, sensors, and door movement. Do not lubricate components that the manual says must remain dry, and never adjust spring tension or lift cables as part of routine opener maintenance.
A Practical Maintenance Checklist
Use the following checklist as a starting point, then adapt it to the manufacturer’s instructions. If you notice a new noise, jerky motion, or a change in door balance, stop operating the system until the cause is identified.
Inspect visible hardware
Look for loose mounting bolts, damaged brackets, worn door-arm connections, and exposed or pinched wiring. Do not tighten spring-related hardware.
Clean the safety sensors
Remove dust from the sensor lenses with a suitable soft cloth and confirm that the beam remains unobstructed.
Test required safety functions
Follow the manufacturer’s schedule and test procedures for photoelectric sensors and automatic reversal. Stop using the opener if a required safety function fails.
Check remote batteries
Replace batteries as needed using the specified type, and keep replacement batteries away from children.
Review backup power
If the opener has a battery backup, inspect or test it as instructed and replace the battery when required.
Keep the door operating freely
Watch for binding, unusual resistance, or changes in movement. Arrange professional door service if mechanical problems appear.
Understand Emergency Release and Power Outages
Learn how your opener’s emergency release works before you need it. The release disconnects the trolley from the door, but it does not repair a mechanical fault or make an unsafe door safe to move.
Use the release only according to the manual, with the door closed and stable whenever possible. If a door is stuck open, unusually heavy, or affected by a suspected broken spring, do not attempt to release or move it without professional guidance.
During a power outage, an opener with a compatible battery backup may retain some functions. Without backup power, manual operation may be possible if the door and counterbalance system are in good condition and the manufacturer’s instructions allow it. Keep people clear of a door that cannot be moved safely.
Know the release location
Identify the release handle and understand the manufacturer’s instructions before an outage or emergency occurs.
Do not force a heavy door
If the door is difficult to lift, drops unexpectedly, or will not remain stable, stop and call a qualified technician.
What to Check Before Calling the Installation Complete
A finished installation should have secure structural supports, correctly assembled moving components, functioning controls, aligned safety sensors, and properly adjusted travel limits. The opener should operate smoothly without loose hardware, unusual movement, or unexplained reversing.
Use this final checklist to confirm that the installation meets the manufacturer’s requirements. Passing one test does not prove that every part of the system is safe, so complete all required checks in the installation manual.
Mounting
The header bracket, rail, motor supports, and specified fasteners are secure and attached to suitable structural members.
Door connection
The door bracket, arm, trolley, pins, and retaining clips are installed as directed.
Controls
The wall control and each remote operate the intended opener as described in the manual.
Safety sensors
The sensors are correctly mounted, aligned, wired, and tested according to the product instructions.
Travel and reversal
The opening and closing limits are correct, and all required automatic reversal tests pass.
Emergency release
You understand how to use the release safely and know when the door must not be moved manually.
Documentation
Keep the owner’s manual, warranty details, model number, and service contact information in a place where you can find them.
When the Installation Is Not Ready for Use
Do not treat the installation as complete if a required safety test fails, the door does not move smoothly, the motor support shifts, or the opener repeatedly reverses without a clear and corrected cause. Disconnect power when appropriate and keep people away from the door until the issue is resolved.
If the manual does not cover an unexpected condition, contact the opener manufacturer or a qualified installer. A safe installation is one that follows the correct model-specific instructions and passes the required functional checks, not merely one that opens and closes once.
Stop for unresolved faults
Do not bypass sensors, defeat reversal protection, or operate a door with a suspected mechanical defect.
Keep records
Record the model, installation date, and any service performed to make later maintenance and warranty support easier.
Frequently Asked Questions
Q
Can I install a new garage door opener myself?
Yes, some homeowners can install a compatible residential opener if they have the required tools, suitable mounting support, and the ability to follow the manufacturer’s instructions. The project may involve overhead lifting, structural mounting, wiring, and safety testing, so it is not suitable for every homeowner.
Hire a qualified professional if the door is damaged or unbalanced, the mounting structure is uncertain, the electrical work is beyond your skills, or the manufacturer requires professional installation.
Q
How long does it take to install a garage door opener?
Installation time varies with the opener design, the condition of the existing door, available tools, and whether you are replacing an old unit or installing a system in a garage that has never had one. A straightforward replacement may take less time than a first-time installation that requires additional structural or electrical work.
There is no reliable single time estimate for every garage. Read the manufacturer’s guidance and allow enough time for careful assembly, mounting, wiring, programming, and complete safety testing.
Q
Can I reuse my old garage door opener brackets?
Only reuse brackets or other mounting parts if the new opener’s manufacturer explicitly permits it and the components are compatible and undamaged. Similar-looking brackets may have different dimensions, load requirements, or mounting arrangements.
Use the new kit’s specified hardware whenever required. Replace damaged, corroded, bent, or loose components before operating the new system.
Q
Why does my new garage door opener reverse before closing?
Possible causes include a blocked or misaligned photoelectric sensor, incorrect travel limits, damaged wiring, a binding door, or an installation problem. Check the manual for indicator lights and approved troubleshooting steps, starting with visible obstructions and sensor alignment.
Do not increase the opener’s force setting to overcome resistance. If the door is heavy, crooked, or difficult to move, stop using the opener and arrange professional inspection.
Q
Do I need to replace the garage door when replacing the opener?
Not necessarily. A compatible opener can often be installed on an existing garage door that is in good mechanical condition. The door must move properly, have suitable attachment points, and meet the new opener’s size and configuration requirements.
If the door has damaged panels, faulty springs, worn cables, bent tracks, or balance problems, have those issues assessed before installing or operating the new opener.
Q
Do new garage door openers need safety sensors?
Many modern residential openers in the United States use photoelectric entrapment protection and automatic reversal functions. Requirements depend on the product, applicable rules, and installation circumstances, so follow the opener’s manual and relevant local requirements.
Install and test every required safety device. Never bypass a sensor or continue using the opener when a required safety feature does not work.
Q
What should I do if the garage door opener has power but will not move the door?
Check the model’s status indicators and instructions, then verify that the trolley is engaged and the door arm and rail assembly are correctly installed. Disconnect power before inspecting mechanical connections, and avoid opening the motor housing unless the manual authorizes it.
If the motor runs but the door remains stationary, or if you notice grinding, loose supports, or unusual resistance, stop operating the unit and contact the manufacturer or a qualified garage door technician.
✦ Wrapping Up
Conclusion
Installing a new garage door opener can be a manageable home improvement project when the existing door is in good condition and the new unit fits the garage. Careful measurements, correct rail assembly, secure structural mounting, proper wiring, and accurate travel settings all help the system work as intended.
Safety checks matter just as much as the installation itself. Test the photoelectric sensors and all required reversal functions, keep the door’s path clear, and follow the exact instructions for your opener model. If the door is unbalanced, the mounting structure is uncertain, or an electrical or mechanical problem appears, stop and seek qualified help.
💡 Key Takeaway
Before buying or installing an opener, read its manual, inspect the garage door, confirm the mounting and power requirements, and make a checklist of every required safety test. Do not put the system into regular use until the installation is secure and all required safety functions pass.
Sarah believes that a messy garage is a wasted room. After years of working in professional home staging and interior design, she shifted her focus to the most neglected part of the house: the garage. She focuses on vertical storage, aesthetic floor coatings, and converting dusty corners into functional workspaces. Sarah’s goal is to help you "unlock" every square inch of your garage.
Sarah believes that a messy garage is a wasted room. After years of working in professional home staging and interior design, she shifted her focus to the most neglected part of the house: the garage. She focuses on vertical storage, aesthetic floor coatings, and converting dusty corners into functional workspaces. Sarah’s goal is to help you "unlock" every square inch of your garage.