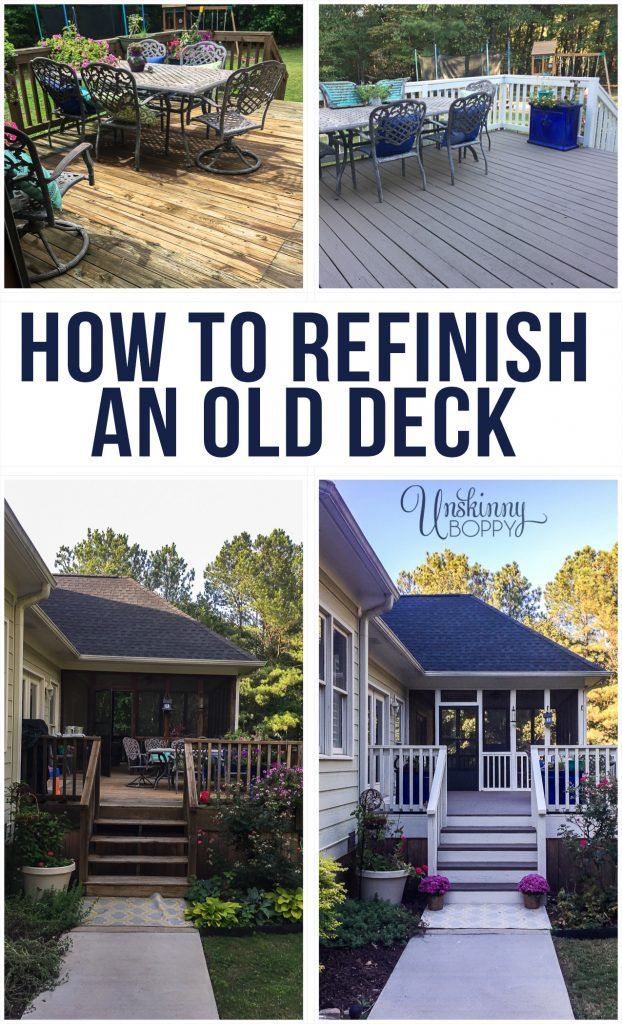
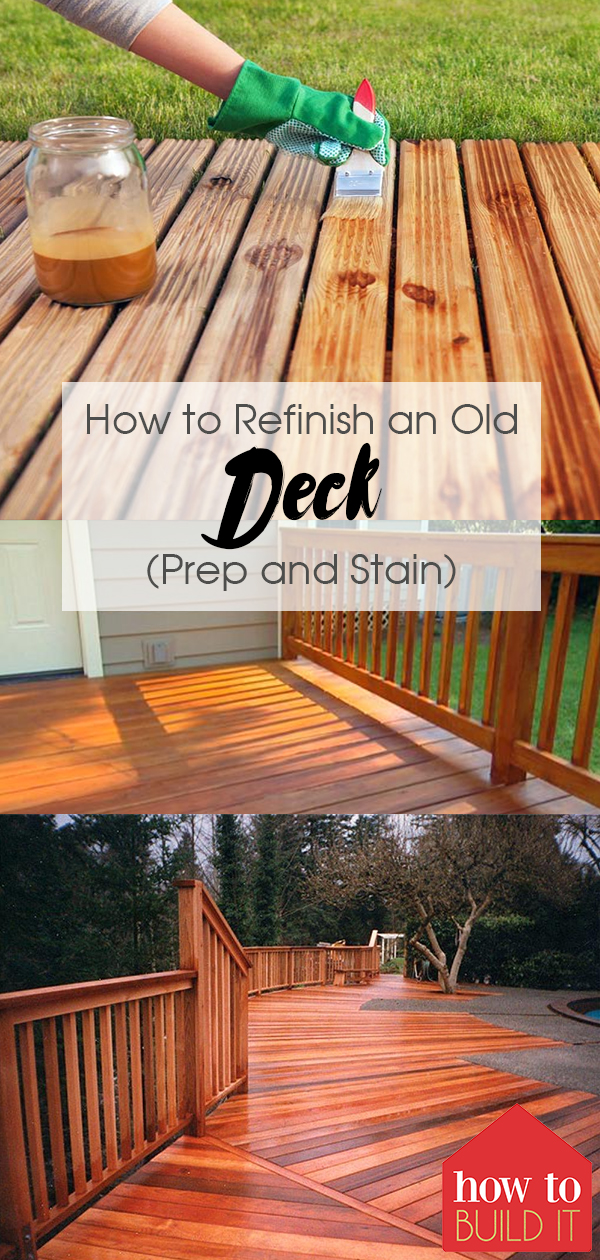
To refinish a deck and make it look like new, inspect the wood, remove dirt and old peeling finish, sand rough areas, apply a suitable stain or coating, and let it cure fully before use.
Across the United States, decks take a beating from summer sun, winter snow, rain, and changing temperatures. A wooden deck in Texas may fade under strong sunlight, while one in Minnesota may face snow and repeated freeze-thaw cycles. Over time, these conditions can leave boards gray, rough, stained, or dull.
The good news is that an old deck does not always need to be replaced. If its frame and boards remain sound, a careful refinishing job can restore much of its original appeal and help protect the wood from future weather damage. The right method depends on the wood species, the existing finish, and the condition of the surface.
This guide explains how to refinish a deck to make it look like new, from the first inspection to the final coat. You will learn how to choose between cleaning, sanding, staining, and painting, how to avoid common mistakes, and when repairs should come before cosmetic work.
Source: i.pinimg.com
What Does It Mean to Refinish a Deck?
Refinishing a deck means restoring its surface and applying a suitable protective finish. Depending on its condition, the work may involve washing, removing an old coating, sanding, replacing damaged boards, and applying stain or paint.
The goal is to improve the deck’s appearance while helping protect exposed wood from moisture, sunlight, and everyday wear. Refinishing cannot repair a weak frame or reverse advanced wood decay, so structural problems must be addressed first.
A deck that looks gray may still be in good condition. Sunlight and weather can change the wood’s color without making the boards structurally unsound. However, soft spots, deep cracks, persistent dampness, and loose connections deserve closer attention.
Source: howtobuildit.org
Surface restoration
Cleaning, removing loose finish, and sanding can improve the look and feel of weathered boards.
Protective finishing
A suitable exterior stain or coating can reduce weather exposure and help the deck maintain its appearance.
Necessary repairs
Replacing decayed boards and correcting unsafe connections may be required before refinishing can begin.
Can You Make an Old Deck Look New Again?
Yes, an old deck can often look much better after proper preparation and refinishing. The best results are usually possible when the boards are sound and the damage is mainly fading, dirt, mildew staining, or an aging finish.
Deep splits, severe warping, extensive rot, and missing wood may remain visible even after sanding and staining. In those cases, replace the affected boards or seek a qualified deck professional if the damage involves the structure.
Good candidate for refinishing
The deck is firm, its boards are secure, and the main problems are fading, surface dirt, or minor roughness.
Needs repair first
The deck has loose boards, protruding nails, localized decay, or damaged railings that require correction.
May need replacement
The frame is extensively decayed, several structural members are damaged, or the deck cannot be made safe through limited repairs.
Step 1: Inspect the Deck Before Refinishing
Start by checking the entire deck in daylight. Look at the walking surface, stairs, railings, posts, ledger connection, and the visible underside. Remove outdoor furniture and other items so you can inspect areas that are normally hidden.
Pay close attention to boards near the house, downspouts, planters, and other places where water may collect. These areas can stay damp longer than exposed boards and may develop decay. Do not cover a damaged area with stain and assume the problem is solved.
Check for loose fasteners, raised nail heads, splintering, large cracks, and boards that move when you walk on them. If a railing feels unstable or a supporting member appears damaged, keep people off the affected area until it has been assessed and repaired.
Source: i.ytimg.com
Look for rot
Soft, crumbly, persistently damp, or visibly decayed wood may need replacement. A surface cleaner cannot restore decayed wood.
Check fasteners
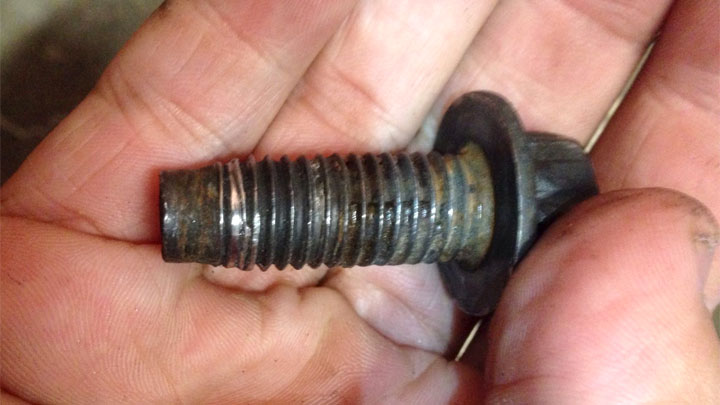
Look for loose screws, raised nails, corrosion, and connections that have pulled away from the wood.
Inspect drainage
Check whether water drains away from the deck and whether gaps between boards allow water to escape.
Review previous coatings
Identify peeling paint, thick solid stain, transparent stain, or a water-repellent treatment because each can affect preparation.
When Should You Call a Deck Professional?
Get qualified help if you find extensive rot, a loose connection to the house, unstable railings, badly damaged support posts, or a deck that moves unusually underfoot. These problems involve safety rather than appearance.
A cosmetic project should never hide structural defects. Have the deck assessed and repaired before investing in a new finish.
Stop and assess
Do not use an area with visibly unsafe stairs, unstable railings, or questionable structural support.
Step 2: Gather the Right Tools and Materials
Having the correct tools ready makes deck refinishing easier and helps prevent damage. You do not need every tool used by a professional crew, but you should have suitable cleaning equipment, protective gear, basic repair tools, and an applicator compatible with your chosen finish.
Choose cleaning products and coatings intended for your specific deck material. Wood, composite decking, and previously painted surfaces do not always respond to the same products or preparation methods.
Read the labels before buying supplies. Some products require a dedicated stripper, a compatible brightener, or a particular type of brush. Following the complete product system can help prevent poor adhesion and uneven color.
Source: inspirationspaint.com.au
Cleaning supplies
Use a deck-safe cleaner, a stiff nylon brush, a garden hose, and a bucket if the label permits dilution.
Sanding equipment
A random-orbit sander, sanding pole, and suitable sandpaper can help smooth accessible surfaces. Use equipment that you can control without gouging the boards.
Repair tools
Keep a compatible screwdriver or drill, replacement exterior-rated fasteners, and basic measuring tools available for minor repairs.
Finishing supplies
Select an exterior deck stain or coating, compatible brushes or rollers, a paint tray, and a small brush for edges and tight spaces.
Personal protection
Use eye protection, gloves, suitable footwear, and hearing protection when needed. Follow the safety instructions for cleaners, strippers, and sanding equipment.
Do You Need a Pressure Washer?
A pressure washer can remove stubborn dirt, but it is not required for every deck. Excessive pressure or holding the nozzle too close can damage soft wood, raise the grain, and leave visible lines.
For many decks, a garden hose and deck-safe cleaner are enough. If you use a pressure washer, follow the decking or cleaner manufacturer’s instructions, begin with a conservative setting, and test an inconspicuous area before proceeding.
Use gentle cleaning first
Start with the least aggressive method that removes the dirt without damaging the surface.
Keep the nozzle moving
Avoid concentrating the spray on one spot or aiming directly at joints, delicate edges, and damaged wood.
Step 3: Clean the Deck Thoroughly
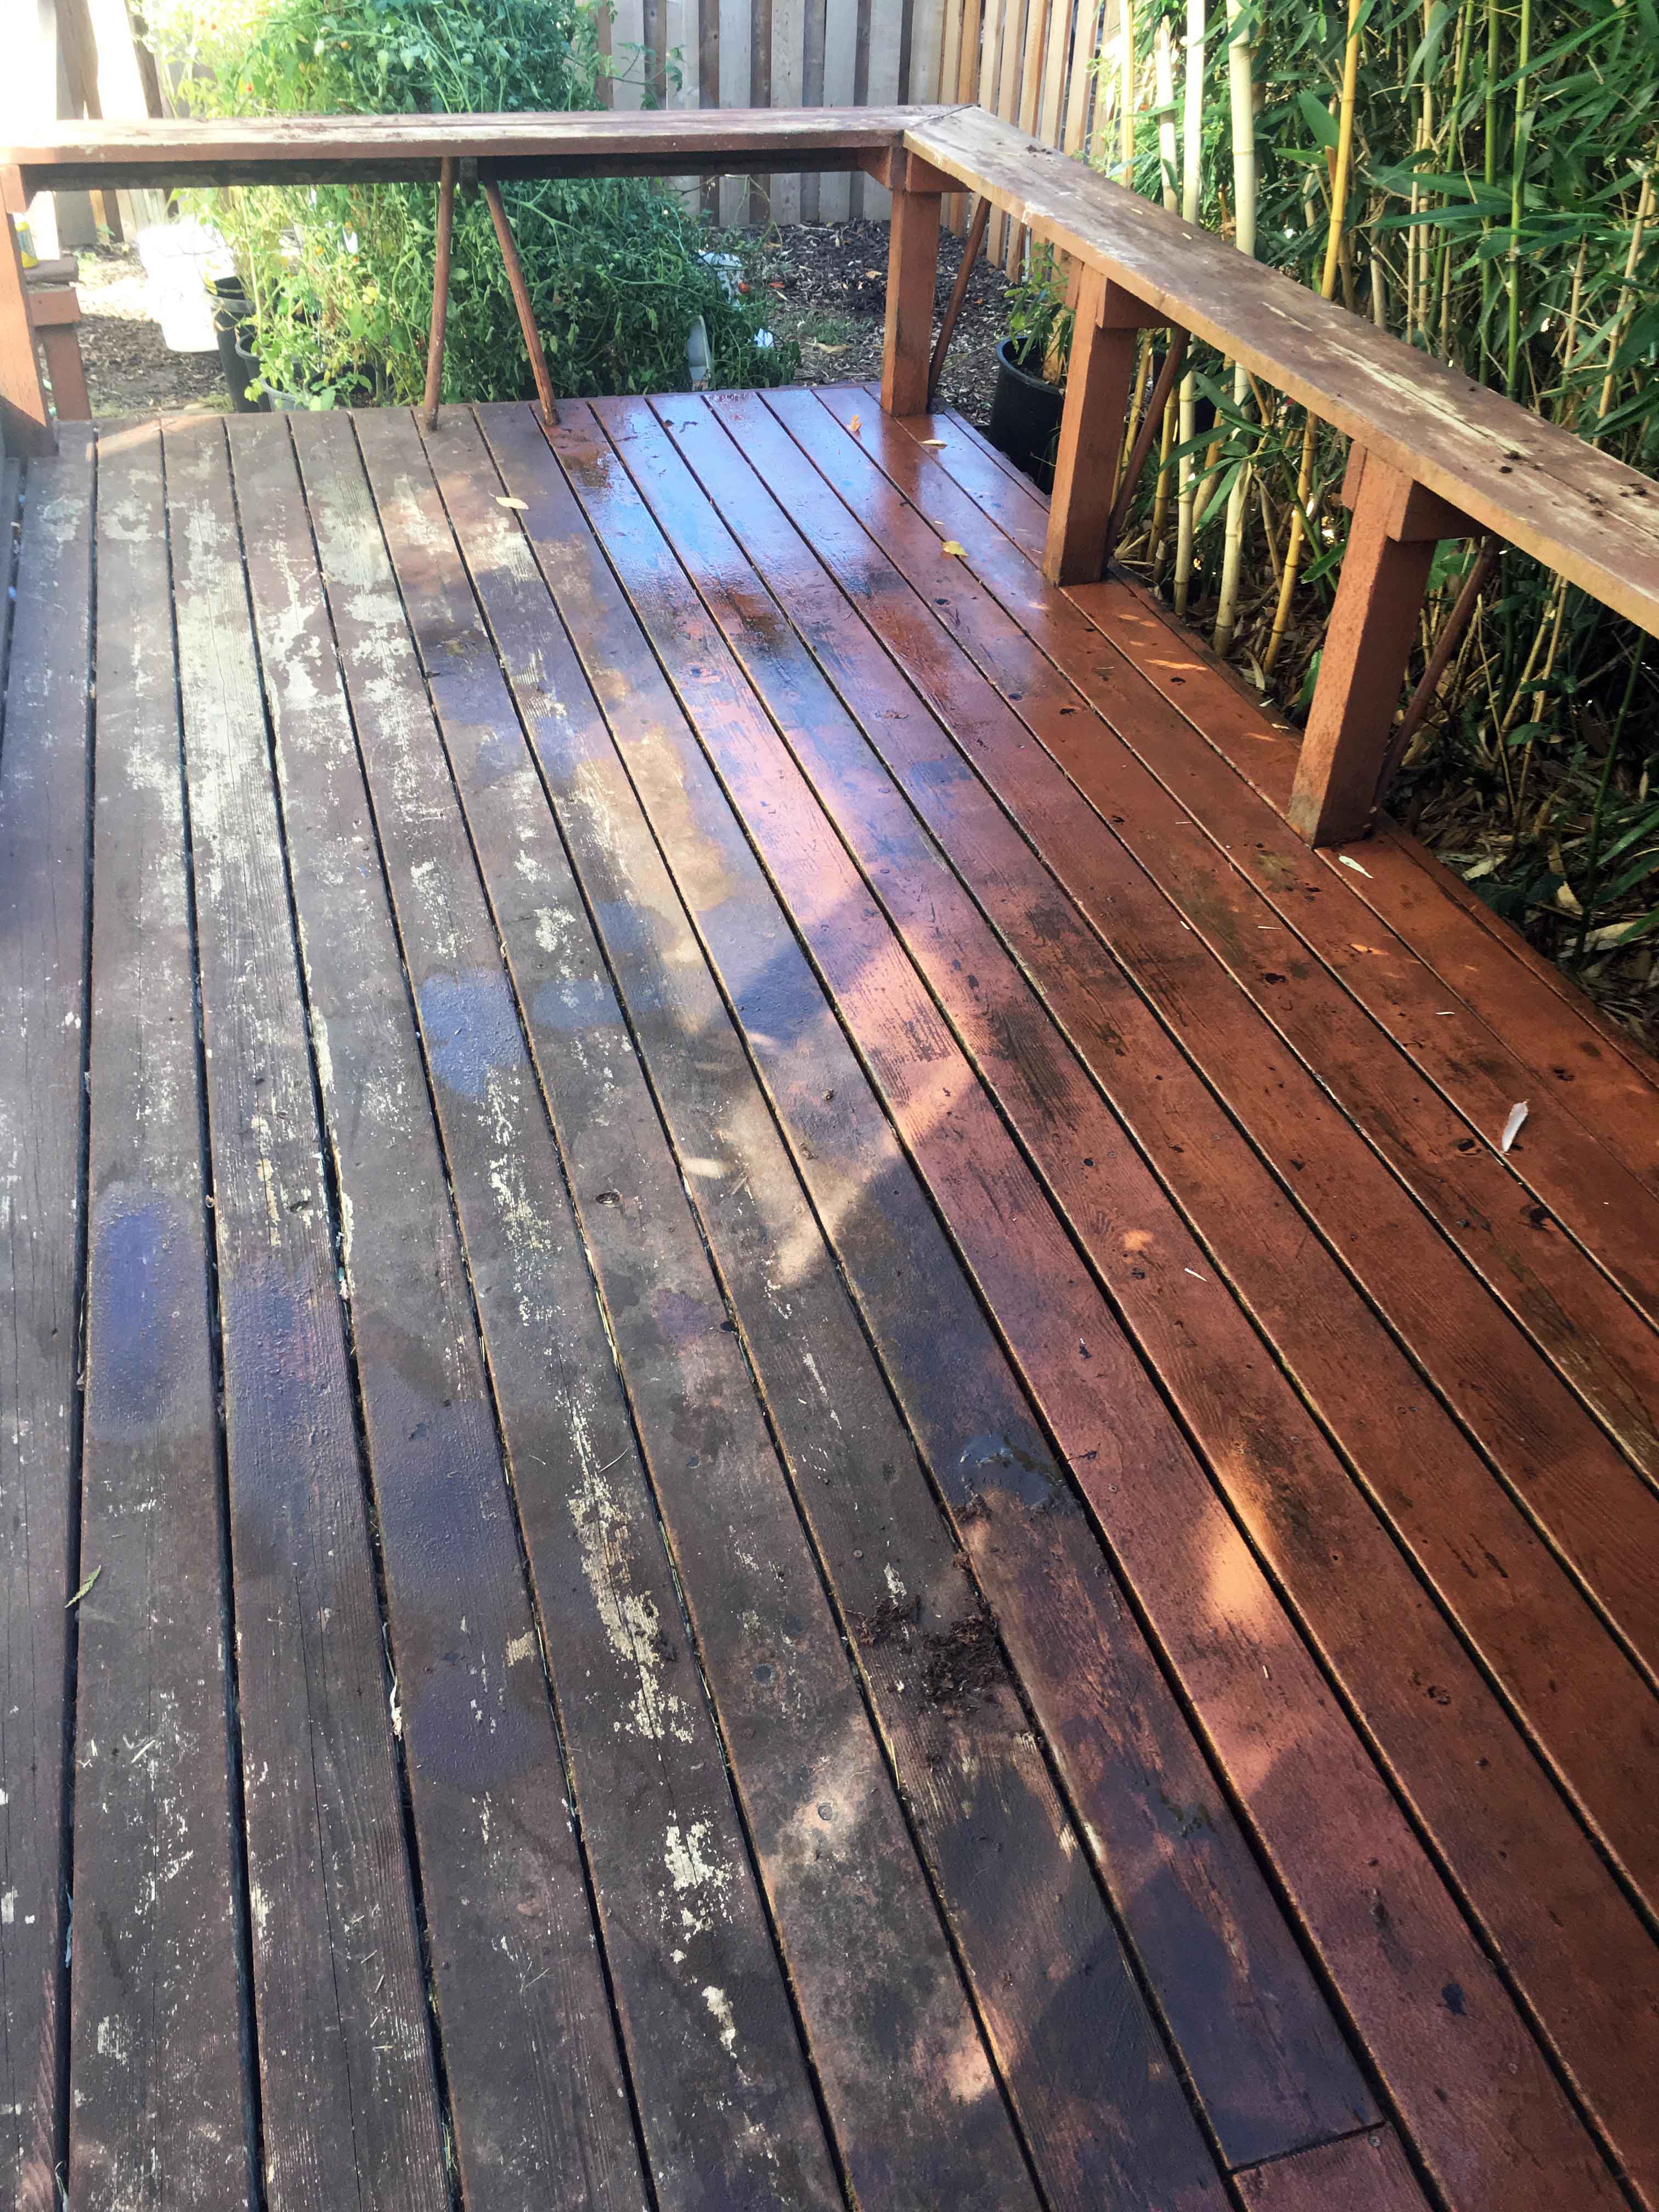
Cleaning is one of the most important steps when you refinish a deck to make it look like new. Dirt, pollen, grease, mildew stains, and loose debris can interfere with the appearance and adhesion of a new coating.
Begin by sweeping the deck and clearing debris from the gaps between boards. Move planters, grills, furniture, and other items away from the work area. Protect nearby plants and surfaces as directed by the cleaner label.
Apply a cleaner designed for the material and existing finish. Use the recommended dilution, application method, and dwell time. Scrub stubborn areas with a suitable brush, then rinse as directed without allowing cleaner residue to remain.
Never mix cleaning chemicals unless the product labels explicitly permit the combination. In particular, mixing bleach with acids or ammonia can release dangerous gases. Keep children and pets away while products are being applied and rinsed.
Source: static.homeguide.com
Remove loose debris
Sweep leaves, dust, and dirt away from board gaps, corners, and stairs before applying a cleaner.
Treat surface stains
Choose a product suitable for the stain and decking material instead of assuming one cleaner will handle every problem.
Rinse carefully
Remove cleaning residue according to the product instructions and avoid forcing water into vulnerable joints.
Allow the deck to dry
Follow the cleaner and finish instructions for drying time. A surface that looks dry may still hold moisture inside the wood.
How Do You Remove Gray Wood and Mildew Stains?
Gray wood is often the result of weathering and sunlight. A suitable wood cleaner or brightener may improve its color, but a brightener is not a substitute for repairing damaged fibers or removing a failed coating.
Dark spots may come from mildew, embedded dirt, metal reactions, or other stains. Identify the likely cause and choose a compatible treatment. If the stain remains after proper cleaning, additional preparation or replacement of the affected board may be necessary.
Avoid aggressive scrubbing
Use a brush suitable for the wood and stop if the surface begins to splinter or become badly rough.
Use brightener only when appropriate
Follow the manufacturer’s instructions, including rinsing and compatibility with the planned finish.
Step 4: Remove Old Paint or Peeling Finish
The condition and type of the existing coating determine how much removal is needed. A deck with a thin, compatible stain may need cleaning and light preparation, while a deck with peeling paint or a failing solid coating may require much more work.
Do not assume that applying a new stain over an old finish will produce an even result. The previous coating may block absorption, cause peeling, or create uneven color. Read the new product label to determine which existing finishes it can cover.
For peeling paint or thick coatings, use a suitable stripping method and follow the product instructions. Chemical strippers can damage nearby plants, metal, or other surfaces if used incorrectly, so protect the surrounding area and use the required personal protective equipment.
Scrape loose material with a suitable scraper without gouging the wood. Remove residue as directed, and allow the surface to dry before moving to sanding or coating. If the old finish contains an unknown or potentially hazardous material, obtain appropriate guidance before disturbing it.
Source: bargaindumpster.com
Lightly weathered transparent stain
Cleaning and limited sanding may be enough if the remaining finish is sound and compatible with the new coating.
Peeling solid stain
Remove loose material and determine whether the new product can be applied over the remaining sound coating.
Peeling paint
Investigate the coating’s age and composition before sanding or scraping, especially on older painted surfaces.
Can You Stain Over an Existing Deck Finish?
Sometimes, but compatibility matters. A new coating may adhere to a sound existing finish if the manufacturer specifically allows that application and the surface is properly prepared.
A transparent stain generally cannot make an opaque old coating disappear. If you want to change from a solid finish to a natural wood look, you may need extensive removal, and the wood underneath may still show discoloration or uneven weathering.
Check the label
Confirm which old coatings are acceptable beneath the new product and what preparation is required.
Test a small area
Apply the proposed finish to a discreet prepared section and assess its appearance after the specified drying and curing period.
Step 5: Sand the Deck for a Smooth Finish
Sanding can remove loose fibers, smooth rough areas, and improve the appearance of weathered boards. It is most useful when the wood has splinters, raised grain, small surface imperfections, or remnants of a finish that need additional preparation.
Let the deck dry to the level required by the sanding and finishing products before starting. Sanding wet wood can produce poor results and may clog the abrasive. Remove protruding fasteners or correct them before sanding so the equipment does not strike metal.
For broad deck surfaces, a suitable floor or deck sander may be useful, while a random-orbit sander can handle smaller areas. Use sandpaper recommended for the wood and finish. Start with a less aggressive abrasive when possible, then move to a finer grit only if the surface needs it.
Sand with the grain where practical and keep the tool moving. Spending too long in one place can create depressions that remain visible after staining. Wear appropriate eye protection and a properly selected dust mask or respirator based on the material and product safety instructions.
Source: i.pinimg.com
Start with damaged areas
Smooth splintered edges, rough patches, and minor surface defects without removing more wood than necessary.
Use controlled pressure
Let the tool and abrasive do the work. Excessive pressure can create dips and uneven board surfaces.
Clean up sanding dust
Vacuum or sweep the surface thoroughly before applying the finish, using a method that does not spread dust into the air.
What If Sanding Does Not Remove the Old Color?
Some stains penetrate the wood, and weathering can create color differences that sanding alone will not remove. Solid stains and paints may also leave pigment in the wood’s texture or gaps.
Avoid sanding deeper and deeper in an attempt to make every board match. If the old finish remains incompatible with the planned coating, consider a suitable stripping system or choose a finish designed for the prepared surface.
Stop when the surface is sound
Do not remove excessive wood to chase a perfectly uniform color.
Choose a realistic finish
A semitransparent or solid stain may hide more variation than a transparent product, depending on compatibility and surface condition.
Step 6: Repair Minor Damage Before Staining
Finish preparation is the right time to complete minor repairs. Tighten or replace appropriate fasteners, secure sound loose boards, and replace boards that are split through, badly warped, or decayed. Use exterior-rated fasteners that are compatible with the wood and any existing metal connectors.
Do not assume that ordinary wood filler is suitable for a deck’s walking surface. Many fillers do not withstand repeated foot traffic, water, sunlight, and seasonal movement. Use a repair material specifically approved for the intended outdoor application, or replace the damaged board when that is the more reliable option.
Inspect stairs and railings again after repairs. Cosmetic improvements should never take priority over safe access and stable support. If the repair affects structural connections or the deck’s attachment to the house, seek qualified help.
Source: i.pinimg.com
Replace unsound boards
Choose suitable replacement lumber and install it using appropriate fastening and spacing practices.
Correct raised fasteners
Secure loose boards and address protruding nails or screws before sanding or walking on the surface.
Preserve drainage gaps
Keep gaps and drainage paths clear so water does not remain trapped between boards.
Should You Replace Every Gray Deck Board?
No. Gray color alone does not mean a board must be replaced. A firm board without significant decay may respond well to cleaning and refinishing.
Replace boards when damage affects their strength or safe use, not simply because they look older than neighboring boards. Keep in mind that new lumber may absorb stain differently, so a repaired deck may show some color variation.
Keep sound wood
Refinish weathered but structurally sound boards when the planned treatment is suitable.
Replace damaged wood
Do not coat over soft, crumbling, or severely split boards in an attempt to restore their strength.
Step 7: Choose the Best Deck Stain or Finish
The right finish depends on the deck’s condition, the appearance you want, and how much preparation you are willing to do. Transparent and semitransparent stains show more of the wood’s natural character, while solid stains and paint cover more of the underlying color.
Check whether the product is suitable for the wood species, the existing coating, horizontal walking surfaces, and local weather conditions. A product designed for fences or vertical siding may not be approved for a deck floor.
No single finish is best for every deck. A transparent stain may suit attractive wood in good condition, while a solid stain may be more practical when boards have uneven color. The most important factors are compatibility, preparation, exposure, and proper application.
Source: ianhalemade.com
Transparent stain
Shows much of the wood grain and natural color. It offers limited hiding power, so surface discoloration and repairs may remain visible.
Semitransparent stain
Adds more color while allowing much of the wood grain to show. It can be a useful compromise between natural appearance and color uniformity.
Solid stain
Provides greater color coverage and hides more variation, although the grain may be less visible. Compatibility with the existing coating remains essential.
Exterior deck paint
Creates an opaque painted appearance when the product is approved for deck floors. A failing paint layer can require substantial removal and maintenance.
Clear water-repellent treatment
May help limit water absorption, depending on the product, but does not provide the same color change or UV protection as every pigmented stain.
Oil-Based or Water-Based Deck Stain?
Oil-based and water-based stains differ in their formulations, application requirements, cleanup methods, and compatibility with existing coatings. The label for the exact product should guide your choice rather than broad claims that one category is always better.
Some oil-based products penetrate the wood and may suit certain weathered surfaces, while water-based products may offer easier soap-and-water cleanup when the label permits it. Actual durability, drying time, and maintenance needs vary by formulation and exposure.
Do not apply a new stain over an old coating until you have confirmed compatibility and completed the required preparation. If the manufacturer recommends a primer, stripper, brightener, or specific drying interval, follow that guidance.
Compare product instructions
Review surface preparation, application temperature, drying time, cleanup, and maintenance requirements before buying.
Match the product to the deck
Choose a coating specifically labeled for your deck material and the type of surface being refinished.
Which Deck Color Makes an Old Deck Look New?
Natural brown, cedar-inspired tones, warm gray, and darker brown shades can all work well, depending on the house exterior, landscaping, and condition of the boards. A lighter transparent stain keeps more of the wood’s natural character visible, while a darker or more opaque stain can reduce the appearance of some color differences.
Test the color on a small prepared area before coating the entire deck. The same stain can look different on new lumber, weathered boards, and previously stained wood. Check the color after the finish reaches the stage specified by its manufacturer.
For a natural wood look
Consider a compatible transparent or semitransparent stain when the underlying boards have an appearance worth showing.
For uneven old boards
Consider a compatible solid stain when greater color coverage is the main goal.
For a coordinated outdoor space
Compare a test patch with the siding, trim, outdoor furniture, and surrounding landscape before committing.
Step 8: Apply the New Deck Stain or Finish
Once the deck is clean, repaired, and dry enough for the chosen coating, prepare the work area. Check the forecast and confirm that the expected temperature, humidity, and rain-free period meet the product instructions.
Stir the finish as directed. Do not thin it or mix products unless the manufacturer allows it. Begin in an area where you can maintain a wet edge, working along the boards and following the recommended coverage rate.
Use a brush, roller, pad, or sprayer only if the product permits that application method. A brush can help work finish into suitable wood surfaces, while a roller or pad may speed up larger areas. If spraying is allowed, use suitable masking and overspray controls.
Apply the specified amount rather than adding extra material to make the deck look darker or glossier. Too much finish can leave a tacky surface, uneven sheen, or a coating that fails to cure as intended. Follow the label for the number of coats and the interval between them.
Source: i.pinimg.com
Work in manageable sections
Coat a practical number of boards at a time to help maintain a consistent appearance and avoid lap marks.
Follow the wood grain
Apply the finish in the direction of the boards when appropriate for the product and application method.
Avoid puddles
Spread excess material as directed and check gaps, board ends, and corners for buildup.
Allow the required drying time
Do not assume that a dry-looking surface is ready for rain, furniture, or foot traffic. Follow the product’s specific instructions.
How Many Coats Does a Deck Need?
The required number of coats depends on the product, wood condition, application method, and manufacturer’s instructions. Some stains are designed for one coat, while others allow or require a second coat under specific conditions.
Applying additional coats without checking the label can lead to poor absorption or a sticky finish. Use the stated coverage rate and wait the specified interval before applying another coat.
Use the specified coverage
Estimate the amount of product using the deck’s measured area and the coverage stated on the container.
Follow recoat instructions
Apply a second coat only when permitted and after the required waiting period.
How Much Stain Do You Need?
Measure the deck’s length and width and multiply them to estimate the main surface area. Add the area of stairs, landings, and other surfaces that will also receive the finish.
For a simple example, a rectangular deck measuring 16 feet by 20 feet has a surface area of 320 square feet. If the label states coverage of 200 to 300 square feet per gallon for the relevant surface and application, one coat would require roughly 1.1 to 1.6 gallons before allowing for stairs, railings, waste, or extra absorption.
This is a hypothetical calculation, not a product performance guarantee. Rough wood, board gaps, application method, and the coating’s stated coverage can change the amount needed. Use the actual product label for your estimate.
Measure first
Calculate the areas that will be coated rather than buying solely by the deck’s approximate size.
Check the label
Use the coverage rate for the exact product, surface, and number of coats.
Step 9: Let the Deck Dry and Cure Properly
Drying and curing are not always the same. A coating may feel dry on the surface before it has developed the properties intended by its manufacturer. Follow the instructions for foot traffic, furniture placement, cleaning, and exposure to rain.
Keep pets, children, and visitors away from the work area while the finish dries. If rain arrives earlier than expected, do not immediately apply another coat or attempt an improvised repair. Allow the surface to dry, inspect the result, and consult the product instructions for corrective steps.
Avoid placing heavy furniture, rugs, planters, or grills on a newly finished deck before the permitted time. These items can trap moisture, leave marks, or damage a coating that has not fully cured.
The correct waiting period varies by product and weather conditions. A warm, dry day may help some products dry faster, but cool temperatures, high humidity, damp wood, and limited airflow can extend the process.
Source: inspirationspaint.com.au
Respect the label
Use the specified times for light foot traffic, full use, recoating, and full curing.
Check the surface
Look for tackiness, pooled finish, uneven sheen, or other signs that may require more drying time or corrective work.
Keep the area clear
Do not rush to return furniture or outdoor equipment before the coating is ready.
What If the Deck Still Feels Sticky?
A sticky surface may result from excess product, cool or humid weather, damp wood, or a coating that has not had enough time to cure. Applying more finish is rarely the right first response.
Check the label and allow the recommended time under suitable conditions. If the finish remains tacky beyond the stated period, contact the manufacturer for product-specific advice before sanding, stripping, or recoating.
Do not add another coat blindly
An additional layer can make a buildup problem worse.
Find the cause
Review application thickness, surface moisture, weather, and recoat timing before choosing a correction.
How Much Does It Cost to Refinish a Deck?
The cost depends on deck size, condition, labor rates, the amount of old finish that must be removed, and the type of coating selected. A deck that needs only washing and a new stain will usually involve less work than one that needs extensive stripping, sanding, board replacement, or structural repair.
For a do-it-yourself project, calculate the cost of cleaner, sandpaper, stain or paint, brushes, protective equipment, replacement fasteners, and any tool rental. For a contractor’s quote, ask which preparation steps, repairs, materials, and cleanup are included.
There is no single reliable price for every U.S. deck. Local labor costs, material prices, access, height, and the condition of the structure can change the total. Obtain current local estimates before setting a firm budget.
Source: bargaindumpster.com
Cleaning and preparation
Include cleaner, brushes, surface protection, sanding supplies, and any stripping products required.
Budget for the correct coating, suitable applicators, trays, and extra material for rough or highly absorbent areas.
Repairs
Add the cost of replacement boards, compatible fasteners, and professional work where structural issues exist.
Tool rental or contractor labor
Compare rental charges and the time needed to do the work safely with quotes from qualified local contractors.
Is DIY Deck Refinishing Worth It?
DIY refinishing may be practical when the deck is structurally sound, the coating is manageable, and you have the tools and time to prepare the surface correctly. Doing the work yourself can reduce labor costs, but poor preparation can waste materials and require another round of work.
Professional help may be worthwhile for large or elevated decks, difficult coating removal, extensive repairs, or situations where the correct preparation method is uncertain. Compare the scope of each quote rather than choosing based only on the lowest price.
DIY may fit
The deck needs routine cleaning, limited sanding, and a straightforward finish application.
Hire help when needed
The job involves structural concerns, extensive stripping, difficult access, or unfamiliar hazardous coatings.
Common Deck Refinishing Mistakes to Avoid
Many poor refinishing results come from preparation errors rather than the finish itself. Taking time to inspect, clean, dry, and prepare the deck can help prevent peeling, uneven color, rough patches, and a coating that remains tacky.
Avoid rushing the process to finish everything in one day. Cleaning, drying, stripping, sanding, and coating may need separate work periods, especially when the deck has been exposed to rain or the weather is humid.
Source: howtobuildit.org
Coating dirty wood
Dirt and residue can interfere with adhesion. Clean the surface and remove the required residue before applying the finish.
Finishing damp wood
Excess moisture can affect penetration, adhesion, and curing. Check the product’s wood-moisture requirements rather than relying only on appearance.
Using excessive pressure
Aggressive pressure washing or sanding can damage the wood and create marks that remain visible.
Applying too much stain
Excess material can leave uneven sheen, sticky patches, or poor curing. Follow the recommended coverage rate.
Ignoring the forecast
Rain, extreme temperatures, and high humidity can disrupt application or drying. Check the entire required weather window.
Skipping a test patch
A small test area helps reveal unexpected color, absorption, or compatibility issues before you coat the whole deck.
Using an indoor product outdoors
Choose a coating specifically approved for exterior deck surfaces and the material being treated.
Why Does a Newly Stained Deck Look Blotchy?
Blotchy color can result from uneven preparation, different wood absorption rates, leftover coating, inconsistent application, or variations between old and replacement boards. A test patch can reveal some of these issues before the full project begins.
Do not immediately apply another coat to dark or uneven spots. First determine whether the finish is still wet, has cured, or has formed a buildup. Use the manufacturer’s corrective instructions to avoid making the problem worse.
Inspect after the stated drying period
Evaluate the surface under consistent lighting once the product has reached the stage specified for assessment.
Correct the actual cause
Depending on the product and problem, correction may require more drying, selective removal, additional preparation, or a compatible new coating.
How to Maintain Your Refinished Deck
Regular maintenance helps preserve the appearance of a refinished deck and makes the next maintenance job easier. Sweep away leaves and dirt, remove spills promptly, and keep board gaps clear so water can drain.
Check the deck after severe weather and inspect areas that stay damp or receive heavy foot traffic. Look for loose fasteners, new splinters, peeling finish, and signs of decay before they become larger problems.
Use cleaning products approved for the coating and avoid harsh methods that may strip or damage the finish. Follow the manufacturer’s recommendations for routine washing and future recoating.
Do not rely on a fixed calendar alone to decide when to refinish again. Exposure, wood species, traffic, product type, and maintenance habits all affect how long a finish lasts. Inspect the surface regularly and follow the product guidance for renewal.
Source: i.pinimg.com
Keep the deck clean
Sweep regularly and remove organic debris that can hold moisture against the boards.
Manage water
Keep drainage gaps clear and address leaking gutters or downspouts that repeatedly wet the deck.
Move objects occasionally
Check beneath planters, rugs, and furniture for trapped moisture or discoloration, while following the coating’s care instructions.
Inspect the finish
Look for fading, water absorption, peeling, and worn areas, then choose maintenance steps suited to the actual condition.
How Can You Tell When a Deck Needs Another Coat?
A fading finish, visibly worn traffic paths, and changing water behavior may indicate that maintenance is needed. However, water beading alone does not provide a complete assessment of a deck’s condition or the coating’s performance.
Check the finish manufacturer’s maintenance guidance and examine the entire surface. If the coating is peeling or failing, identify why it failed and complete the required preparation instead of simply applying another layer.
Look for wear
Check exposed board edges, stairs, and areas used most often.
Repair before recoating
Address loose boards, persistent dampness, and failing finish before beginning routine maintenance.
Special Considerations for Composite Decking
Composite decking is not the same as natural wood, so traditional wood refinishing methods may damage it. Many composite boards have a manufactured surface layer that should not be sanded or coated unless the decking manufacturer specifically permits it.
If a composite deck looks dull or stained, begin with the manufacturer’s cleaning instructions. Use approved cleaners and a suitable brush, and test any permitted cleaning method in a discreet area.
Do not apply wood stain, paint, brightener, or chemical stripper to composite boards merely because the product works on a wooden deck. Some composite materials and capped surfaces have specific restrictions that affect which products can be used.
Source: inspirationspaint.com.au
Identify the material
Confirm whether the boards are natural wood, uncapped composite, capped composite, or another decking product.
Follow manufacturer guidance
Use the approved cleaning method and avoid sanding or applying coatings unless expressly allowed.
Replace damaged boards when appropriate
If the surface layer is badly damaged or the board is defective, contact the manufacturer or a qualified installer about suitable repair options.
Can You Paint Composite Decking?
Some composite products may accept certain coatings, while others prohibit painting or refinishing. The answer depends on the exact board construction and the coating manufacturer’s compatibility guidance.
Before proceeding, check both the decking manufacturer’s warranty and the proposed coating instructions. Painting an incompatible surface may lead to peeling, poor appearance, or warranty concerns.
Confirm compatibility first
Do not assume a coating designed for wood will adhere properly to composite decking.
Frequently Asked Questions
Q
What is the easiest way to make an old deck look new?
For a structurally sound wood deck, the simplest approach is to inspect it, clean it with a suitable deck cleaner, allow it to dry, complete any needed light sanding, and apply a compatible exterior deck stain. If the old finish is peeling or incompatible, remove it as required before recoating.
Q
Can I refinish my deck without sanding?
Yes, sanding is not always necessary. A deck with sound wood and a compatible existing finish may need only cleaning and other preparation specified by the coating manufacturer. Rough boards, splinters, peeling coatings, and certain finish changes may require sanding or stripping.
Q
How long does it take to refinish a deck?
The total time depends on the deck’s size, the amount of preparation, the weather, and the coating’s drying and curing requirements. A simple project may involve relatively little hands-on work, but cleaning, drying, stripping, repairs, and curing can extend the schedule across several days or longer.
Q
Should I stain or paint an old wooden deck?
Choose stain when you want a natural wood appearance or a colored finish designed for deck boards. Choose paint only when an exterior deck-floor coating is suitable for the existing surface and you prefer an opaque appearance. The deck’s current coating and required preparation may determine which option is practical.
Q
Can I refinish a deck in one day?
A small deck that needs minimal preparation may allow some work to be completed in one day, but that does not mean the entire process can safely be finished in that time. Cleaning, drying, sanding, repairs, application, and curing all depend on the surface and product instructions. Do not shorten required drying or curing periods to meet a one-day deadline.
Q
What is the best weather for deck refinishing?
The best conditions are those specified by the chosen product, with suitable temperatures, manageable humidity, and enough time without rain or heavy dew. Check the forecast for the full application and drying period. Do not coat wet wood or work outside the product’s stated temperature range.
Q
Can I refinish a deck that has already been painted?
Yes, in some cases, but preparation depends on the paint’s condition and the new coating’s compatibility. Remove loose paint and follow the manufacturer’s instructions for the remaining sound finish. On older painted decks, check for potential lead-containing paint before sanding or scraping and use appropriate professional guidance if hazardous material may be present.
Q
How can I make deck stain last longer?
Start with sound wood and proper surface preparation, apply a compatible product at the recommended coverage rate, and allow it to cure as directed. Regular cleaning, clear drainage gaps, prompt repairs, and periodic inspection can help preserve the finish. No coating lasts equally long in every climate or exposure condition.
✦ Wrapping Up
Conclusion
You can often refinish a weathered wooden deck and make it look much newer without replacing the entire structure. The key is to inspect the deck first, correct safety problems, clean the surface, remove failed coatings when necessary, and prepare the wood for a compatible exterior finish.
Choose a stain or coating based on the wood’s condition and the appearance you want. Apply it according to the manufacturer’s instructions, watch the weather, and allow enough time for drying and curing before returning furniture or foot traffic.
A successful deck makeover is about more than fresh color. Sound boards, safe railings, proper drainage, and routine maintenance all help keep the outdoor space attractive and usable.
💡 Key Takeaway
Start by inspecting your deck for loose boards, decay, and damaged connections. If the structure is sound, clean a small test area, confirm the existing finish, and choose a compatible refinishing product before beginning the full project.
Sarah believes that a messy garage is a wasted room. After years of working in professional home staging and interior design, she shifted her focus to the most neglected part of the house: the garage. She focuses on vertical storage, aesthetic floor coatings, and converting dusty corners into functional workspaces. Sarah’s goal is to help you "unlock" every square inch of your garage.
Sarah believes that a messy garage is a wasted room. After years of working in professional home staging and interior design, she shifted her focus to the most neglected part of the house: the garage. She focuses on vertical storage, aesthetic floor coatings, and converting dusty corners into functional workspaces. Sarah’s goal is to help you "unlock" every square inch of your garage.